Advertisement
Advertisement
Table of Contents

Related Manuals for Joroto X1S


Summary of Contents for Joroto X1S
- Page 1 JOROTO-X1S...
- Page 2 USER MANUAL Read all instructions carefully before using this product. Retain this owner’s manual for future reference. For customer service, please contact support@jorotofitness.com.
- Page 3 Dear Customer, Please read this instruction very carefully before using this item. You will find important information regarding safety of your exercise bike. Note the following precaution before assembling or operating the machine. 1. Keep children and pets away from the bike at all times. DO NOT leave unattended children in the same room with the machine.
- Page 4 CONSULT YOUR PHYSICIAN FIRST. THIS IS ESPECIALLY IMPORTANT FOR INDIVIDUALS OVER THE AGE OF 35 OR PERSONS WITH PRE-EXISTING HEALTH PROBLEMS. READ ALL INSTRUCTIONS BEFORE USING THE BIKE. JOROTO ASSUMES NO RESPONSIBILITY FOR PERSONAL INJURY OR PROPERTY DAMAGE SUSTAINED BY OR THROUGH THE USE OF THIS PRODUCT.
-
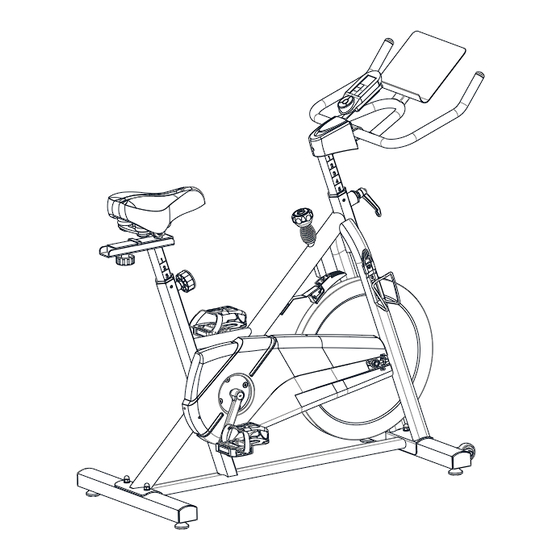
Page 5: Exploded View And Parts List
EXPLODED-VIEW & PARTS LIST:... -
Page 8: Assembly Instruction
ASSEMBLY INSTRUCTION: 1.PREPARATION: A. Before assembling make sure that you will have enough space around the item. B. Use the present tooling for assembling. C. Before assembling please check whether all needed parts are available (at the above of this instruction sheet you will find an explosion drawing with all single parts (marked with numbers) which this item consists of. - Page 9 Convex point FIG.3-1 ATTENTION:: Connected with the computer line, to Gap(A1) corresponding to the convex point (A2) to insert link FIG.3 FIG.3: Insert the Handlebar Post (pt.6) into the handlebar post tube of the main frame. You will have to slacken the Knob (pt.84) and pull the knob back. Then select the desired height. Release the knob and retighten the knob.
- Page 10 A.) Adjust the resistance: To increase resistance (requiring more strength to pedal), turn the Emergency Brake & Resistance Control Knob (pt.32) to the right. To decrease resistance (requiring less strength to pedla), turn the Emergency Brake & Resistance Control Knob (pt.32) to the left. FIG.A B.) The Emergency Brake Function: The Emergency Brake &...
-
Page 11: Exercise Instructions
ADJUSTMENT *To adjust the seat height, slacken the spring knob on the vertical post stem on the main frame and pull back the knob. Position the vertical seat post for the desired height so that holes are aligned, then release the knob and retighten it. -
Page 12: Muscle Toning
2.The Exercise Phase This is the stage where you put the effort in. After regular use , the muscles in your legs will become Stronger. Work to your but it is very important to maintain a steady tempo throughout. The rate of work should be sufficient to raise your heart beat into the target zone shown on the graph below. - Page 13 EXERCISE BIKE MONITOR INSTRUCTION MANUAL DISPLAY FUNCTION: ITEM DESCRIPTION . In SCAN mode, press MODE key to choose functions. . Automatically scan through each mode in sequence every 6 seconds. SCAN . The sequence of display when press MODE key: TIME→ DIST→CAL→RPM/ SPEED .
- Page 14 OPERATION PROCEDURE POWER ON . LCD will display all segments as Drawing 1. Drawing 1 POWER OFF Without any signal being transmitted into the monitor for 4 minutes the monitor will enter SLEEP mode. OPERATION Workout setting 1, Press MODE key to select the function of TIME, DISTANCE and CALORIES. Use SET key for setting and press MODE key for confirmation.
Need help?
Do you have a question about the X1S and is the answer not in the manual?
Questions and answers