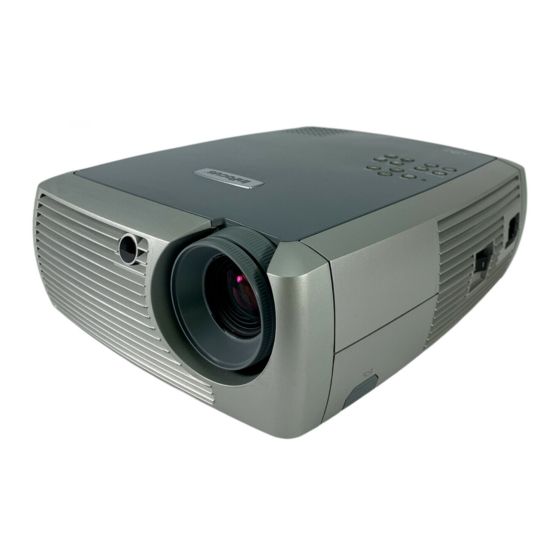
InFocus X1 User Manual
Infocus x1: reference guide
Hide thumbs
Also See for X1:
- Service manual (94 pages) ,
- Specifications (4 pages) ,
- Introduction (3 pages)
Table of Contents
Advertisement
Advertisement
Table of Contents

Related Manuals for InFocus X1


Summary of Contents for InFocus X1
- Page 1 multi-use per formance User’s Guide...
- Page 2 This entire user’s guide is available on the enclosed CD as an Adobe Acrobat pdf file in the following languages: English, French, German, Italian, Norwe- gian, Portuguese, Spanish, Russian, Japanese, Korean, Traditional Chinese, Simplified Chinese. Before using this projector, please read these instructions.
- Page 3 Apple, Macintosh, and PowerBook are trademarks or registered trademarks of Apple Computer, Inc. IBM and PS/2 are trademarks or registered trademarks of International Business Machines, Inc. Microsoft, PowerPoint, and Windows are trademarks or registered trademarks of Microsoft Corporation. InFocus and LP are trademarks or registered trademarks of InFocus Corporation.
-
Page 4: Table Of Contents
Important Operating Considerations Do not place the projector on a tablecloth or other soft coverings that may block the front or back vents. Do not use a non-approved ceiling mount. In the unlikely event of the bulb rupturing, thoroughly clean the area in front of the projector and discard any edible items that may have been placed in that area. -
Page 5: Introduction
Your new digital projector is easy to connect, use, and maintain. It is an exceptional projector for both business presentations and home entertain- ® ment. The InFocus X1 is compatible with a wide variety of computers and video devices, including: • Most standard VCRs, DVD players (progressive and interlaced), HDTV sources (1080i, 1035i, and 720P HDTV formats), TV and satellite tuners, camcorders, video games, and laser disc players. -
Page 6: Positioning The Projector
If you are installing the projector on the ceiling, refer to the installation guide that comes with the Ceiling Mount Kit for more information. To turn the image upside down, see “Ceiling” on page 35. InFocus recom- mends using an authorized InFocus ceiling mount. The Ceiling Mount Kit is sold separately;... -
Page 7: Projector And Device Connector Guide
Video connections The first step for connecting video is deciding what type of output connector you want to connect to the projector has. If there is more than one output, select the one with the highest quality. The best quality ranking, with 1 being the highest and 3 being the lowest, is:... - Page 8 NTSC, PAL, and SECAM formats Component 480i Standard Video Game Attach to this If Your Device Labeled Connector Connector Is on Projector Composite video Composite video or S-video or S-video Component Video S-video via the optional Component to S-video adapter...
- Page 9 Component 480p 1080i, 720p Progressive Video Game Component 480p Attach to this If Your Device Labeled Connector Connector Is on Projector Computer In Component video Computer In (via the optional Component to VESA adapter) Computer In Component video Computer In (via the...
-
Page 10: Connecting A Computer Source
Connect one end of the computer cable (see page 14 for connecting video devices) to the dark blue Computer In connector on the projector. Connect the other end to the video port on your computer. If you are using a desktop computer, you will need to disconnect the monitor cable from the com- puter’s video port first. -
Page 11: Displaying A Computer Source Image
Displaying a computer source image Remove the lens cap. Toggle the Power switch on the side of the projector to the On position. The LED flashes green and the fans start to run. When the lamp comes on, the start up screen displays and the LED is steady green. It can take a minute for the image to achieve full brightness. -
Page 12: Adjusting The Image
Adjusting the image Adjust the height of the projector, if necessary, by pressing the release but- ton to extend the foot. Rotate the leveling foot located at the rear of the projector, if necessary. Avoid placing your hands in near the hot exhaust vent in front of the projec- tor. -
Page 13: Using The Projector With Windows 98 For The First Time
Using the projector with Windows 98 for the first time The first time you connect a computer running Windows 98 to the projector, the computer recognizes the projector as “new hardware” and the Add New Hardware Wizard appears. Follow these instructions to use the Wiz- ard to load the correct driver (which was installed with your Windows operating system). - Page 14 Skip this page if you did not connect a USB mouse cable For Windows 98: • If you connected the USB cable, the Add New Hardware Wizard appears again. Drivers must be installed to use the USB functionality. • The Wizard launches three times. The first time it detects a USB Composite Device.
-
Page 15: Connecting A Video Device
HDTV receivers, and TV tuners to the projector. There is also an audio input. You can connect the audio directly to the projector to get sound from the built-in speaker, or you can connect the audio to your stereo system. -
Page 16: Video Device Connections
Plug the composite video cable’s (not included) yellow connector into the video-out connector on your video device. Plug the other yellow connector into the yellow Video In connector on the projector. Plug the included audio adapter’s white connector into the left audio out connector on your video device;... -
Page 17: Component Video Connection
Computer In connector on the projector. Use the audio adapter as described on the previous page. Connect the power cord to the Power connector on the side of the projector and to your electrical outlet. NOTE: Always use the power cord that shipped with the projector. -
Page 18: Displaying Video
Displaying video Remove the lens cap. Toggle the Power switch on the side of the projector to the On position. The LED flashes green and the fans start to run. When the lamp comes on, the start-up screen is displayed and the LED is steady green. It can take a minute for the image to achieve full brightness. - Page 19 Adjust the zoom and focus. If the image is not square, adjust the keystone using the buttons on the key- pad. Press the top Keystone button to reduce the upper part of the image, and press the bottom Keystone button to reduce the lower part. Adjust the volume on the keypad or remote.
-
Page 20: Shutting Down The Projector
20 minutes. By default, this feature is off. See page 35. Turning off the projector You can turn the projector off simply by toggling the power switch to the off position. You can also press the remote’s Power button to place the projector in the Off state while it is running. - Page 21 Problem no start up screen only start up screen appears Solution plug power cord in projector’s left side remove lens cap toggle power switch toggle power switch on side press the Computer button activate laptop’s external port restart laptop Result...
- Page 22 Problem no computer image, just the words “Signal out of range” Solution press the Auto Image button on keypad adjust computer refresh rate in Control Panel>Display>Settings>Advanced>Adapter (location varies by operating system) you may also need to set a different resolution on your computer, as shown in the following problem, “image fuzzy or cropped”...
- Page 23 Problem image fuzzy or cropped image not centered on screen Solution set your computer’s display resolution to the native resolution of the projector (Start>Settings>Control Panel>Display>Settings tab) select 800x600 For a laptop, disable laptop monitor or turn-on dual- display mode move projector, adjust zoom, adjust height...
- Page 24 Problem image not square image not sharp image does not fit 4:3 or 16:9 screen Solution adjust Keystone on keypad adjust Sharpness (video sources only) in the Picture>Advanced menu change aspect ratio to 4:3 or 16:9 in Picture>Aspect ratio menu Result square image correct image...
- Page 25 Problem image upside down image reversed left to right projected colors don’t match source COLOR Solution turn off ceiling in Settings>System menu turn off rear in Settings>System menu adjust color, tint, color temperature, brightness, contrast in the menus Result correct image correct image correct image COLOR...
- Page 26 LED blinking red Solution make sure vents aren’t blocked, turn off the projector and allow it to cool for a minute if lamp hours > 4,000, lamp must be replaced (see page 38) check lamp hours Main>About...
- Page 27 1-888-592-6800. Or, send us an e-mail at techsupport@infocus.com. In Europe, call InFocus in The Netherlands at +31 (0) 20 579 2820. In Asia, call InFocus in Singapore at (65) 6334-9005. This product is backed by a limited two-year warranty (page 47). An extended warranty plan may be purchased from your dealer.
-
Page 28: Using The Remote Control
Pressing the remote’s Power button when the projector’s Power toggle switch is in the Off position does not cause the projector to power up. You need to put the projector’s Power toggle switch in the On position to let the remote power on the projector. -
Page 29: Using The Audio
Using the audio To use the projector’s speaker, connect your source to the Audio In connec- tor on the projector. See page 15 regarding using the audio adapter. To adjust the volume, press the Volume buttons on the keypad or remote. -
Page 30: Optimizing Computer Images
(page 36). • Two options, Power Save and Screen Save, are provided to automati- cally shut down the projector after several minutes of inactivity or dis- play a black screen. This helps preserve lamp life (page 35). -
Page 31: Optimizing Video Images
• Turn on Overscan to remove noise on the edges of the image. Customizing the projector You can customize the projector for your specific setup and needs. See page 35 to page 37 for details on these features. • For rear projection, turn rear mode on in the Settings>System menu. -
Page 32: Using The Menus
For example, if the projector is set to a video source but the source, such as a DVD player, is turned off video menu options are grayed out. -
Page 33: Picture Menu
TV screens are usually 4:3. HDTV and most DVDs are 16:9. The default is 4:3. Select Native to see the unmodified input with no resizing by the projector. Select 16:9 to watch enhanced widescreen DVDs. For more information regarding Aspect Ratio, see page 14. - Page 34 Presets: Presets are provided that optimize the projector for displaying computer presentations, photographs, film images, and video images. Film input is material originally captured on a film camera, like a movie; video input is material originally captured on a video camera, like a TV show or sporting event.
- Page 35 Color Control Video Standard: when it is set to Auto, the projector attempts to automati- cally pick the video standard based on the input signal it receives. (The video standard options may vary depending on your region of the world.) If the projector is unable to detect the correct standard, the colors may not look right or the image may appear “torn.”...
-
Page 36: Settings Menu
Sources 1 (for S-video connections), and Video 2 (for composite video connections) Power-up for video sources. When this feature is Off, the projector defaults to the Source source selected in Power-up Source. To display another source, you must manually select one by pressing the Computer or Video button on the remote or keypad. - Page 37 Press the right mouse button to decrease the magnification. Press the Effect button to cancel zoom and return to normal magnifica- tion. • About: the default effect. It opens a window with projector and source information. Startup Logo Effect Key...
- Page 38 Do this only after changing the lamp. Service Code: only used by authorized service personnel. About: provides information about the projector and the active source. Showing the About box is the default action assigned to the Effect button. Language menu...
-
Page 39: Maintenance
Turn off the projector and unplug the power cord. Wait 30 minutes to allow the projector to cool thoroughly. Turn the projector on its side so that the lamp door is facing you. Using a flat-blade screwdriver, gently pry the lamp door from the projector by placing the screwdriver blade into the space between the top of the lamp door and the projector. - Page 40 Re-attach the lamp connector to the projector. The locking tab should engage when the connector is fully plugged in. Replace the lamp door. Plug in the power cord and toggle the Power switch to turn the projector back on. To reset the lamp hour timer, navigate to the Settings>Service menu and select Lamp Reset.
-
Page 41: Cleaning The Lamp Housing Screens
Replace the lamp housing and lamp door. Using the security lock The projector has a security lock for use with a PC Guardian Cable Lock System. See “Optional Accessories” on page 42 for ordering information. Refer to the information that came with the lock for instructions on how to use it. -
Page 42: Appendix
Input Power Requirements 100-120/200-240 3/2A 50/60Hz Ceiling Mount UL tested/listed ceiling mount with minimum capacity of 34 lbs (15.5 kg) Accessories Standard Accessories (ship with the projector) Shipping Box (with packaging) ° C) at sea level Soft Carrying Case °... - Page 43 IR Presentation Remote Full-Feature Remote with Laser PocketPoint RF Presentation Remote You can purchase these items by contacting your dealer or InFocus Catalog Sales at 1-800-660-0024 or visiting our website at www.infocus.com/acces- Part Number sories. For general product information, please call 1-800-294-6400.
-
Page 44: Projected Image Size
Projected image size NOTE: Visit our website at www.infocus.com/service for an interactive image size calculator. Table 2: Range of distance to the screen for a given screen size for the InFocus X1 Distance to screen Diagonal Maximum Screen Size Image Width... - Page 45 4 component cable connector 16 Computer In connector 9 connecting video device 14 connectors on projector 7, 8 contacting InFocus 26 Contrast 32 Customer Service 26 customer service contact information 26 customizing the projector 30 Display Messages 35...
- Page 46 43 LED behavior 19 lens cap 41 leveling foot 17 Macintosh computers compatibility 4 maintaining the projector 38 Menu button 31 menu usage 31 Monitor Out connector 9 mouse, using your 9 Mute button 28 NND 35 optimizing images 29...
- Page 47 26 phone numbers 26 temperature limits 41 Tint 32 Tracking 34 troubleshooting 19 turning off projector 19 TV tuner 14 USB 9 USB, using your mouse 9 vents 3 Vertical 34 Video In connector 15 video optimizing 30...
- Page 48 Product found to be defective within the Limited Warranty period and to repair or replace defective parts with new parts or, at the option of InFocus, serviceable used parts that are equivalent or superior to new parts performance. Limited Warranty periods are as follows: •...
- Page 49 To Be Eligible For Limited Warranty Coverage Any person exercising a claim under this Limited Warranty must establish to the satisfaction of InFocus both the date of purchase and that the Product was purchased new. The sales receipt or invoice, showing the date of pur- chase of the Product is the proof of the date of purchase.
- Page 50 InFocus Corporation 27700B SW Parkway Avenue Wilsonville, Oregon 97070-9215 1-800-294-6400 • 503-685-8888 Fax: 503-685-8887 http://www.infocus.com In Europe: InFocus International BV Strawinskylaan 585 1077 XX Amsterdam The Netherlands Phone: (31) 20 5792000 Fax: (31) 20 5792999 Freephone: 008000 4636287 (008000 INFOCUS)
Need help?
Do you have a question about the X1 and is the answer not in the manual?
Questions and answers