Table of Contents
Advertisement
Quick Links
BIN AND CASE MODULES
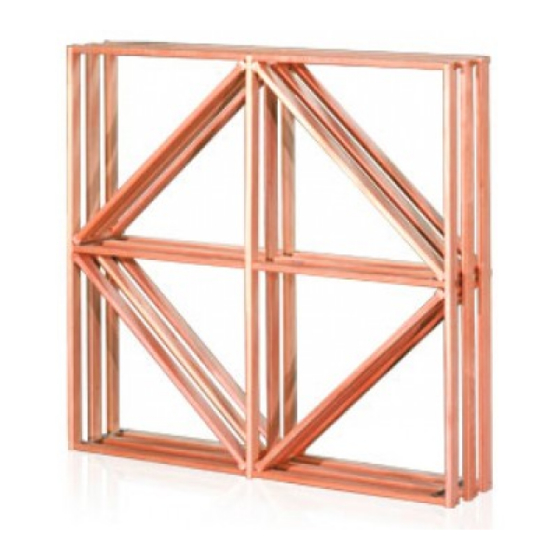
DIAMOND F05 (A)
DIAMOND F05 (B)
32" x 32"
32" x 48"
BORDEAUX BIN /
BORDEAUX BIN /
CARDBOARD CASE F06 (B)
CARDBOARD CASE F06 (A)
16" x 48"
16" x 32"
BURGUNDY /
BURGUNDY /
CHAMPAGNE /
BORDEAUX BIN F07 (A)
BORDEAUX BIN F07 (B)
MAGNUM F08 (A)
16" x 32"
16" x 48"
16" x 32"
WOOD CASE F09 (A)
WOOD CASE F09 (B)
CHAMPAGNE / MAGNUM F08 (B)
24"x 32"
24" x 48"
16" x 48"
ASSEMBLY & INSTALLATION GUIDE
Advertisement
Table of Contents

Related Manuals for Koolr red rack DIAMOND F05 A


Summary of Contents for Koolr red rack DIAMOND F05 A
- Page 1 BIN AND CASE MODULES DIAMOND F05 (A) DIAMOND F05 (B) 32” x 32” 32” x 48” BORDEAUX BIN / BORDEAUX BIN / CARDBOARD CASE F06 (B) CARDBOARD CASE F06 (A) 16” x 48” 16” x 32” BURGUNDY / BURGUNDY / CHAMPAGNE / BORDEAUX BIN F07 (A) BORDEAUX BIN F07 (B)
- Page 2 TOOLS 1”-1 ” Finishing Nailer Highly recommended to prevent splitting of wood. This tool is also handy for projects around the home. 8 ” Philips Screwdriver Hammer Level Drill COMPONENTS (Diamond Slat) Vertical Bar Horizontal Bar HARDWARE 1/2” Screw x 12 7/8”...
- Page 3 GETTING STARTED IMPORTANT NOTE : Bin and Case WineRack modules are available in a variety of styles and sizes. The Diamond, type B (F05) is illustrated in the follow- ing instructions. Some modules will not have a central vertical bar; others will have a different number of horizontal bars.
- Page 4 STEP 2 NAIL BARS : Nail at intersections for a good hold ( figure A ) . Nail through all outer bars into perpendicular bar ends ( figure B ). Nail two nails at every corner of rack assembly ( figure C ). STEP 3 FASTEN BRACKETS TO REAR RACK :...
- Page 5 STEP 4 INSTALLING ANCHORS : BEFORE ATTACHING TO WALL : For a professional look, install a Base Trim Kit* before mounting rack to wall. (Shown on last page) Stand rear rack up against wall where it is to be fastened. Mark through bracket holes with a pencil where plastic anchors should be installed .
- Page 6 STEP 5 FASTEN RACK TOGETHER AND TO WALL : Stand middle rack in position with horizontal bars locked in middle bracket slot, horizontal bars facing forward. Fasten brackets to bars with 1/2” screws ( figure A ). Stand front rack into position, horizontal bar facing forward and fasten bracket to bars with 1/2”...
- Page 7 MULTIPLE MODULES If installing multiple modules, screw adjoining racks together. Fasten through adjoining bars with 7/8” screws at top, middle and bottom rows, as shown (Take the diamond slats out for more space). To avoid cracking, pre-drill 1/16” holes for screws. Fasten through rear rack sections as well as front.
- Page 8 TEST BEFORE USE Use of Red Rack is strictly at your own risk. Koolr Products Inc. will not i l i i l i i t l assembled precisely as directed, or not securely fastened to a wall or support with suitable fasteners.
Need help?
Do you have a question about the red rack DIAMOND F05 A and is the answer not in the manual?
Questions and answers