Advertisement
Quick Links
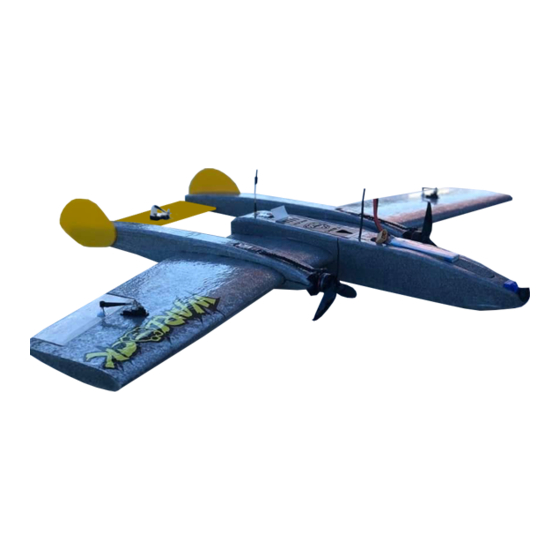
Thank you for purchasing a Warlock from TBRC Wings.
Kit Contents
1x Center wing panel
2x Outer wing panels
2x Tail booms
1x Fuselage
1x Coroplast horizontal stabilizer with built in elevator
2x Vertical stabilizers
12x Spars
2x Balsa ailerons
1x 2-56 Control rod with plastic clevis for elevator
1x Plastic control horn for Elevator
2x 2-56 Control rods with metal clevises for ailerons
2x Heavy duty aluminum control horns
1x Laser cut ply motor mount
8 Feet 3mil laminate
3x Decals
Centre of Gravity (CG) is 1.25" (32mm) from the leading edge of the wing.
Advertisement

Related Manuals for TBRC Warlock

Summary of Contents for TBRC Warlock
- Page 1 Thank you for purchasing a Warlock from TBRC Wings. Kit Contents 1x Center wing panel 2x Outer wing panels 2x Tail booms 1x Fuselage 1x Coroplast horizontal stabilizer with built in elevator 2x Vertical stabilizers 12x Spars 2x Balsa ailerons...
- Page 2 Step1 Trim 5mm off the trailing edge of the wing centre section. This is so that it fits perfectly inside the booms. Step2 Glue the outer wing panels to the centre wing section.
- Page 3 Step3 While the glue is drying on the wing panels cut spar channels into your fuselage and booms and install the fiberglass spars. Fuselage Sparing top, bottom and sides. For the top and bottom the spars are to be cut to 11.75 inches. For the sides they are to be cut at 9.75 inches...
- Page 4 Boom Spars Cut the boom spars to 9.75” length and install them on the top, bottom and sides of the booms as shown.
- Page 5 Step4 Cut and add the spars to your wing. Be careful that you make sure the wing is straight and without warp as the glue dries. Pay particular attention to the outer wing panels as they are tapered. Be sure to spar top and bottom of the wing. The main spar is 1.25”...
- Page 6 Step5 Laminate the wing with the supplied laminate. Cut out spaces in the laminate for where the booms and fuselage will attach. This way when we attach them they will be glued foam to foam for the best bond possible. Step6 Laminate and install the ailerons to the outer portions of the wings.
- Page 7 Step7 Glue the booms and the fuselage to the wing, be sure that they are straight and parallel. Step8 Glue in the horizontal stabilizer in the slot at the back of the booms. Be sure that the elevator is at the back.
- Page 8 Step9 Glue the vertical stabilizers on the outside rear portion of the booms. Step10 If you are making the Warlock in a pusher configuration attach the motor mount to the rear of the fuselage.
- Page 9 Step11 Cut the fuselage battery plug to the desired height and glue it in place inside the fuselage. Step12 Laminate the fuselage and the booms Step13 Install the electronics. The elevator needs only small throws. Connect the pushrod to the centre hole and the second hole down on the elevator control horn to decrease pitch sensitivity.
Need help?
Do you have a question about the Warlock and is the answer not in the manual?
Questions and answers