
Related Manuals for Oton Geek N8

Summary of Contents for Oton Geek N8
- Page 1 User Manual 8CH Touch Screen NDI Switcher With Built-in Camera Control Oton Geek N8 Model...
-
Page 2: Introduction
Introduction Thank you very much for using our portable broadcast platform products!please read the manual carefully before using this product. This manual describes in detail the functions, installation and operation of the portable broadcast station general principles or methods. This series of portable broadcast station is a high performance, multi - function product of live broadcast switching station. -
Page 3: Warranty Terms
Warranty only valid in the country or region of purchase. Shipping expenses are at Oton for any delivery claim - you get a defective piece at box just opened. What Is Not Covered It is important to note that our warranty is not an unconditional guarantee for the duration of the Program. -
Page 4: Register For 2-Year Warranty
Manufacturer reserves the right to refuse to service any product which has been altered, modified or repaired by any non-authorized personnel Register for 2-year Warranty Visit https://otontechnology.com/warranty/ or scan below QR code to register 2-year warranty for your Oton switcher. -
Page 5: Table Of Contents
Table of Content Introduction................................... 2 Warnings and Precautions............................2 Warranty Terms................................3 Standard Warranty............................... 3 What Is Not Covered............................3 Register for 2-year Warranty..........................4 Table of Content................................5 Overview..................................6 Control Surface..............................6 Rear Panel................................6 Key Features.................................. 7 Technical Specification............................... 7 Getting Started................................10 Using Multi-view.............................. -
Page 6: Overview
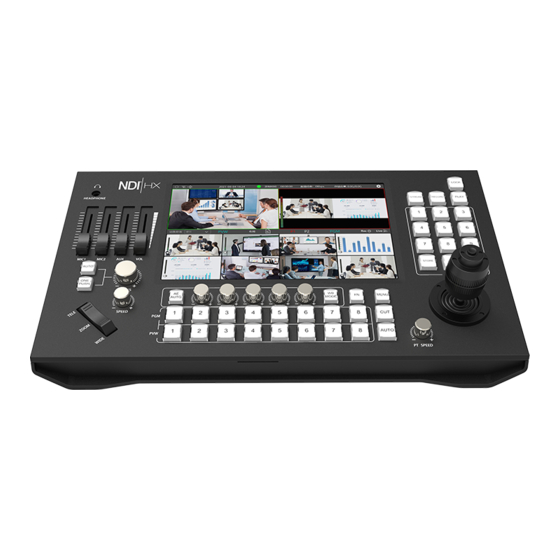
Overview The Geek N8 combines a live switcher, H.264 video encoder, PTZ camera controller, video recorder and audio mixer in one unit. Live production for live musical performances, lectures, presentations and church service can now be done easily by one operator, instead of the multiple operators that are usually required. -
Page 7: Key Features
Key Features 8 channel inputs from NDI|HX, HDMI , USB local video or online decoding video Built-in 10.1 inch multiview screen Touch screen or mouse & keyboard control for configuration HDMI out for viewing program video on big screen ... - Page 8 Video Source NDI®|HX, HDMI V1.4 Type-A, USB local video, RTSP online video Video Output HDMI V1.4 Type-A Audio Source 1 pair 6.35mm audio + 1 pair R/L audio Audio Output 1 pair R/L audio + 1x3.5mm audio Screen 10.1 inch USB 2.0 Port Mouse &...
- Page 9 Protocol RTMP Bit Rate High Bit Rate - 512/768kbps, 1/1.5/2 Mbps Low Bit Rate - 3/5/8/12/16 Mbps Resolution High Bit Rate - 960x540, 1280x720,1920x1080 Low Bit Rate - 640x360, 736x416, 960x540 Frame Rate High Bit Rate - 30/60 Fps Low Bit Rate - 25/30 Fps Stream Address Preset Multistream 2 platforms at the same time...
-
Page 10: Getting Started
Upgrade USB Drive Warranty 1 year standard warranty for limited labor and parts Register for 2-year warranty Package Content Package Content Main Unit x1 HDMI Cable x1 Power Adapter x1 User Manual x1 Warranty Card x1 Getting Started The switcher might seem intimidating with all the connectors and buttons, however the unit is actually very easy to set up and use. -
Page 11: Connecting Ndi|Hx Sources
LAN port of network switch using Ethernet cable Connect the network switch to LAN port at the rear of Geek N8 using Ethernet cable Press or click the [+] of input channel section on multi-view to see a list of available sources. -
Page 12: Connecting Hdmi Sources
Connecting HDMI Sources Connect your HDMI Sources including camera, computer or drone to the HDMI input via HDMI Cable. Press or click the [+] of input channel section on multi-view to assign channel for HDMI. HDMI Video is grouped under [Local Interface] heading. - Page 13 Add Video - Single address configuration Click [Add Video], input name and URL address for RTSP/RTMP video, then click [Confirm] Import Video - Bulk address configuration Open NetStream.ini configuration file in notebook Copy your RTMP or RTSP video address to the notebook and save it. You are allowed to save 8 sets (16) address in the notebook Save NetStream.ini to your USB drive and plug in the USB to USB2.0/3.0 port of N8 Click [Import Video], you will see a popup message(as below image), click [Confirm] to import...
-
Page 14: Removing Channel Video
Tally light support allows you to connect external tally light and similar devices. These typically provides a red LED for the video input that is currently selected on Geek N8’s Program row. (NDI|HX outputs also natively support tally over the network, without a separate connection) -
Page 15: Connection Diagram
Name Input/Output Pin Out Listing Program 1 Open Circuit Output LED 1 Program 2 Open Circuit Output LED 2 Program 3 Open Circuit Output LED 3 Program 4 Open Circuit Output LED 4 Program 5 Open Circuit Output LED 5 Program 6 Open Circuit Output LED 6... -
Page 16: Switching Your Production
Now that you have your everything connected, the switcher is ready to start switching your production. This happens when you switch from one video source in your broadcast to another. With Geek N8, you can switch cleanly using professional cuts or transitions. For example, a cut will instantly change from one source to another and a transition will change sources over a defined duration often using an effect. -
Page 17: Adding Logo
Adding Logo Geek N8 allows you to preset 4 brand logos from USB drive and be up-and-running in seconds! Dragging the logo for re-position. You can also use the logo as a trick for lower thirds titles! To add logo: Add your logo in USB drive and plug in the USB drive to USB2.0/3.0 port of N8... -
Page 18: Adding Titles
②Logo Size should be within 48x48 and 400x400 ③ Width and height must be in multiples of 4 Adding Titles Geek N8 integrates 4 title template contributing to the ultimate program output. To add titles: Click the Gear icon on the upper right corner of Dashboard, then click image icon Click [+add subtitle] and edit your subtitles with the built-in keyboard or external keyboard. -
Page 19: On-Board Ptz Camera Control
On-Board PTZ Camera Control Geek N8 features with an additional camera control function. Once your camera is connected to your LAN (Local Area Network), the built-in camera controller can be set up to quickly access up to 8 cameras with a single button press. - Page 20 iris is enabled. Check the iris setting (auto manual) This manually adjusts the saturation of camera lens. on the camera. Turn the dial clockwise to increase saturation, and [Iris] Dial counterclockwise to decrease saturation. This manually adjusts the iris of the camera lens. [R Gain] Dial Turn the dial clockwise to operate the iris in the This manually adjusts the intensity of red color.
-
Page 21: Controlling Audio
Important Notice: To control cameras, you have to make sure all units share same sub-net mask and gateway settings so that they can communicate. In addition, the first three fields of numbers in the panel’s IP address also need to match, but have their own identifying number in the last field so they won’t conflict with each other. -
Page 22: Adjust Volume
When video and audio sync is critical, and the two sources are not aligned, a production can go to shambles quickly. Even a few milliseconds off can distract a viewer. Oton Geek N8 unlocked adjustable audio delay for program audio. Simply move the round slider to adjust delay between 0-500ms for the best audio and video sync. - Page 23 That means you can live stream to YouTube, Facebook and Twitch in better quality, without dropped frames and with much simpler settings. To enable live streaming on N8: Press [MENU] button or click gear icon on the dashboard and click [Live Address Setting] Use the built-in keyboard to input your stream URL for RTMP1 and RTMP2 and click [Save] Click [Enable check box] if you’d like to activate either address.
-
Page 24: Video Recording And Playback
Video Recording and Playback Geek N8 lets you record your live stream video to USB drive via USB2.0/3.0 port. Simply plug in an USB disk or hard drive to the USB port and press [RECORD] button and you are now recording your broadcast, to stop recording, simply press [RECORD] button again. -
Page 25: System Settings
Note: 1. Supported USB drive format: FAT32,NTSF, EXFAT 2. Please make sure the capacity of your USB drive is larger than 1GB, it will stop recording when the capacity is less than 200MB. 3. Recording video format: MP4 4. Recording resolution and bitrate are the same with what you live on air, if you enable multi-stream, then you will get 2 clips (high bitrate version &...
Need help?
Do you have a question about the Geek N8 and is the answer not in the manual?
Questions and answers