Table of Contents
Advertisement
Quick Links
1
bottom shelf (one side will be unfinished)
1
middle shelf (back panel groove will be on both sides)
1
divider shelf (back edge will be flat, with notches for dividers)
1
top shelf (one side will have groove for back panel and 8 plastic
cam inserts)
1
right side panel*
1
left side panel*
2
toe kick boards
4
bottom dividers
4
top dividers ( will have notch for divider shelf cut in)
1
bottom back panel
5
top back panels
*left and right side panels are identified as if you were standing in front of the assembled unit. The groove to
accommodate back panels will be on the inside back of the side panels
28
50 millimeter hex bolts
16
connecting cam pins
16
cam locks
16
wooden dowels
6
37 millimeter flat head Phillips wood screws
20
15 millimeter round head Phillips wood screws
10
coat hooks
1
4 millimeter Allen wrench
1
Phillips head screw driver
*optional – these items are recommended for assembly, but are not included – flat head screw driver
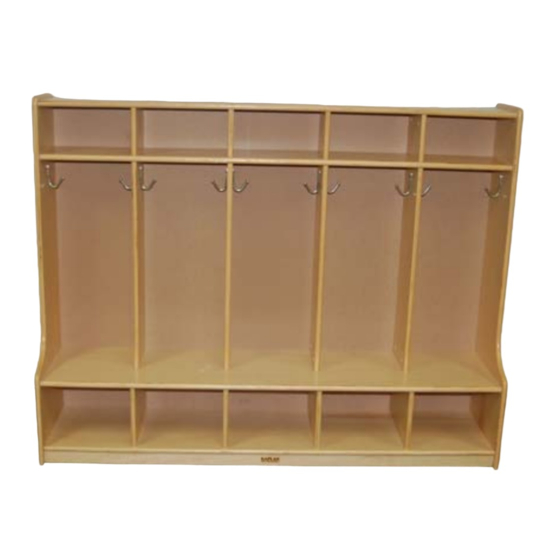
5 Section Locker # 48084
left side
right side
hammer
rubber mallet
Advertisement
Table of Contents

Related Manuals for KAPLAN 48084

Summary of Contents for KAPLAN 48084
- Page 1 5 Section Locker # 48084 bottom shelf (one side will be unfinished) middle shelf (back panel groove will be on both sides) divider shelf (back edge will be flat, with notches for dividers) top shelf (one side will have groove for back panel and 8 plastic...
- Page 2 This unit can be assembled by one person, but it is highly recommended that two people assemble this unit, as it is quite heavy for one person to handle. Step # 1 To begin, stand the bottom shelf on it’s back edge, with the unfinished side facing you.
- Page 3 Step # 4 Slide bottom back panel into back panel grooves in between bottom and middle shelves. Step # 5 Install 8 connecting cam pins into the plastic cam inserts on top of the middle shelf, using a Phillips head screw driver. Tighten clockwise, until snug.
- Page 4 Step # 7 Slide dividers, with groove for back panel facing the back of the unit, onto connecting cam pins on top of the middle shelf. Once divider is tight against middle shelf, tighten cam with a Phillips or flat head screw driver, clockwise about 1/2 turn, or until snug.
- Page 5 Step # 10 Slide back panels into back panel grooves on both ends of the unit, and install 4 wooden dowels into dowel guide holes on the ends of each shelf on both sides of the unit. If dowels are tight, use a hammer to lightly tap dowel into place.
Need help?
Do you have a question about the 48084 and is the answer not in the manual?
Questions and answers