Table of Contents
Advertisement
Quick Links
Advertisement
Table of Contents

Related Manuals for Aerofanture SWITCH AT52-01-01B

Summary of Contents for Aerofanture SWITCH AT52-01-01B
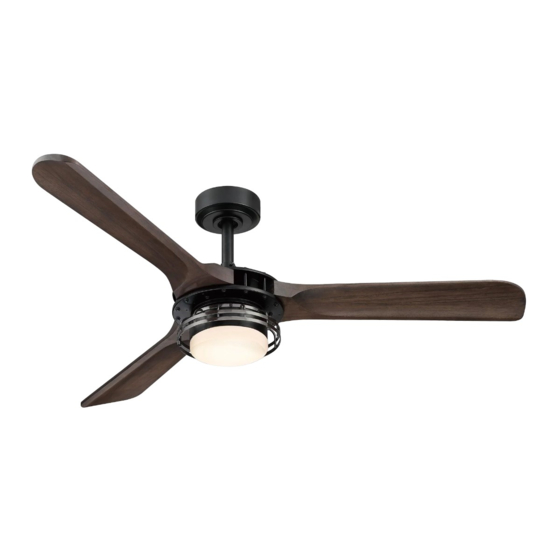
- Page 1 S W I T C H Ceiling Fan Installation Manual TYPE...
-
Page 2: Table Of Contents
CONTENTS INSTALLATION & OPERATING INSTRUCTIONS FOR THE AEROFANTURE OWNER’S INSTALLATION, MANUAL SAFETY TIP P 01 UNPACKING YOUR FAN CONTAINS P 03 INSTALLING YOUR FAN STEP 01 - 04 P 04 STEP 05 - 08 P 05 STEP 09 - 10... - Page 3 OPERATING YOUR REMOTE CONTROL STEP 01 - 06 P 09 AFTER INSTALLATION “WOBBLE” P 10 NOISE P 11 CARE AND CLEANING P 11 S W I T C H...
- Page 4 INSTALLATION & OPERATING INSTRUCTIONS FOR THE AEROFANTURE OWNER’S INSTALLATION, MANUAL * WARNING: SHUT POWER OFF AT FUSE OR CIRCUIT BREAKER THANK YOU FOR YOUR PURCHASE Thank you for purchasing this quality product. To ensure correct function and read and save all instructions safety, please before using the product.
- Page 5 After making electrical connections, spliced conductors should be turned upward and pushed carefully up into outlet box. The wires should be spread apart with the grounded conductor and the equipment-grounding conductor on one side of the outlet box. WARNING: To reduce the risk of electrical shock and fire, do not use this fan with any solid-state fan speed control device, or rheostat.
-
Page 6: Unpacking Your Fan
UNPACKING YOUR FAN TOOLS REQUIRED Phillips screwdriver Blade screwdriver 11 mm wrench Step ladder Wire cutters CONTAINS: Hanger bracket / Downrod / Canopy / Canopy Cover / Upper Blade Holder Ring System / Fan Motor Assembly / Blades x 3 / Receiver + Remote control incl. / Loose parts bag containing / Blade screw / Washer / Spring Washer / Screw nuts / Cable hardware (1pc per item) / Light Kit / Lampshade Hanger Bracket Downrod... -
Page 7: Installing Your Fan
INSTALLING YOUR FAN Fig.1a Turn Off Power Source Turn Off Power Source REMEMBER to turn off the power. Follow the steps below to hang your fan properly: STEP. Pass the 120-volt supply wires through the center hole in the ceiling hanger bracket as shown in Fig. Fig.1b Secure the hanger bracket to the ceiling outlet box with the screws and washers provided with... - Page 8 INSTALLING YOUR FAN Fig.5 STEP. Loosen the 2 screws on the adapter at the top of the motor assembly. Fig.6 Route the wires out of the top of the fan motor through the adapter, canopy cover and canopy and then through the downrod. STEP.
- Page 9 INSTALLING YOUR FAN Fig.9 Black Release 1 screw of the hanger bracket socket. White Grounded/Green Place the downrod ball into the hanger bracket socket. Make sure the hanger ball is seated in the groove on the hanger bracket. Rotate fan until notch on downrod ball engages the STEP.
- Page 10 INSTALLING YOUR FAN Fig.11 Attach the canopy up to mounting bracket and STEP. align the screw hole with the canopy. Secure it by tightening the two set screws. Slide the canopy cover up to the canopy, turn canopy cover until it locks at the end of the circular holes.(Fig.
- Page 11 INSTALLING YOUR FAN Fig.12 Hold the light kit close to the switch housing and securely attach the 2-pin connectors. Tuck the connectors neatly into the light kit. Align three round holes on the light kit and switch housing. Securely tighten with 3 links (Fig.12) STEP.
-
Page 12: Step
OPERATING YOUR REMOTE CONTROL Installing the Remote Control : FOLLOW STEP 01-06 STEP. STEP. STEP. STEP. STEP. STEP. -
Page 13: After Installation
Restore power to ceiling fan and test for proper operation. Turn up the speed of the fan ON/OFF THE FAN Turn down the speed of the fan Short press: ON/OFF the light Long press: Adjust the brightness of the light Direction of the fan (reverse switch) The fan and light will turn off... -
Page 14: Noisep
Use the enclosed Blade Balancing Kit if the blade wobble is still noticeable. If the blade wobble is still noticeable, interchanging two adjacent (side by side) blades can redistribute the weight and possibly result in smoother operation. WARNING: TO REDUCE THE RISK OF PERSONAL INJURY, DO NOT BEND THE BLADE ARM WHILE INSTALLING, BALANCING THE BLADES, OR CLEANING THE FAN. - Page 16 Ceiling Fan Installation Manual...
Need help?
Do you have a question about the SWITCH AT52-01-01B and is the answer not in the manual?
Questions and answers