Table of Contents
Advertisement
Quick Links
Advertisement
Table of Contents

Subscribe to Our Youtube Channel
Related Manuals for ZEAK 2500LB


Summary of Contents for ZEAK 2500LB
- Page 1 ZEAK 2500LB WINCH...
- Page 2 ZEAK 2500LB 12 Volt Electric ATV WINCH WARNING: Read carefully and understand all ASSEMBLY AND OPERATION INSTRUCTIONS before operating. Failure to follow the safety rules and other basic safety precautions may result in serious personal injury. Keep this manual and the receipt in a safe and dry place for future reference.
-
Page 3: Table Of Contents
CATALOGO 1 SAFETY WARNING: Important Safety Information Hazardous Chemicals Warning Work Area Safety Personal Safety CAUTION: Electric Winch Use and Care 2 SPECIFIC OPERATION WARNING General Safety Installation Safety Winching Safety 3 INTRODUCTION Technical Specifications 4 ASSEMBLY INSTRUCTIONS Mounting the Winch Mounting the Solenoid Assembly Wiring Circuit Break Protection Rubber Sleeve... -
Page 4: Safety Warning
1.SAFETY WARNING Important Safety Information Read and understand all instructions. Failure to follow all instructions may result in fire, serious injury and /or DEATH. The warnings, cautions, and instructions in this manual cannot cover all possible conditions or situations that could occur. Exercise common sense and caution when using this electric winch. -
Page 5: Personal Safety
Personal Safety Stay alert, watch what you are doing, and use common sense when operating the electric winch. Do not use the electric winch while you are tired or under the influence of drugs, alcohol, or medication. A moment of inattention while operat- ing the tool may result in serious personal injury. -
Page 6: Specific Operation Warning
2.SPECIFIC OPERATION WARNING General Safety 1.To prevent injury or property damage, read and understand all instructions before operating winch. 2.Wear ANSI Z87.1 compliant safety goggles and heavy duty leather work gloves during operation. 3.Do not exceed the rated load capacity. Be aware of dynamic loading! Sudden load movement may briefly create excess load causing product failure. - Page 7 9.Stay out of the direct line that the wire rope is pulling. If it slips or breaks, it will create a whiplash effect. Utilize a winch dampener to help absorb the force released if the wire rope breaks. 10.Do not use for overhead hoisting. This winch is intended to be used for pulling only.
-
Page 8: Introduction
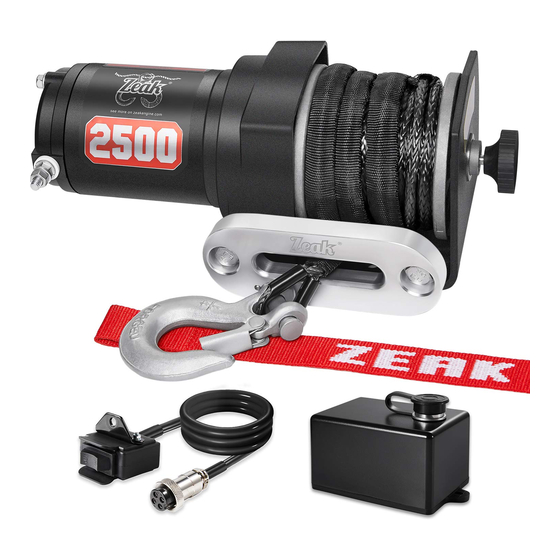
3.INTRODUCATION The ZEAK 2 500-Lb. 12 Volt DC Electric ATV Winch has plenty of power to assist in ATV recovery traversing rough terrain or loading a boat. This winch is a reli- able and safe addition to any off-road adventure. - Page 9 Winch Specifications Rated Single Line Pull 2 ,500 lb. Horsepower (hp.) Fairlead Rope Material Synthetic Hawse Fairlead Rope Length(ft.) Rope Diameter(in.) 3/16 Brake System Dynamic Freespool Pull and Trun Knob Gear Train Single-Stage Planetary Gear Ratio 153:1 Hook 1/4” Clevis with Latch Drum Size(in.) 1.25’’...
-
Page 10: Assembly Instructions
4.ASSEMBLY INSTRUCTIONS Mounting the Winch 1.The mounting plate must be rated to at least the winch’s capacity. 2.Align the winch perpendicular to the center line of the center line of the vehi- cle at the desired location and mark the locations of the winch base holes. Com- pare the dimensions of the marked holes. -
Page 11: Wiring
Wiring To prevent serious injury from explosion (sparking at the battery connection), disconnect the battery cables before making other wiring connections. To prevent serious injury from leaking battery acid, do not use a dirty, corroded or leaking battery. Only use a 12V automotive (or equivalent) battery, in good condition. -
Page 12: Circuit Break Protection Rubber Sleeve
Preparing the Wire 1.The wire rope must be properly coiled under tension to be able to support a load without damage. 2.Uncoil the wire rope, expect for 5 full wraps. 3.Recoil the rope back into the winch under at least 500lb. of tension. Circuit Break Protection Rubber Sleeve they can be used for circuit break protection,... -
Page 13: Operation Instructions
5.OPERATION INSTRUCTIONS 1.Inspect the winch rope, hook, and slings before operating the winch. Frayed, kinked, or damaged winch ropes must be replaced immediately. Damaged com- ponents must be replaced before operation. 2.Wrap the wire rope under 500 lbs. of tension before use. Otherwise, the wire rope may bind during operation. -
Page 14: Operation Warning
OPERATION WARNING Note: If a winch is to be used to pull a vehicle, it should optimally be rated to a single line pull at least twice the vehicle’s weight. Leave at least five full turns of wire rope on the drum. 1.Examine the wire rope. - Page 15 10.To pull out the wire rope, move the clutch control to the release position (shown in the following picture), slide the loop of the hook strap over the hook, then pull on the hook strap to pull out the wire rope. 11.
-
Page 16: Duty Cycle
16.Do not continue use of the winch until the battery is completely run down. Stop before it reaches that point. 17.When possible, keep the engine running while using this winch to continu- ally recharge the battery and prevent the battery from being drained so much that the vehicle cannot start. -
Page 17: Troubleshooting
6.TROUBLESHOOTING Follow all safety precautions whenever diagnosing or servicing the tool Disconnect power supply before service. Use the table below to troubleshoot problems before contacting service personal or your local dealer. If the probem continues after troubleshooting, call your local dealer for istance. Failure Possible Cause Corrective Action... -
Page 18: Maintenance
7.MAINTENANCE 1.To prevent serious injury from accidental operation: disconnect the battery cables before operate any inspection, maintenance, or cleaning. 2.Performing any inspection, maintenance, or cleaning procedures. 3.To prevent serious injury from winch failure: do not use damaged equipment. If an abnormal noise or vibration occurs, have the problem corrected before further use. -
Page 19: Parts Diagram
8.PARTS DIAGRAM Parts List Part Number Description Quantity Clutch Knob Base Plate Assembly Tension Plate Hex Flange Nut M5 Screw M5 X 10MM Hex Socket FH SCREW M6 X 16MM Bushing Synthetic Assembly Hook Drum Assembly Screw M5X8MM Pin 2.5 x 2 Spring Spine Clutch Assembly... -
Page 20: Replacement Part
REPLACEMENT PART Not all product components are available for replacement. The illustrations provide are a convenient reference to the location and position of parts in the assembly sequence. When ordering parts, the following information will be required: item descrip- tion, item model number, item serial number/item lot date code, and the replace- ment part number.
Need help?
Do you have a question about the 2500LB and is the answer not in the manual?
Questions and answers