Table of Contents
Advertisement
Quick Links
Advertisement
Table of Contents

Related Manuals for ADTI Surveyor 61S

Summary of Contents for ADTI Surveyor 61S
- Page 1 Surveyor 61S Full Frame Quick Start Guide...
-
Page 2: New Features
New Features 01. PCB integrated 03. Autopilot compatibility 02.Ultimate light weight more reliable pixhawk, DJI A2, A3, only 220 gram wide voltage input and N3, .DJI M210 and smallest and range M600 as well as most lightest full frame better PPK results commercial Autopilot 04. - Page 3 Including the Package 61MP Full Frame Camera *1 Multi-Terminal Cable*1 UART to USB Cable*1...
-
Page 4: Viewing The Guide
Viewing the Guide... - Page 5 Viewing the Guide...
-
Page 6: Power The Camera
Power the Camera Connect the camera cable with camera as photo above. Connect the VIN and GND cable with 12-28V lipo battery VIN = 12-28V GND= Ground DO NOT! Do not power the camera with any power supply that provides more than 28 V, as it may damage the camera. - Page 7 Power the Camera Quickly press to turn camera ON/OFF, also you can use this method to save your new camera settings. After connecting a battery to the camera: LED light will turn on when the ON/Off button is pressed. Do not using USB cable to power the camera via the multi terminal port.
- Page 8 Triggering Camera PWM Triggering 1. connect flight controller as photo above 2. power the camera 3. try the PWM from flight controller to test the camera shutter PWM > 1500 us - - -triggering camera ( 0.5 s)
- Page 9 Triggering Camera Triggering the camera by GCS before mapping mission starting is very important. It makes sure that the camera can be triggered properly by GCS before the mission. trigger the camera so the camera can enter the capture model. Now camera is ready to capture photos or change settings.
-
Page 10: Factory Reset
Factory Reset Tips: if the camera has any error, you can simply reset camera to factory settings. Press & hold the power button untill the camera LED is flashing。 Camera will do the self-check as following: 1. turn off for 3 second and turn on 2. - Page 11 Connect to PC 1. install "Advance serial port monitor" in a Windows PC 2. connect camera with a display via micro HDMI 3. connect camera with PC via UART to USB cable 4. power the camera with lipo battery 5. turn on the PC 6.
- Page 12 Companion Computer 1. connect camera with a Video Transmitter via micro HDMI 2. connect camera with companion computer via UART to USB cable 4. connect the camera with Dronelipo battery (you will need to know how to set a serial port monitoring software in your companion computer).
-
Page 13: Camera Lens
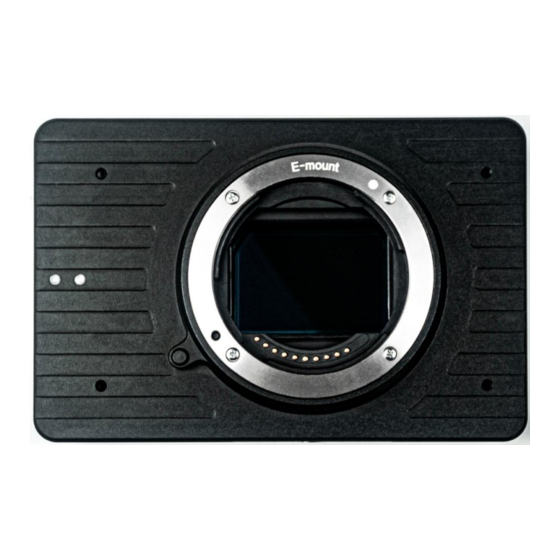
Camera Lens 61MP lightweight mapping camera is compatible with Sony E- mount Full frame lenses: Also we have 35mm, 40mm, 50mm and 56mm F5.6 full frame mapping lens you can choose for. Our 35mm Mapping lens only weigh 25 g Our 40mm Mapping lens only weigh 58 g Our 50mm Mapping lens... -
Page 14: Inserting Memory Cards
Inserting Memory Cards 61S has three memory card slots, two SD cards for images and videos, and one TF card for POS file (Future development), either you use an old memory card or a new memory card, you need to format the card in the way the camera wants it, so the camera can save the photos in the TF card properly. -
Page 15: Inserting A Sd Card
Inserting a SD Card Step #3 Formatting the memory card deletes all the data on it ,check the photo below, it will ask for confirmation, you will select " YES" and go to next step. Step #4 once camera is done formatting TF card, turn the camera off, and then turn it back on, and take a photo for testing, see if the photo is saved in the SD card successfully. -
Page 16: Camera Settings
Camera Settings Please refer to the page#11- connect to PC After setting changes is done, please push "P"-Camera ON/OFF to save the new settings! - Page 17 MAVlink developers can use ADTi drone mapping camera protocol to setup a video feed and camera controlling via Mavlink. Mavlink communication uses UART Hi3516 is used for HDMI transcoder & RTP Video streaming via Ethernet Camera definition file download via Mavlink FTP is needed...
- Page 18 Intergrating with Autopilot PWM (Pixhawk) Connect PWM camera triggering cable to the pixhawk ports, as . Here we have selected RC10, which corresponds to AUX2 on the Pixhawk Triggering the camera on Mission Planner: by action to trigger camera and click " do action"...
- Page 19 Intergrating with Autopilot PWM (DJI) In DJI Assistant 2 configure any of the available ports as "Shutter". For example the F1. Change shutter parameters or leave them by default.
- Page 20 PPK Setting Up (Emlid) The Surveyor 61S has PPK feedbacks to provide the PPK feedback to time stamp on the PPK GNSS. We use the Emlid Reach M+ as example. please see connection diagram as following.
- Page 21 Preparing your Survey It is important to understand the setup survey parameters to help optimize your survey results..We have listed some of the factors that affect your map quality. they are overlap, fly speed, and fly attitude. please see below data to determine your best numbers for those factors.
- Page 22 What Is Coming Next As ADTi (Aerial Dynamic Technologies and Innovations, we are passion about the innovations, we are going to continue and design the better products, that supply our camera for simple and easy mapping missions. New 30X RGB zoom with 640x480 thermal object tracking dual sensors camera is coming..
Need help?
Do you have a question about the Surveyor 61S and is the answer not in the manual?
Questions and answers