Table of Contents

Subscribe to Our Youtube Channel
Related Manuals for MITS AIR MOD31-24HFN1-MTOW


Summary of Contents for MITS AIR MOD31-24HFN1-MTOW
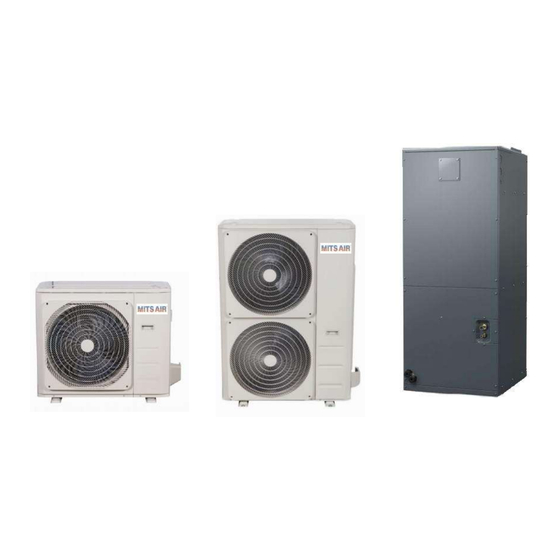
- Page 1 MITS AIR Inverter Compressor Matched System Installation / Service Manual Heat Pump Models (Outdoor + Indoor) MOD31-24HFN1-MTOW (2 Ton) + MVB-24HWFN1-M MOD30U-36HFN1-MX (3 Ton) + MVB-36HWFN1-M MOE30U-48HFN1-MX (4 Ton) + MVB-48HWFN1-M...
-
Page 2: Table Of Contents
Table of Contents Important ......................... 2 Warning ........................... 2 Important Installation Considerations ................3-4 Refrigerant Gases ......................4 Electrical Work Warnings ....................5 Outdoor Unit Installation ....................6 Extreme Weather Conditions ................7 Anchoring ......................7 Bracketing ......................8 Unit Dimensions & Clearances ................8-9 Wiring ......................... -
Page 3: Important
Important: Legislation for Compliance within Canada This manual is intended for use by personnel qualified by Federal, Provincial, and Municipal licensing in Canada and skill recognitions as required in the jurisdiction in which the equipment is being installed. Appropriate permits must be taken out as required in that jurisdiction in which the equipment is being installed and reporting of installation as required by law are the responsibility of the installer or contractor as obligated by law. -
Page 4: Important Installation Considerations
Important Installation Considerations 1. The metering device must be removed from the indoor coil. 2. The liquid line and the gas line from the outdoor unit to the indoor coil must be insulated. 3. The thermostat must be used or configured as a 2 stage heat cool thermostat and the furnace type is “Electric Furnace”... -
Page 5: Refrigerant Gases
CAUTION Do not install the unit close to an electrical or gas meter as regulated in the jurisdiction where the equipment is being installed. Do not install the unit in a location that may be exposed to combustible gas leaks. If combustible gas accumulates around the unit, it may cause fire. -
Page 6: Electrical Work Warnings
BEFORE PERFORMING ELECTRICAL WORK, READ BELOW: 1. All wiring must comply with local and national electrical codes, and must be installed by a licensed electrician. 2. All electrical connections must be made according to the Electrical Connection Diagram located on the panels of the interface and outdoor units. 3. -
Page 7: Outdoor Unit Installation
Outdoor Unit Installation Step 1: Select installation location before installing the outdoor unit. The following are standards that will assist with choosing an appropriate location for the unit. Proper installation locations must meet the following standards: ✓ Meets all spatial requirements shown in Installation Space Requirements (refer to Fig. -
Page 8: Extreme Weather Conditions
Special Considerations for Extreme Weather Conditions If the unit is exposed to prevailing winds: Install the unit so that air outlet is at a 90° angle to the direction of the wind. If needed, obtain wind baffles from your distributor to protect the unit from extremely heavy winds. -
Page 9: Bracketing
5. Check that the mounting brackets are level. 6. Carefully lift unit and place its mounting feet on brackets. 7. Bolt the unit firmly to the brackets. Unit Dimensions Dimensions Model Unit MOD31-24HFN1-MTOW Inches 37.24 16.14 31.89 40.6 26.5 15.9... - Page 10 Minimum Clearance For Outdoor Unit Multiple Unit Clearances for Outdoor Units Page 9 of 35...
-
Page 11: Wiring
BEFORE PERFORMING ANY ELECTRICAL OR WIRING WORK, TURN OFF THE MAIN POWER TO THE SYSTEM. ALL WIRING MUST BE PERFORMED STRICTLY IN ACCORDANCE WITH THE LOCAL CODE WITHIN CANADA. 1. Prepare the cable for connection: a. Using wire strippers, strip the rubber jacket from both ends of cable to reveal about 40mm (1.57 in) of the wires inside. -
Page 12: Refrigerant Tubing Connection
Refrigerant Tubing Connection Note on Pipe Length: The length of refrigerant piping will affect the performance and energy efficiency of the unit. Nominal efficiency is tested on units with a pipe length in North America of 7.5 m (25’). A minimum pipe run of 3 meters (10 ft) is required to minimize vibration and excessive noise. - Page 13 Step 2: Remove Burrs Burrs can affect the air-tight seal of refrigerant piping connection. They must be completely removed. 1. Hold the pipe at a downward angle to prevent burrs from falling into the tubing. 2. Using a reamer or deburring tool, remove all burrs from the cut section of the tubing.
-
Page 14: Instructions For Connecting Flares
CAUTION – DO NOT USE EXCESSIVE TORQUE Excessive force can break the nut or damage the refrigerant tubing. Torque requirements must not exceed values as shown in the table below. Step 4: Connect Tubes When connecting refrigerant tubing, be careful not to use excessive torque or to deform the tubing in any way. -
Page 15: Pressure Testing & Evacuation
Pressure Testing and Evacuation This procedure is intended for professionals with appropriate certification and licensing in the jurisdiction that the equipment is installed in. This procedure requires the use of high-pressure gasses that if incorrectly used can cause injury and death. Ensure the maximum test pressure of your indoor coil. - Page 16 4. Connect your manifold center hose to the regulator and your high-pressure hose to the machine. You will require a 1/4” to 5/16” hose adaptor to do this. 5. Open the main high pressure valve of the tank and ensure that the regulator is not leaking.
-
Page 17: Connecting Piping
Instructions for Connecting Piping to Outdoor Unit USE WRENCH TO GRIP MAIN BODY OF VALVE Excessive torque can damage the valve, flare nuts, tubing, and snap off other parts of the valve. 1. Unscrew the cover from the packed valve on the side of the outdoor unit (see Fig. -
Page 18: Evacuation And Opening The System
Evacuation and Opening System Preparations and Precautions • Air and foreign matter in the refrigerant circuit can cause abnormal rise in pressure, which can damage the air conditioner, reduce its efficiency, and cause injury. • Use a vacuum pump and manifold gauge to evacuate the refrigerant circuit, removing any condensable gas and moisture from the system. -
Page 19: Test Run
Opening the System 1. If the one-way length of refrigerant liquid line is greater than twenty-five feet (25’), consult the charge sheet in the rear of the manual and weigh in the charge adjustment. Refer to page 33. 2. Remove the cap of the gas line stop valve. Use a metric Allen key to open the valve and rotate the valve stem to its maximum opening. -
Page 20: Indoor Unit Installation
Indoor Unit Installation Indoor Unit Parts Safety Precautions • Securely install the indoor unit on a structure that can sustain its weight. If the structure is too weak, the unit may fall and cause personal injury, unit and property damage, or death. •... -
Page 21: Installation Instructions, Dimensions, & Duct Connections
Indoor Unit Installation Instructions The indoor unit should be installed in a location that meets the following requirements: • Enough room for installation and maintenance. • Enough room for the connecting pipe and drain pipe. • The ceiling is horizontal & its structure can sustain the weight of the indoor unit. Recommended Distances Between the Indoor Unit The distance between the mounted indoor unit should meet the specifications in the diagram. -
Page 22: Mount Positions
space. Where return air duct is short, or where sound is likely to be a problem, sound absorbing glass fiber should be used inside the duct. Insulation of duct work is a must where it runs through an uncooled space during the cooling season. The use of a vapor barrier is recommended to prevent absorption of moisture from the surrounding air into the insulation. - Page 23 For the Horizontal left installation and Vertical down installation, the direction of the evaporator should be changed and the drain pan should be removed first. Please do it according to the following steps: 1. Remove the fixed plate of the filter, 2.
- Page 24 7. The pipe temperature sensor should 8. Reinstall the drain pan fixed plate and be put back in the same position. supporting plate Attach the room temperature to the evaporator output pipe protective sleeve 9. Reinstall evaporator cover 10. Reinstall the filter and filter plate 11.
-
Page 25: Installation Of Electric Auxiliary Heat Module
Installation of Electric Auxiliary Heat Module Electric Heaters Compatible to MITS AIR Air Handling Units NOTE: Installation must be performed by an authorized dealer or specialist. Please wear necessary protection when installing the unit. *Refer to Electric Heat Wiring Diagram(s) included in the box. - Page 26 3. Install the electric auxiliary heat module NOTE: For model EAH-10A(UL) ① Electric auxiliary heat assembly ② Electric auxiliary heat cover For model EAH-15A(UL), EAH-20A(UL) ① ② Electric auxiliary heat assembly 4. Using two screws (packed with accessories) to install the electric control components NOTE: •...
-
Page 27: Drainpipe Installation
Drainpipe Installation The drainpipe is used to drain water away from the unit. Improper installation may cause unit and property damage. CAUTION • Insulate all piping to prevent condensation, which could lead to water damage. • If the drain pipe is bent or installed incorrectly, water may leak and cause a water-level switch malfunction. - Page 28 NOTE: Horizontal runs must also have an anti-siphon air vent (stand pipe) install ahead of the horizontal run to eliminate air trapping. NOTE: Drainpipe Installation • When using an extended drainpipe, tighten the indoor connection with an additional protection tube to prevent it from pulling loose. •...
-
Page 29: Startup Form
Address 1 Address 2 City Province Postal Code Telephone Number Email Outdoor Unit Indoor Coil Manufacturer Mits Air Model Serial No. Testing Check List Ambient °F Piston / TXV Removed Return Air °F Liquid Line Insulated Supply Air °F Gas Line Insulated Return Air Temp at RA Sensor °F... -
Page 30: Wiring Diagrams
Wiring Diagrams SIMPLIFIED POWER WIRING FOR 2.0 TON OUTDOOR UNITS Models: Heat Pumps MOD31-24HFN1-MTOW OUTDOOR UNIT Page 29 of 35 SW 2020 V1... - Page 31 SIMPLIFIED POWER WIRING FOR 3 & 4 TON OUTDOOR UNITS Models: Heat Pumps MOD30U-36HFNI-MX MOE30U-48HFNI-MX OUTDOOR UNIT Page 30 of 35...
- Page 32 SIMPLIFIED LOW VOLTAGE WIRING FOR MATCHED SYSTEM Models: Heat Pump Models (Outdoor + Indoor) MOD31-24HFN1-MTOW + MVB-24HWFN1-M MOD30U-36HFN1-MX + MVB-36HWFN1-M MOE30U-48HFN1-MX + MVB-48HWFN1-M Page 31 of 35...
-
Page 33: Additional Refrigerant Charge Chart
Additional Refrigerant Charge Chart Page 32 of 35... -
Page 34: Unit Data
§ All testing and values are per Manufacturer’s testing and use of Manufacturer’s coils. *Rated Heating Capacity at 47°F outdoor temperature § Thermostat used must be 2 Stage Heat-Cool when using Electric Heater Option *Air flow measured at 0.20 in. w.c. ESP MOD31-24HFN1-MTOW model is Energy Star rated Page 33 of 35... -
Page 35: Notes
Notes ____________________________________________________________________________________ ____________________________________________________________________________________ ____________________________________________________________________________________ ____________________________________________________________________________________ ____________________________________________________________________________________ ____________________________________________________________________________________ ____________________________________________________________________________________ ____________________________________________________________________________________ ____________________________________________________________________________________ ____________________________________________________________________________________ ____________________________________________________________________________________ ____________________________________________________________________________________ ____________________________________________________________________________________ ____________________________________________________________________________________ ____________________________________________________________________________________ ____________________________________________________________________________________ ____________________________________________________________________________________ ____________________________________________________________________________________ ____________________________________________________________________________________ ____________________________________________________________________________________ ____________________________________________________________________________________ ____________________________________________________________________________________ ____________________________________________________________________________________ ____________________________________________________________________________________ ____________________________________________________________________________________ ____________________________________________________________________________________ ____________________________________________________________________________________ ____________________________________________________________________________________ ____________________________________________________________________________________ ____________________________________________________________________________________ ____________________________________________________________________________________ ____________________________________________________________________________________ ____________________________________________________________________________________ ____________________________________________________________________________________ ____________________________________________________________________________________ ____________________________________________________________________________________ ____________________________________________________________________________________ ____________________________________________________________________________________ ____________________________________________________________________________________ ____________________________________________________________________________________ ____________________________________________________________________________________ ____________________________________________________________________________________... -
Page 36: Limited Warranty
MITS AIR Inverter Compressor Matched System with Air Handling Unit (AHU) 1. MITS AIRCONDITIONING INC. (“MITS”) warrants to the original end user of this MITS AIR Inverter Compressor Matched System with Air Handling Unit (AHU) (the “Equipment”) for the periods described below that the Equipment will be free of manufacturing defects. If the Equipment fails to operate under normal use due to a manufacturing defect, the Equipment has 5 year parts and 5 year compressor warranty effective from the date of installation.
Need help?
Do you have a question about the MOD31-24HFN1-MTOW and is the answer not in the manual?
Questions and answers