Table of Contents
Advertisement
Quick Links
Advertisement
Table of Contents

Related Manuals for Succeeder SF-8200

Summary of Contents for Succeeder SF-8200
- Page 1 Operation Manual Fully Automated Coagulation Analyzer SF-8200 PLEASE READ THIS MANUAL CAREFULLY BEFORE OPERATION Beijing Succeeder Technology Inc. www.succeeder.com.cn service@succeeder.com.cn Effective Date: 01/12/2017 SUCQF·T-CK-STAD-SF82-001(a)
- Page 2 SF-8200 Operation Manual Thank you for purchasing our product! Read this manual carefully before using this analyzer! Specification: SF-8200 Product: Fully Automated Coagulation Analyzer Beijing Succeeder Technology Inc. Tower 1A, No. 27 Chuangxin Road, Tech Park, Changping District, Beijing 102200 China...
-
Page 3: Table Of Contents
4 NOTES FOR PREPARING THE TEST ................... 7 4.1 SAMPLE PREPARATION ..................... 7 4.2 PREPARATION OF REAGENTS ..................8 4.3 PROJECT SETTINGS AND INSTRUMENT STATUS ............8 I SF-8200 SIMPLE INTRODUCTION ......................9 1 OVERVIEW............................. 9 2 INSTALLATION ..........................9 2.1 INSTALLATION STATEMENT ....................9 2.2 INSTALLATION ENVIRONMENT .................. - Page 4 SF-8200 Operation Manual 1. SAMPLE LOADING ........................31 1.1 SAMPLE INTERFACE ......................31 1.2 SAMPLE LOADING ......................32 1.3 EMERGENCY SAMPLES ....................34 2 TEST ANALYSIS ........................... 35 2.1 "TEST" INTERFACE ......................35 2.2 TEST TASKS ........................35 2.3 CHECK THE TEST STATUS ....................36 3 TEST RESULTS ...........................
- Page 5 SF-8200 Operation Manual 2.2 TEST ITEM PROCEDURE SETTING ................. 59 2.3 TEST PARAMETERS AND DILUTION FUNCTION SETTING ........... 61 2.4 RESULT UNIT SETTING ....................63 2.5 ADD OTHER ITEMS ......................64 3 DICTIONARY SETTINGS ......................65 4 EQUIPMENT ADVANCED FEATURES OPTIONS ............... 66 4.1 CHANNEL SETTING ......................
-
Page 6: Quality Commitment
SF-8200 Operation Manual QUALITY COMMITMENT The company's manufactured products undergo a rigorous quality inspection, would be in full com- pliance with the technical requirements of this product The analyzers pass the safety testing and performance testing of medical device testing agencies, ... -
Page 7: Precautions
SF-8200 Operation Manual PRECAUTIONS 1 GENERAL PRECAUTIONS Before installing and using the instrument for the first time, please read the instructions in the manual carefully and strictly observe the operating procedures and precautions. The instrument must be operated in accordance with the methods specified in this manual. Failure to use the device in accord- ance with the methods specified in this manual may damage the protection provided by the device. -
Page 8: Notes For Preparing The Test
SF-8200 Operation Manual 3) The network power must have a protective earth terminal. Internal protective grounding terminal marked with symbols, must be reliably grounded through the power outlet. 4) The network power input socket is a disconnect device for the power supply of the instrument and the network. -
Page 9: Preparation Of Reagents
SF-8200 Operation Manual liquid is platelet poor plasma (PPP). 3) Sample placement Coagulation Test The PT test sample should be tested within 24 hours at (18-24) °C; the APTT test sample should be tested within 4 hours; other tests (eg FIB, PC, Factor V, Foctor VIII, D-Dimer, FDP, etc. ) Should be tested within 4 hours. -
Page 10: I Sf-8200 Simple Introduction
2 INSTALLATION 2.1 INSTALLATION STATEMENT The SF-8200 Automated Blood Coagulation Tester has been thoroughly inspected at the factory and carefully packed to prevent damage due to vibration during shipping. After delivery, please double-check the packaging to confirm that the instrument is free from any ex- ternal damage. -
Page 11: Working Environment
SF-8200 Operation Manual 4) The network power input socket is a disconnect device for the power supply of the instrument and the network. Do not install this device in a hard-to-disconnect position. 5) The analyzer contains non-corrosive gases, non-toxic gases, no special ventilation requirements. -
Page 12: Instrument Specifications
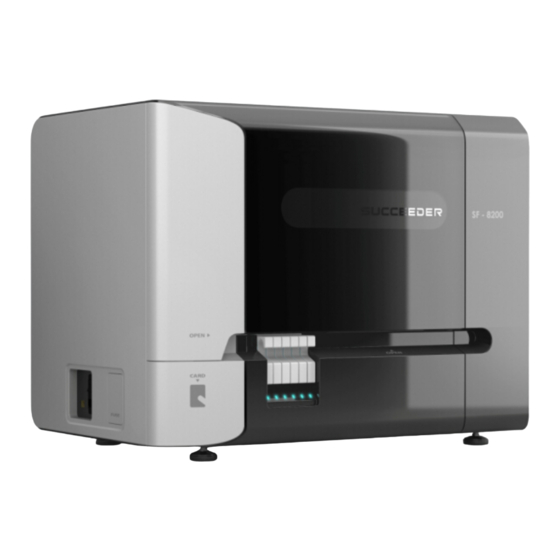
SF-8200 Operation Manual ④ Alarm for waste solution ⑤ Alarm for cleaning solution ⑥ Inflow socket ⑦ Outflow socket 3 INSTRUMENT SPECIFICATIONS 3.1 INSTRUMENT COMPOSITION 3.1.1. Instrument appearance Left side view of the instrument 1) Communication interface USB interface: IC card reader connection port, connected with the PC;... - Page 13 SF-8200 Operation Manual WARNING: Do not open the front cover during instrument testing as this may cause the instrument to stop operating or produce incorrect test results. 8) reagent barcode scanning window For reagent automatic scanning code loading, the specific operation refer to "Chapter II 3.2 rea- gent loading / unloading";...
- Page 14 SF-8200 Operation Manual 3.1.2. Internal components of the instrument 1) manipulator Used to test the handling of the cuvette, with rotation, can avoid the needles, improve operating efficiency. 2) Reagent arm Independent loading arm, used to start the reagent loading, running the reagent zone for the rea- gent zone start reagent zone and the test position;...
-
Page 15: Specifications
SF-8200 Operation Manual push the bar code scanning, and prompted to load the sample information in the software. Warning: The sample has potential biochemical hazards, please wear rubber gloves operation. Warning: laser radiation, do not look directly at the light beam. - Page 16 SF-8200 Operation Manual ※ APC-R ※ s, g/l, mg/dl ※ s, % ※ %, OD/min ※ s, % ※ %, OD/min ※ %, OD/min ※ ※ %, OD/min D-Dimer ※ DOD, μg/ml ※ DOD, μg/ml ※ DOD, μg/ml ※ ※...
-
Page 17: Analysis Principle
SF-8200 Operation Manual chromogenic sub- ≤5.0% ≤10.0% AT-Ⅲ(%) Optical strate method method immunoturbidimetric D-Dimer(μg/ml) ≤10.0% ≤5.0% method Note: 1, the conventional four abnormal samples refers to not less than twice the median value of the normal reference range of the instrument;... -
Page 18: Test Process Introduction
SF-8200 Operation Manual tics of the test substance and labeled with its specific antibody particles, making the reaction system of turbidity change, by measuring the change in light intensity to be Method of measuring objects. Optical method detection principle: After a monochromatic light through the reaction vessel, part of the incident light is absorbed or refracted by the reaction medium, the transmitted light is detected by the detection system, and through the formula converted into absorbance (optical density, O. -
Page 19: Routine Use
SF-8200 Operation Manual II ROUTINE USE 1 START THE INSTRUMENT BEFORE CHECKING 1.1 GARBAGE BASKET INSPECTION Plastic bag 垃圾袋 垃圾筐 Waste basket Pull out the instrument trash basket, remove the distance of about 260mm, remove the trash bag, dispose of bio-waste according to local regulations;... -
Page 20: Drainage Inspection
SF-8200 Operation Manual 1.2 DRAINAGE INSPECTION Liquid-outflow alarm and Liquid-overflow alarm and 废液满液报警接口 清洗液缺液报警接口 inflow pipe adapter outflow pipe adapter 及排水水嘴接头 及进水水嘴接头 Liquid-overflow switch Liquid deficient switch Cleaning liquid barrel Waste liquid barrel Alarm interface with quick connector, insert, you need to limit the connector and the interface of the instrument alignment;... - Page 21 SF-8200 Operation Manual 杯盘支撑限位块 Cuvette roll support block 测试杯盘 Cuvette roll Left front door 左前门 locker 钩锁 Rolling pulley 收带轮 Rolling belt fixing pulley 杯带限位滑轮 Cuvette belt 杯带 杯盘抽拉方向 Rolling direction Belt fixing direction 杯带固定方向 1) Remove the cuvette holder from the left front door of the instrument, and pay attention to unlock the cuvette holder bracket "lock hook"...
-
Page 22: Start The Instrument
You can change the login name and login password on the Settings screen after login. Specific operations, see "Chapter VII 1.2. User Settings" 2.3 SOFTWARE INTERFACE DESCRIPTION SF-8200 software interface function partition as shown, the function of the screen in a similar way Function area Notes... -
Page 23: Function Panel
SF-8200 Operation Manual 2.4 FUNCTION PANEL The function panel is fixed at the top of the screen and an icon is displayed to display the corresponding menu: "Sample" loading interface "Reagent" loading interface "Test" interface "Results" screen interface "Calibration" interface "Control"... -
Page 24: Reagent Preparation
SF-8200 Operation Manual 3 REAGENT PREPARATION 3.1 PREPARE REAGENTS Prepare the required amount of clotting reagents, buffers, and special wash solutions as expected Item Reagent Dosage/Test SFT/Test PT Reagent 100μl 120μl APTT Reagent 50μl —— APTT Calcium Chloride Solution 50μl 60μl... -
Page 25: Reagent Loading / Unloading
SF-8200 Operation Manual 3.2 REAGENT LOADING / UNLOADING The "Reagents" screen is displayed in the software user interface. Activation Reagent Area Information of Reagent Intermediate Reagent Area Reagent Cleaning Solution Area 3.2.1. Manual operation 1) Manually load the reagent Information of the Selected... -
Page 26: Check The Calibration Curve
SF-8200 Operation Manual Click the reagent hole to be unloaded Click the "Uninstall" button, the hole reagent information disappears, the icon becomes blank; Remove the reagent bottle corresponding to the hole in the instrument and complete the reagent ... -
Page 27: Quality Control Test
SF-8200 Operation Manual ① ③ ② ⑤ 1) Click "Calibration" on the software interface to display the calibration interface; 2) Select the test items that need to check the calibration curve in the item list. For example, if the "D-Dimer" item is used as an example, if the calibration curve already exists, the number of curves will be displayed beside the item name. - Page 28 SF-8200 Operation Manual ① ② ③ 2) Click the "Quality Control" button, enter the quality control interface; 3) Click the "Quality Control Test" button, pop-up quality control test setting interface; 4) Select the required quality control, batch number and test items, to determine the quality control tasks generated and displayed in the test interface;...
-
Page 29: Sample Preparation
SF-8200 Operation Manual 6 SAMPLE PREPARATION 6.1 PREPARE THE PLASMA 1) Refer to "4.1 Sample Preparation" in "Precautions". Note! Vacuum blood collection tube in the machine before the need to remove the cap. 2) the smallest sample size Vacuum blood vessels were measured using a blood coagulation of 12 mm in diameter. The lowest point of the sample needle was placed at a height of about 800 μl from the bottom of the test tube (ie,... -
Page 30: Sample Loading / Unloading
SF-8200 Operation Manual 12mm Vacuum blood collection tube Attention! Place the tube in the sample bar with the tube's barcode label facing the barcode scanner. 6.3 SAMPLE LOADING / UNLOADING 1) Insert the specimen into the instrument sample position; The sample bar is pushed along the track, keeping the sample bar horizontal when placed so that it can be fed into the sample position. - Page 31 SF-8200 Operation Manual 2) The sample bit can automatically recognize the sample strip insertion process. When the sample strip is fully pushed into the sample position, the software automatically pops up the "Sample Load" dialog box, and the front window indicator of the instrument turns to "green";...
-
Page 32: Sample Management
SF-8200 Operation Manual III SAMPLE MANAGEMENT 1. SAMPLE LOADING 1.1 SAMPLE INTERFACE In the software display "sample" interface, you can add test tasks, view the sample test status, set the sample entry information and other operations. Refer to Chapter 2 to load the sample automatically. -
Page 33: Sample Loading
SF-8200 Operation Manual 1.2 SAMPLE LOADING Sample bar test tube location number The tip of the sample bar is No. 1, and the hole nearest to the handle is No. 10. Sample Number Barcode recognition can be automatically entered or manually entered. - Page 34 SF-8200 Operation Manual Set the required tests for loading a sample by checking the checkboxes before the item's name, and select "Select All" under the box to set all tests for all items or "Clear All" to cancel all items;...
-
Page 35: Emergency Samples
SF-8200 Operation Manual 1.3 EMERGENCY SAMPLES The instrument supports any emergency location. When loading a sample, select the "Priority" checkbox in the "Sample Load" window to test it as an emergency marker. During the test, you can also convert a normal sample to an emergency by simply selecting "Con- vert to Emergency"... -
Page 36: Test Analysis
SF-8200 Operation Manual 2 TEST ANALYSIS 2.1 "TEST" INTERFACE The "Test" interface is the monitoring area for the instrument testing task. It is mainly used for ob- serving and monitoring all the testing tasks; Test Items Display 测试任务显示 Test Items Status 测试状态图例... -
Page 37: Check The Test Status
SF-8200 Operation Manual Double-click a blank area below the test item to add the corresponding test item. As shown in the figure, sample No. 1 can add a D-Dimer test item to the sample by double-clicking a blank area below the D-Dimer. - Page 38 SF-8200 Operation Manual View the task details Data Test items Diagram Reagent Through the task details window, data acquisition and analysis curves can be monitored in real time, and test start time, end time, incubation channel number, test channel number and reagent status can...
-
Page 39: Test Results
SF-8200 Operation Manual 3 TEST RESULTS Click the "Result" button, enter the results query interface, the program automatically displays the results of the day. The left shows all sample numbers for the day, the middle shows the test results for the selected sample, and the right shows the sample information. -
Page 40: View Sample Results
SF-8200 Operation Manual 3.2 VIEW SAMPLE RESULTS Select the sample you want to view in the sample list on the left. The last result of the sample test is displayed in the middle test result area. The sample details display the sample information area on the right. -
Page 41: Sample Result Review
SF-8200 Operation Manual CV value. If the result of the sample test is abnormal, it is determined that the man-made correction is allowed. Click the result in the list to pop up the "Result Modification" dialog box. After changing to the desired value, tick "I agree to bear the legal consequence caused by modifying the test result"... -
Page 42: Print Sample Results
SF-8200 Operation Manual Confirm again whether you need to delete, if you need to click the "Yes" button to confirm the dele- tion result, or click "No" button to cancel; Attention! After deleting the sample cannot be restored, please exercise caution, and only the administrator user can delete the sample operation . - Page 43 SF-8200 Operation Manual Name Date Click the "Print" button in the operation area to pop up all the sample result print preview pages, one by one to print. Print multiple consecutive sample results Use the mouse to select the first sample information to be printed in the left sample list;...
-
Page 44: Ⅳ Reagent Management
SF-8200 Operation Manual Ⅳ REAGENT MANAGEMENT 1 BATCH MANAGEMENT Before loading the required reagents, reagent management is required, which means "lot number management". Enter the reagent information, you can choose to load the reagent has been entered batch number of reagents. -
Page 45: Supplies Recharge
SF-8200 Operation Manual When adding special items, refer to the reagent manual to set additional reagent parameters; Such as: PT thrombin, pay attention to the normal average and ISI value items; Calibrator, please pay attention to set the calibration value of the content. -
Page 46: Quality Control Parameters Entry
SF-8200 Operation Manual 4 QUALITY CONTROL PARAMETERS ENTRY Select "Batch No." in the reagent interface, pop-up "batch number" management dialog box. 1) Select the quality control in "Product Name" through the drop-down menu; 2) Select the newly added control lot number in the lot number list;... -
Page 47: Reagent Loading/Unloaing
SF-8200 Operation Manual Cancel If you need to reload the reagent, click the "Delete Layout" button in the "Reagents" interface, the system will empty the reagent layout; Recharge reagent When the reagent is not enough, click "Reagent" button on the "Reagents" interface. The device is halted after a brief interruption. -
Page 48: Ⅴ Quality Control
SF-8200 Operation Manual Ⅴ QUALITY CONTROL Enter the software function area, enter "QC" interface, as shown below. Diagram Items list Data 1 QC SETTING Before the QC test, the QC used for the test item needs to be specified. ③... -
Page 49: Qc Test
SF-8200 Operation Manual Before the quality control test, it is also necessary to determine whether the quality control param- eters are set correctly. For details, refer to Chapter 4 2 QC TEST After the quality control information is set up, the test items related to the reagents and controls loaded, you can conduct quality control tests. - Page 50 SF-8200 Operation Manual Select quality control test results, double-click to view the test task. Or delete the QC result by "Delete" button; Click "Print" button, pop-up print report preview dialog box...
-
Page 51: Ⅵ Calibration
SF-8200 Operation Manual Ⅵ CALIBRATION Click the software function panel area "calibration" button, enter the calibration interface. Diagram Display Data Test items Trace information Information Display Calibration 1 CHECK THE CALIBRATION CURVE Refer to chapter 2 2 CREATE A CALIBRATION CURVE 2.1 SET THE CURVE PARAMETERS... -
Page 52: Load Calibrators And Reagents
SF-8200 Operation Manual Click the "Settings" button, pop-up "FIB calibration settings" dialog box; test project calibration settings calibration mode The calibration mode is the curve fitting algorithm. At present, it supports three modes: linear, pol- ynomial and spline curve. According to the requirements of test items, it chooses a reasonable calibra- tion mode. -
Page 53: Create A Calibration Curve
SF-8200 Operation Manual 2.3 CREATE A CALIBRATION CURVE ② ① Click the "New" button to display the setting interface for adding calibration test items on the right; Set the calibration test In the project drop-down box, select the test items to be calibrated;... - Page 54 SF-8200 Operation Manual When all the tests are completed, as shown below. The "Calibration" interface displays the "Meas- ured Values" of all the calibration points and click the "Save" button. Pop-up confirmation dialog box, store calibration data; Clotting cali Clotting cali...
-
Page 55: Modify The Curve
SF-8200 Operation Manual Click "Measured Value" and enter it manually. Note: Please refer to Chapter 3 to find the test result or enter it according to the general curve provided by the manufacturer. Click "Save" button to pop up confirmation dialog box to store calibration data;... -
Page 56: Ⅶ Instrument Setting
SF-8200 Operation Manual Ⅶ INSTRUMENT SETTING 1 GENERAL SETTING Report setting Data back up Language setting LIS setting User setting Other setting 1.1 REPORT SETTING Fill in the title of the report; Select report template style; By default, the software provides two styles of report templates. Users can add a new template through the small program "Report Editor"... -
Page 57: Language Setting
SF-8200 Operation Manual Including the operator’s rights, following items are also allowed for administrator: Modify the calibration result Delete / modify test result Delete quality control result Add / delete users of the same or lower level permissions Including the administrator’s rights, following items are also allowed for engineer: ... -
Page 58: Lis Setting
SF-8200 Operation Manual 1.4 LIS SETTING Port Setting Set the serial port number, communication speed, data format and check mode of the communica- tion port as required. Protocol Type Succeeder Protocol Type The manufacturer defines the protocol type. This protocol supports only the upload function for the time being and does not support the download. -
Page 59: Test Item Setting
SF-8200 Operation Manual 2 TEST ITEM SETTING In “Options” interface, click “Tests”. Item information Item list Item setting 2.1 TEST INFORMATION Name Test item name; Code Test item abbreviation Method Choose different methodologies according to different test items. The instrument supports three methodologies: clotting, immunoturbidimetry, chromogenic substrate method;... -
Page 60: Test Item Procedure Setting
SF-8200 Operation Manual 2.2 TEST ITEM PROCEDURE SETTING At present, the instrument does not support the custom test items. Only the items in the existing list can be modified. If you need to create a special test project, please contact the factory service. - Page 61 SF-8200 Operation Manual Amount Set sample loading according to the test item and reagent’s requirement. When the sample is pre-diluted one, set it to the total quantity of diluted sample. Incubation Time When added as the sample to be added to the last intermediate reagent, the temperature incuba- tion time need to be set.
-
Page 62: Test Parameters And Dilution Function Setting
SF-8200 Operation Manual 2.3 TEST PARAMETERS AND DILUTION FUNCTION SETTING In the list of test items on the right, select the test item to set. Analyze the parameters Different methodologies have different analytical parameters clotting parameters Maximum time: test time-out;... - Page 63 SF-8200 Operation Manual Result parameters The test interface displays the "main unit" of the test result, which is added by setting the "result unit". For details, refer to Chapter 7. Re-dilute The Dilution range is determined by setting the "Low Limit" and "High Limit". And choose the "dilu- tion rate"...
-
Page 64: Result Unit Setting
SF-8200 Operation Manual 2.4 RESULT UNIT SETTING ADD UNIT Add a unit for the selected test item, click "Add Unit", "Result Unit" dialog box will pop up; Units: drop-down menu, the available units are s, DOD, PTR, INR,%, g / L, mg / dL, Description: Describe the meaning of the selected unit expression and fill in the normal or negative range of test results;... -
Page 65: Add Other Items
SF-8200 Operation Manual 2.5 ADD OTHER ITEMS For the convenience of printing the report card, other test items other than the native test can be added and displayed in the sample test result. In the "Options" interface "Tests" tab, click on the "external", and then pop-up the dialog box Fill in the test code, test name, result unit and reference range. -
Page 66: Dictionary Settings
SF-8200 Operation Manual 3 DICTIONARY SETTINGS Check the contents of the dictionary Select the name of the lower right side of the list of the dictionary name, doctor or department, the dictionary content will be displayed in the left list;... -
Page 67: Equipment Advanced Features Options
SF-8200 Operation Manual 4 EQUIPMENT ADVANCED FEATURES OPTIONS 4.1 CHANNEL SETTING This function is only displayed and operated under "Engineer" user privilege. Enable or disable the channel to be tested during testing by setting the state of certain ... -
Page 68: System Information
SF-8200 Operation Manual 5 SYSTEM INFORMATION Click “ ” button. View the device "Device Information" via the "System" option, or switch users via the "Logout" option. 5.1 INSTRUMENT INFORMATION Temperature Software displays the measured temperature of each temperature control area of the instrument. It is normal for the temperature to differ from the temperature required by the instrument's performance standards. -
Page 69: Log
SF-8200 Operation Manual 6 LOG Click on the icon in the lower left corner of the software, enter the "log interface." Log searching By setting up the “operate date” range, search the log information. Log Type System log Used to record all the fault information in the process of using the system. -
Page 70: Ⅷ Maintenance
SF-8200 Operation Manual Ⅷ MAINTENANCE Maintain timely to keep the machine run well. 1 MAINTENANCE SCHEDULE Frequency Type of Maintenance Remarks Maintain pipes Clean the probes We recommend the user make mainte- Add washing solution nance. If any questions, please contact... -
Page 71: Daily Maintenance
SF-8200 Operation Manual 2.2 DAILY MAINTENANCE Add cuvette roll, and clean waste bin To make sure the machine runs well, check the cuvette amount and take out the used cuvettes drawer, discard the waste. Please refer to “Ⅱ” to add the cuvette roll;... - Page 72 SF-8200 Operation Manual value. Adjust according to "optical test debugging process." Needle Maintenance Check the probes, including sample probe and reagent probe, whether there is blocking needle phenomenon. Check the steps are as follows: Place a 25 ml empty bottle in the reagent area and enter the debugging software.
- Page 73 SF-8200 Operation Manual Check the inlet pump and drain pump in working condition, whether there is abnormal noise or large vibration. According to the degree of abnormalities decide whether replace it or not. Check inlet pipe filter. If there is a foreign body jam, you need to change the inlet pipe filter.
-
Page 74: Half Year Maintenance
SF-8200 Operation Manual 4 HALF YEAR MAINTENANCE Add the following maintenance items in the basis of monthly maintenance items. Synchronous belt inspection and maintenance; First, check all the belts’ status of wear and aging. There should not be surface cracking, and broken teeth etc;;... - Page 75 SF-8200 Operation Manual Attention! When the instrument is switched on, do not operate on the circuit board. After the instrument is powered off, wait at least 15 seconds before proceeding with the fuse re- placement operation. After replacing the blown fuse, close the fuse box window and fix it with the tool.
-
Page 76: Ⅸ Faq
SF-8200 Operation Manual Ⅸ FAQ This chapter describes the FAQ and indicates the debugging methods. If the machine still runs abnormally after using the following methods, please contact the service department of SUEECSS or local agent. 1 FAQ SOLVING Turn on the power switch without starting the instrument Possible Causes: Power cord is not properly connected;... - Page 77 SF-8200 Operation Manual The liquid is not detected Possible Causes: Indoor humidity is too large or too dry, leading to poor capacitance environment, affecting the liquid level sensing sensitivity; Lack of reagent; Solution: Humidity should be suitably adjusted. Meet the humidity requirements of the working environment of the instrument is 30% -75%;...
Need help?
Do you have a question about the SF-8200 and is the answer not in the manual?
Questions and answers