Advertisement
Quick Links
Advertisement

Related Manuals for Wonderfu X565

Summary of Contents for Wonderfu X565
- Page 1 X565 AC REFRIGERANT RECYCLING AND FLUSHING MACHINE Operation Manual...
-
Page 2: Table Of Contents
Index 1 Caution………..…………………………………………. ……3 2 Technical parameter………………………………. …………3 3 Function……...………………………………………..…….….3 4 Structure…………..………………….……..……… …………4 4.1 Keypad……………………………..……………………………3 4.2 Inner Structure ………………………..…………………………7 5 Basic operation…………………….………………. ……….…8 6 Maintenance…………………………….……. ……………..45... -
Page 3: Caution
1 Caution: Wear the glove and eye protection glass to protect the skin and eyes from refrigerant. Don’t use this device near the fire or spark. Don’t expose this device into sunshine or rain. Avoid to contact with corrosive liquid and gas. Keep good ventilation. During transportation, strong vibration or bumping may damage the piping or loose some screws. -
Page 4: Structure
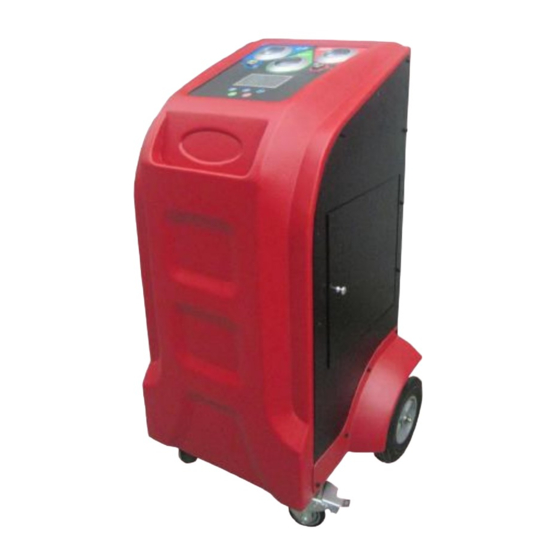
Appearance 4. Structure Picture 1: Front View... - Page 5 Handle LP Connector HP Connector Power supply Picture 2 Back View Fresh oil bottle Waste oil bottle Picture 3 : Side View...
- Page 6 Control Pannel: High-Side Gauge Low-Side Gauge Glass window Cylinder pressure gauge LCD Screen Glass window Operation keys Keys on Control Pannel: Digital keys to set the parameter Cancel key Selection key “ON/OFF” key (“Start” or “Pause” Key) Exit...
-
Page 7: Inner Structure
Inner structure : Main board Pump Oil entry Relay (vacuum) Pump Relay(recovery) Expansion valve Hp sensor Filter drier Oil separator Storage Cylinder Pump Oil exit Condenser Hose (recovery) Oil drain valve Compressor Inner structure... -
Page 8: Basic Operation
How to Connect to the car 5. Basic Operation 1.) Fix the red hose on machine HP connector 2. )Fix the blue hose on machine LP connector 3. )Connect red hose to car HP side, and blue hose to LP side. 4.) Make sure enough space of the waste oil bottle and enough fresh oil in fresh oil bottle. - Page 9 Close or open adaptors How to close High-side or Low-side adaptors: See below picture: twist the adaptor anti-clockwise to close the quick adaptor: How to open High-side or Low-side adaptors: See below picture: twist the adaptor clockwise to open the quick adaptor:...
- Page 10 How to refill For a new machine, the storage cylinder is empty. We need to refill 2~4KG fresh refrigerant into the cylinder before operation. How to refill: 1) fix blue hose onto the “LP connector” at back of the machine, and red hose onto “HP Connector”...
- Page 11 When everything going smoothly, LCD reads:...
- Page 12 When there is refrigerant in the hose, the “VACUUM” process will be suspended, LCD reads: Set the value when LCD message reads as below, then press to start refilling. Press to go ahead...
- Page 13 When the REFILLING process completed, press to exit.
- Page 14 The refilling process can be suspended if you press “PAUSE” The refilling process can be suspended when the tank being full or at high pressure. The refilling process can be suspended when there is no refrigerant in external tank.
- Page 15 RECOVERY to choose “RECOVERY”,then press 1. Switch on the machine, press 2. Press to continue 3. When we read the following message, please follow the instruction to do vacu...
- Page 16 5 After vacuum, press to next step. 6. After setting value, please press to continue...
- Page 17 7. The recovery process can be suspended when the storage cylinder full or pressure too high. 8. The recovery process can be suspended when NOT enough refrigerant inside the A/C system: 9. When the recovery process is going back to normal, it reads:...
- Page 19 VACUUM Before charging refrigerant into the A/C system, please vacuum the system first.
- Page 21 Vacuum process can be suspended when there is refrigerant in the hose, or you “PAUSE” it.
- Page 22 CHARGE 1. Turn on, choose “Charge” 2. Pree to next step 3. Refer to Page 8~ 9 on how to connect hoses and adaptor, and then press to go ahead.
- Page 23 CHARGE 4. Set the charge amount, then press 6. After charging, please check if air outlet cool or not, then press to go ahead.
- Page 24 CHARGE 7. Follow the instructions on the screen, and press 8. The recovery process is going smoothly, it reads: 9. If recovering residue gas from the hose, it reads as below. And please follow the instruction.
- Page 25 CHARGE 10. Charge process being done, and please press to exit.
- Page 26 FLUSH to choose “FLUSH”, then press 1. Press to enter 2. press to enter press to enter...
- Page 27 FLUSH 4. Vacuum before flushing, 6. When there is gas inside the hose, vaccum can be suspneded. Need to recover the hose first.
- Page 28 FLUSH 7. Vacuum done 8. Set the times you need to flush, and press to continue. 9. The gas amount should be more than 2KG inside the tank, otherwise, there will be a warning:...
- Page 29 FLUSH 10. When the flushing process is going smoothly, it should be displaying the route of flushing. 11. When gas amount too little or the valve being closed, flushing will be stopped.
- Page 30 FLUSH 12. When the tank being full or pressure too high, flushing will be stopped. 13. When flushing completed, it will recover the residue gas from the hose automatically. 14. When tank pressure beign high, recovery will be suspended.
- Page 31 FLUSH 16. After recovery from the hose, it will drain the oil automatically. 17. Flushing completed. Press to go back to main menu.
- Page 32 RECYCLE...
- Page 33 RECYCLE 5. We can see the recycling route when it is going smoothly...
- Page 34 6. When recycling failed, this message can be displayed 6. When pressure too high: 8. Recycling done, press to exit.
- Page 35 AUTOMATIC (1) Flush + Recovery + Vacuum + Charge...
- Page 36 AUTOMATIC 4. Follow the instruction if you see this message.
- Page 37 AUTOMATIC Set the value: 7. 8. Set the value, and press to shift to another parameter...
- Page 38 MAINTENANCE 11. After flushing, it will recover gas from the hose. We can see the actual recovery amount.
- Page 39 12. It will drain the oil after recovery 13. After recovery, jump to Vacuum process 14. Jump to charge process...
- Page 40 AUTOMOTIC 15. Done (2) Recovery + Vacuum + Charge 2. Press to go ahead...
- Page 41 AUTOMATIC...
- Page 42 AUTOMATIC...
- Page 43 AUTOMATIC...
- Page 44 AUTOMATIC...
-
Page 45: Maintenance
Maintenance (1) Empty the internal tank When the tank being full, need to charge out some gas or even empty the tank. - Page 46 4. Set the amount you need to discharge. 6.If there is no space in the first tank, please change a new one.
- Page 47 MAINTENANCE 6. Cleaning is done, please exit. (2) Reset data of filter The lifetime of filter is 200KG. After it has recovered 190KG, it will warn to change a new filter when you turn on the machine. After 200KG, you must change it. Otherwise, it will not work.
- Page 48 MAINTENANCE How to change a new filter: (1) Open the cover and side cover, you can see the filter in black color, being next to the oil separator. (2) At the top of the filter, use M16 spanner to solid the connector, and M21 spanner to loose the screw anti-clockwise: (3) At the bottom of the filter, use M16 spanner to fix, M21to loose the screw clockwise: (4) UseM8 adaptor to loose the screw that used to fixed the filter.
- Page 49 6) Fix the new filter, and make sure arrow down. (7) Use M8 adaptor to solid the screw anti-clockwise. (8) At the bottom of the filter, use M16 spanner to fix the connector, and use M21 to tight the screw. (9) At the top of the filter, use M16 spanner to fix the connector, and use M21 to tight the screw.
- Page 50 MAINTENANCE...
- Page 51 MAINTENANCE (3) Reset data of the vacuum pump oil In following cases, you need to change pump oil: (a) When the oil level is lower than minimum, please add oil. When it is higher than maximum level, please loose the screw and drain some oil. (b) The lifetime of pump oil is 150 Hours.
- Page 52 MAINTENANCE (3) loose the cover on top of pump. Cover (4) Get a bottle ready for the waste pump oil. Use tool to loose the screw under the pump. (5) After draining the oil, tighten the screw. (6) Use a funnel to help to fill the oil into the pump.
- Page 53 MAINTENANCE (7) When filling oil, make sure the oil level being correct. (8) Use a tool to tighten the screw on top. (9) ) After that, reset the pump oil data. Please follow below steps. Reset the pump oil data...
- Page 54 MAINTENANCE...
- Page 55 MAINTENANCE (4) Scale Calibration After replacing the storage tank, or the machine has been used for a long time, we can do calibration on the scale to ensure scale will be accurate, and the tank’s weight will be correct. Firstly, make sure the storage tank is empty or nearly empty, so we can do calibration. Take off the tank (1) Here is the tank position.
- Page 56 MAINTENANCE (3) Remove the yellow cover from the air releasing valve, and take the black valve out. Solenoid (4) Use a tool to loose the screws under the storage tank, so we can take the tank out. (5) Put 7kg weight onto the scale tray (6) Switch on the machine, and run the process of “Calibrate the electronic Scale”.
- Page 57 MAINTENANCE 3. Please input the password. Ask for your distributor on the password. 4. When you see this message, please follow the instructions to take out tank, then press...
- Page 58 MAINTENANCE 7. When users see below message, the users must make sure the operation is 100% proper. Otherwise, the calibration cannot been done.
- Page 59 MAINTENANCE 9. When you confirm the weight being correct, press to continue...
Need help?
Do you have a question about the X565 and is the answer not in the manual?
Questions and answers
I need the password to finish this operation
Hi , i have problem with my X565 machine, it can’t recovery refrigerant
If the Wonderfu X565 machine cannot recover refrigerant, follow these troubleshooting steps:
1. Check Machine Power – Ensure the machine is powered on and functioning properly.
2. Select Recovery Mode – Confirm that “RECOVERY” mode is selected on the machine.
3. Perform Vacuum Process – Follow the on-screen instructions to perform a vacuum before recovery.
4. Check Storage Cylinder – Ensure the storage cylinder is not full or at high pressure, as this can suspend the recovery process.
5. Verify Refrigerant Levels – Make sure there is enough refrigerant in the A/C system, as the process may stop if there is insufficient refrigerant.
6. Monitor Display Messages – Pay attention to any error messages on the screen and follow the indicated steps.
7. Inspect Hoses and Connections – Ensure all hoses and adaptors are properly connected and there are no leaks.
8. Resume Process – If the recovery process was suspended, ensure conditions are normal and restart the process.
If the issue persists, further inspection or maintenance may be required.
This answer is automatically generated
i don't know my password is there a admin one