Advertisement
Product Name:
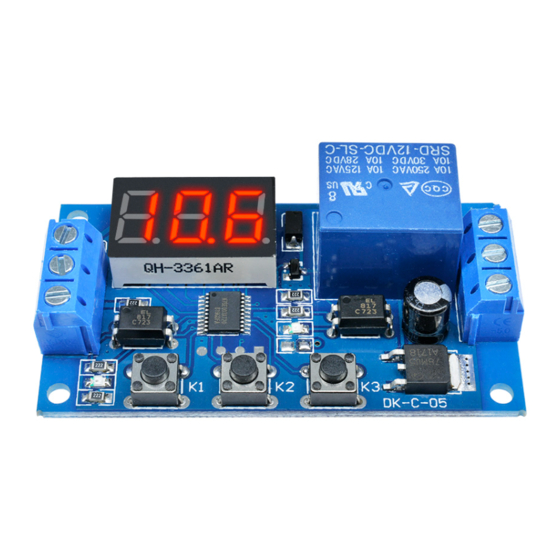
Programmable timer relay module
Model:
DK-C-01
Working voltage:
Source:
DC4V ~ 20V (positive trigger common power button, PNP sensors, PLC
signals, etc.)
Output capability:
Quiescent Current:
working current:
Life:
more than 10 million times;
Working temperature:
Weight:
about 26g
Dimensions:
64.2mm * 34.8mm * 18.5mm
anti-reverse voltage input circuit, worry-free wiring. Signal
input optocoupler isolation, anti-interference ability. Set the
parameters of power and permanent memory. Powerful flash MCU online
programming capabilities, according to user needs can contact the
manufacturers to customize the functionality.
Modules and devices are powered wiring diagram:
power supply modules and devices sharing wiring
diagram:
DC12V (normal operating voltage DC10V-16V)
You can control the DC or AC 220v5A within 30v5A within
20mA,
50mA
-40 ~ 85'C;
Shenzhen Deek Technology Co., Ltd.
Advertisement
Table of Contents

Summary of Contents for Deek-Robot DK-C-01
- Page 1 Product Name: Programmable timer relay module Model: DK-C-01 Working voltage: DC12V (normal operating voltage DC10V-16V) Source: DC4V ~ 20V (positive trigger common power button, PNP sensors, PLC signals, etc.) Output capability: You can control the DC or AC 220v5A within 30v5A within...
- Page 2 Features: power on, press S1 2 seconds to enter mode selection menu, press S1, choose P-1 ~ P-4 mode. OK / Shift key: Press to adjust the position of the LED is blinking, which LED is blinking, S3 to adjust the value of digital tube flicker. Until you press S2, the digital is no longer flashing.
- Page 3 P-1 mode: Long press S1 2 seconds to enter mode selection menu, press S1, select P-1, press S2 OK; automatically jump to the menu to select the function after pressing S1 (A1 A2 A3 optional), press S2 OK; automatically jump to set the time, press S3 to adjust the position of the decimal point, automatically jump press S2 OK LED is blinking, press S3 to adjust the flashing digits from 0-9 successively changed, press S2 to determine the order of operation until the blinking stops, set fixed end.
Need help?
Do you have a question about the DK-C-01 and is the answer not in the manual?
Questions and answers