Table of Contents
Advertisement
Quick Links
Advertisement
Table of Contents

Related Manuals for Sinsion SI-350

Summary of Contents for Sinsion SI-350
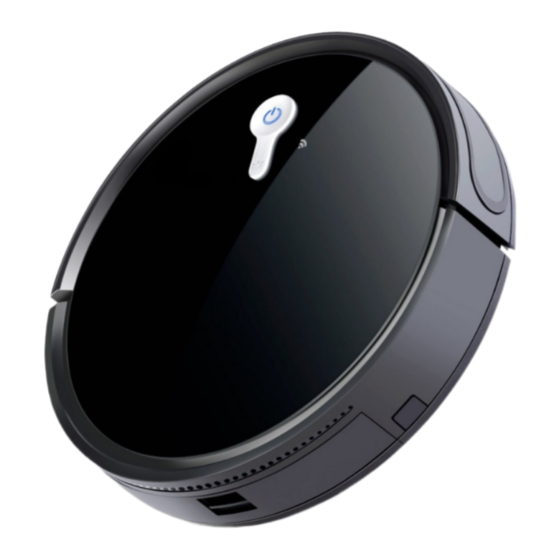
- Page 1 SI-350 Smart Sweeping Robot Product Manual...
-
Page 2: Table Of Contents
Table of Contents 1 Important Safety Instructions..............1,2 2 Product Components...................3 ..............3 2.1 The main machine and accessories ..................4 2.2 The main machine ..................4 2.3 Charging station ....................5 2.4 Dustbin ....................5 2.5 Water tank ....................6,5 2.6 Side brush ..................6 2.7 Remote control 3 Product Operations..................7 ..................7 3.1 Quick start guide... -
Page 3: Important Safety Instructions
1 Important Safety Instructions Please read the following safety instructions before using this product to avoid damage. Warning! Violation of safety instructions may cause severe personal casualty and property loss. Do not put weight on the power cord or Always use the original charger with this product, otherwise may cause bend the power cord, otherwise may Do not touch the power cord with wet... - Page 4 - If there is any damage on the external flexible cord of the adapter, the adaptor should be scrapped. Hereby, Sinsion Technology Industrial Co., Ltd., declares that this Smart Sweeping Robot is in compliancewith the essential requirements and other relevant provisions of RE Directive...
-
Page 5: Product Components
2 Product Components 2.1 The main machine and accessories Name Quantity Main machine Charging station Remote control Adapter Cleaning brush Insturction manual Side brush 2pcs Water tank Attention: Please take actual product shall prevail on the basis of not less than the above accessories. -
Page 6: The Main Machine
2 Product Components 2.2 Main machine 1. Touch clean button 7. Stair detection 12. Drving wheel 2. Bumper sensor 13. Signal receiving window 3. Panel 8. Main brush 14. Side brush 4. Universal wheel 9. Dustbin 5. Charging poles 10.Dustbin cover button 11.Charging socket 6. -
Page 7: Dustbin
2 Product Components 2.4 Dustbin 3.Dusbin upper cover 4. Dusbin botton cover 2.5 Water tank 1. Water tank button 2. Water inlet cap 3.Air valves 4. Water leakage hole 5. Mop 2.6 Side brush Please install the side brush according to the "L"... -
Page 8: Remote Control
2 Product Components 3 In cleaning mode, press this button to stop cleaning. the schedule setting. 5 Press this button to start cleaning when the robot is recharging on charging station. Press this button to start random cleaning mode. The process is zigzag cleaning mode, edgewise. -
Page 9: Product Operations
3 Product operations 3.1 Quick start guide 1.Place charger Place charger, connect the adapter and power, and the power light on the charger will stay lit. Position the charger against the wall, and remove all obstacles about 1 or 2 meters ahead of the charger. 2. -
Page 10: Start/Pause/Standby Mode
3 Product operations 4 When charging, the cleaning button blinks, and when fully charged, the cleaning button stops blinking, and lit permanently. 5 Please switch the main machine off when long time no use. 3.2 Pause/Standby mode 1. This model operation process: sleep mode>Standby mode>Cleaning mode 1 Sleep mode: power switch is on, CLEAN button light is off, the robot does not work. -
Page 11: Cleaning Mode
3 Product operations 2 Long press the “plan” button in the remote controller for 3 seconds into the plan mode, and set 3 Press the on/off button to save the settings, and to cancel the plan, press the “plan” button again (During the operation, the machine is always on the standby status.) Attention: 1 Set clock for your remote control before cleaning, the time settings are using real time. -
Page 12: Water Tank And Mop Operation
3 Product operations 3.Edge cleaning 1 Press edge cleaning button on remote control to start edge cleaning mode, the robot will start edge cleaning. 2 In auto cleaning mode, the robot also may start edge cleaning. 4.Advanced zigzag cleaning Press zigzag cleaning button on remote control to start advanced zigzag cleaning. - Page 13 3 Product operations 2 Installation of water tank jacks. Attention 1 Please remove the water tank when injecting water, and do not inject with complete machine. 2 Please remove water drops when installation of water tank. 3 Mop shall not be too wet, and wring to prevent tire slippage.
-
Page 14: Product Maintenances
4 Product Maintenances 4.1 Cleaning of side brush Side brush can be removed and clean by water. Please dry them completely before second use. If side brushes damaged, please replace them. Attention: When replace side brush, please pay attention to the L and R position and color. 1 Press PUSH button on dustbin, remove the dustbin. -
Page 15: Cleaning Of Sensors And Charging Poles
4 Product Maintenances 4.3 Cleaning of sensors and charging poles 1 Clean sensors and charging poles on robot bottom by using soft cloth. 2 Clean charging poles on charging station by using soft cloth. Charging contactor Charging contactor Sensor Sensor Sensor Charging contactor Charging contactor... -
Page 16: Water Tank Maintenance
4 Product Maintenances 4.5 Water tank maintenance 1 When the mop need to be cleaned, remove Air valve assembly 2 Air valve do not need to be maintained when normal use. Clean it when water leakage is Air valve cover abnormal (the power switch is off). -
Page 17: Troubles Shooting
5 Trouble shooting Problems Solution The robot keeps 1 Avoid working in high light intensity environments. moving backwards 2 Avoid working on deep dark carpets. 3 Clean the stair detection sensors by using a soft cloth. 4 Check the bumper and clean. The robot do not work 1 Turn on the power switch button. -
Page 18: Product Parameters
6 Product Parameters... - Page 19 Disposal This product is subject to the provisions of European Directive 2012/19/EC. The symbol showing a wheelie bin crossed through indicates that the product requires separate refuse collection in the European Union. This applies to the product and all accessories marked with this symbol. Products identified with this symbol may not be discarded with normal household waste, but must be taken to a collection point for recycling...
- Page 20 Company name : Sinsion Technology Industrial Co., Ltd. Company address : No.11,Tongle Rd.,Tangxia town, Pengjiang Qu, Jiangmen City, Guangdong Province, 529085 People's Republic of China...
Need help?
Do you have a question about the SI-350 and is the answer not in the manual?
Questions and answers