Table of Contents
Advertisement
Quick Links
Advertisement
Table of Contents

Related Manuals for Eazao Zero

Summary of Contents for Eazao Zero
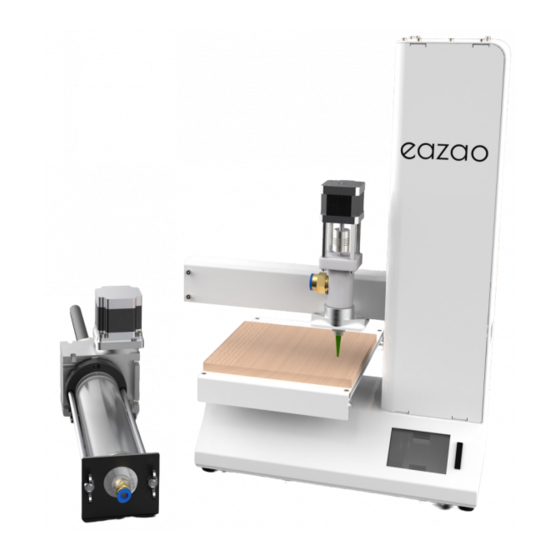
- Page 1 Eazao Zero DESKTOP CERAMIC 3D PRINTER INSTRUCTION MANUAL MODEL NUMBER: Eazao Zero...
- Page 3 If you experience any issues with this product, or it’s performance is not what you had expected, please contact us at Eazao before returning the item to the store. It is likely that we can resolve any problems for you via phone or email.
- Page 4 The benefits conferred by this warranty are in addition to all rights and remedies in respect of the product that the consumer has under the China laws. In case you purchase from Eazao distributor, your warranty shall be covered by distributor’s Warranty and honored by Eazao distributor too.
- Page 5 •Please read and understand the contents of this installation and user manual carefully. Failed to make full use of the manual to make full use of the Eazao 3D printer. •The Eazao 3D printer is not suitable for use by persons with weak physical and/or mental abilities, or lack of experience and knowledge, unless the person responsible for its safety gives supervision or guidance on the use of the equipment.
- Page 6 Technical Specifications Technical Specifications Print Technology DIW (Direct Ink Writing) Build Volume 150 x 150 x 240 mm (Width x Depth x Height) Layer Resolution 0.4 -1mm Extrusion Feeding Method Electric Push Rod + Screw Extrusion Nozzle Diameter 1.5mm, 2mm, 3mm Print Speed 10mm/s - 40mm/s Supported Print Materials...
- Page 7 Parts List 1 x eazao zero 3D Printer 1 x Tube 1 x Needle Set 1 x Electric Putter 1 x Hex Key Set 1 x Instruction Manual(Not shown) 1 x Power Adapter 1 x Printing Platform *1 x Microwave Kiln(Optional)
-
Page 8: Table Of Contents
4.7 Creating and Printing your own Models. 4.7.1 Saving files to SD Card. 4.7.2 Creating a GCODE file using Cura. 4.7.3 Installing Cura. 4.7.4 Adding your Eazao Zero to Cura. 4.7.5 Import cura slice configuration file. 4.7.6 Loading a 3D design into Cura and slice. SERVICING 5.1 Servicing your Eazao Zero. - Page 9 Contents FINISHING 6.1 Finishing Techniques. 6.1.1 Useful Tools/Equipment. 6.1.2 Polishing. 6.1.3 Surface Glazed. MAINTENANCE 7.1 Maintenance. DISPOSAL OF PACKAGING TROUBLE SHOOTING 9.1 Troubleshooting. 9.1.1 Printing Problems. 9.1.2 Connectivity Problems. 9.1.3 Other Problems. 9.1.4 Note Supplement. APPENDIX...
-
Page 10: Introduction
3D object. 1.2 From 3D Design to Printed 3D Object. 3D Design Slice to GCODE Setup Eazao 3D Printer 3D Printed Object Printing Process 3D Design Having a 3D design is the first step to creating a 3D Object. - Page 11 INTRODUCTION Setup Eazao 3D Printer It's important to check your printer before every print. We've included some steps on page 14 in section 4.2 Good 3D Printing Practices for you to quickly refer to each time. 3D Printing Process Now that you've loaded a GCODE file into the printer, you...
-
Page 12: Product Overview
PRODUCT OVERVIEW 2.1 Printer Front View. Print Bed Extruder Z-Axis Frame X-Axis Frame SD Card Slot G 1/2 Tube Quick Connect Full Color Touch Screen Needle... -
Page 13: Printer Rear View
PRODUCT OVERVIEW 2.2 Printer Rear View. Microsd Power Switch Electric Putter Connection Cable Plug Socket USB Port... -
Page 14: Printer Side View
PRODUCT OVERVIEW 2.3 Printer Side View. Lock Nut Z-Axis Limit Bolt Thumbwheels 2.4 Electric Putter. 57 Stepper Cartridge Threaded Push Rod Fixed Screw Thrust Block Anti-Rotation Flange Finger Screw Nut Reducer 10. Rubber Piston Cartridge Fixing Ring * As shown in the figure above, the electric putter stroke is at the maximum position. -
Page 15: Set Up
SET UP 3.1 Unboxing and Assembly. Your Eazao 3D Printer is carefully packed to avoid damage in transit. Take your time unpacking it. The printer is preassembld and requires only minimal set up before powering on. 1.Carefully remove the 3D printer from the box and place on a clean, level work space. -
Page 16: Main Interface
*Preheat: Please ignore this option. *Move: Manual control movement of XYZ axis of 3D printer. *Home: Manually reset the XYZ axis of the 3D printer to the zero point. *Printing: After inserting the SD card, select the file from the SD card to print. -
Page 17: Home Option
SET UP 3.4 Home Option. After entering this option, you can control the XYZ axis to zero. 3.5 Extrusion Option. In this option, you can control the push rod motor and extrusion motor. 3.6 Leveling Option. In this option, the print bed can be leveled by manual. -
Page 18: Clay Pre-Extrusion
SET UP 3.9 Clay Pre-extrusion. 1.Click the extrusion option on the screen, First select the return ratio "10-200-2000", then select "BackPutter", and finally click the "Out" option, and return the push rod motor to the motor side. Note: When putter approaching to the side of the motor, please click the "Shutdown" option to terminate the return, otherwise the motor will be damaged.PrintPutter-This step needs to ensure that each adjustment of the electric putter must be carried out and cannot be omitted, otherwise it will cause printing failure. - Page 19 SET UP Installation matters Installation matters 3.First select the return ratio "10-200-2000", then select "PrePutter", and finally click the "In" option, the electric putter pushes the clay forward, the clay enters and exits the extrusion motor, and extrudes from the needle. Electric putter pre-extrusion clay sequence The clay can be squeezed out smoothly from needle...
-
Page 20: Levelling The Print Bed
SET UP 4. When a clay is extruded from the needle, select the shutdown option to turn off the push rod motor and the extruder. 3.10 Levelling the print bed. Levelling the print bed and board is arguably the most important step in producing successful prints and should be checked before every print. -
Page 21: Print Checking Chart
Before printing, water can be sprayed on the printing bed board to increase the adhesion of the first layer. If you are new to 3D Printing we highly recommend that you visit our website to review our video tutorial on leveling the print bed at https://www.eazao.com... -
Page 22: Printing
PRINTING 4.1 Printing a file. The Eazao Zero only accepts and prints GCODE files. The included SD Card has simple model GCODE available to get you started. See section 4.7 Creating and Printing your own Models on page 16 to load your own models. -
Page 23: Good 3D Printing Practices
PRINTING 4.2 Good 3D Printing Practices. Please refer to these steps during every print to ensure the best quality. Before Printing 1.Ensure your GCODE file is correctly setup, filament diameter is set to to 1.75mm and the temperature settings is 0. 2.Check all cables and connerctors are connected and the printer is on a stable surface. -
Page 24: Removing 3D Objects From The Print Bed
4.4 Materials. The Eazao Zero is designed to be only used with clay .Only use genuine Eazao clay as using generic clay may damage your 3D printer and may void your warranty. Extra clay including multiple colors and clay types are available from the online store at : https:// www.eazao.com... -
Page 25: Creating And Printing Your Own Models
A GCODE file provides the extrusion settings and movement information for your Eazao Zero. A number of 'Slicer' software programs exist which convert a 3D model file into a series of 3D printable layers. Cura is free open source slicer software relesed on the AGPLv3 license. - Page 26 PRINTING 4.Select the associated file format, it is recommended to keep the default, click Install: 5.The installation process will pop up a window to install the arduino driver. Please keep the default installation and follow the prompts to complete the installation. * Refer to your computer manual of further instructions on the above steps if required.
-
Page 27: Adding Your Eazao Zero To Cura
"Add Printer", the printer setting interface will pop up, select the Custom FFF printer; Set the printer parameters as shown below. 2.Select custom and enter machine name as 'Eazao Zero', or your desired name 3.Input Machine width as 150mm, Machine depth as 150mm, Machine height as 240mm. - Page 28 G1 Z15.0 F1500 ;move the platform down 15mm G92 E0 ;zero the extruded length G1 F200 E3 ;extrude 3mm of feed stock G92 E0 ;zero the extruded length again M302 G1 F1500 M302 S0 ; always allow extrusion (disable checking) M163 S0 P0.9 ;...
-
Page 29: Import Cura Slice Configuration File
PRINTING 4.7.5 Import cura slice configuration file. In order for Eazao Zero to recognize the gcode generated by cura, you need to import the slice configuration file, and operate as shown below. 1. Select "Print Settings" --> "Configuration File" --> "Manage Configuration File"... - Page 30 PRINTING Note: The latest configuration file can be downloaded on the official website: https:// www.eazao.com Configure Cura's parameter slice print settings as shown below, or import the configuration file directly: eazao_zero_cura silcing setting.curaprofile If you cannot import, you can manually enter the value as the picture shows...
- Page 31 PRINTING Shell...
- Page 32 PRINTING Infill Material...
- Page 33 PRINTING Speed Special modes...
- Page 34 Key option description: Layer height: the height of each layer printed, the smaller the print surface is finer, but the slower it is, the parameter range is 0.5-3, Eazao Zero uses 1.5 nozzles by default. Wall thickness: the thickness printed on the outer surface of the model. Setting 3 here means that the outer surface will print a layer.
-
Page 35: Loading A 3D Design Into Cura And Slice
PRINTING 4.7.6 Loading a 3D design into Cura and slice. 1.Click “File” > “Open File (O)...” to select the model that needs to be sliced. Cura supports models in the STL/OBJ/AMF format. NOTE: Files in grey are outside of the print area and need to be moved or scaled to fit. 2.Model slice:... - Page 36 PRINTING 3.View slice details:After setting the slice parameters, select “Slice”-“Preview”.
- Page 37 PRINTING 3.Start printing: Click the drop-down menu in the lower right corner and select "Save to File" Note: The SD card used for offline printing must be Fat32 and the capacity is no more than 2G.
- Page 38 PRINTING 4.Print online After connecting the printer to the computer, the operation is the same as above. Note: Please start Cura after the machine is connected to the computer and powered on. Some computers may need to install driver support and print online via USB.
-
Page 39: Servicing
SERVICING 5.1 Servicing your Eazao Zero. 5.1.1 Extruder cleaning. 1. Disassemble the extruder: rotate the motor part of the extruder and pull out the screw. 2. Clean the clay inside the extruder sleeve, clean the screw clay, clean the oil seal and seal plug clay. -
Page 40: Extruder Diagram
SERVICING 5.1.3 Extruder diagram. 4 5 6 7 1 2 3 Extruder Tailstock Extruder Shell Sealing Ring Needle Adapter Extrusion Screw Needle G 1/2 Tube Quick Connect Note: After each use, be sure to clean the extruder and tube. Rotating 1-extruder tailstock and 5 extruder shell can separate the two, and clean the screw and the inside of the extruder shell. -
Page 41: Routine Component Check
We recommend using bearing grease and to apply liberally to both the Y Axis and Z Axis rods. Nuts and Bolts Loose nuts and bolts could affect the geometry of the Eazao Zero. Check that all nuts and bolts remain firmly tightened. If required, retighten using the hex wrench. 6.1 Finishing Techniques. -
Page 42: Polishing
*Check the condition of the wiring on the printer to ensure nothing is pinched of damaged. *Check the fans are operational during print. *Check the chassis is secure.Tighten any screws if there is flex in the frame. Always store your Eazao Zero in a cool, dry location that is free from dust. -
Page 43: Disposal Of Packaging
DISPOSAL OF PACKAGING This product has been packaged to protect it against transportation damage.Unpack the appliance and keep the original packaging carton and materials in a safe place.It will help prevent any damage if the product needs to be transported in the future,and you can use it to store the appliance when it is not in use. -
Page 44: Trouble Shooting
TROUBLE SHOOTING 9.1 Troubleshooting. If having any troubles when using the Eazao Zero,please refer to the troubleshooting guide below,or email customer support:support@eazao.com You can also visit https://www. eazao.com for support videos and advanced tutorials 9.1.1 Printing Problems. Clicking sound from one of the stepper motors One of your stepper motors may not be connected properly. -
Page 45: Connectivity Problems
TROUBLE SHOOTING 9.1.2 Connectivity Problems. My 3D Printer isn’t turning on Check that you have correctly inserted the power cable into the rear of the Control Box, the power cord is plugged into the mains outlet and that the Control Box power switch is on. -
Page 46: Note Supplement
.stl A common file format for 3D Designs/Models. USB Cable This cable allows communication between the Eazao 3D Printer and a computer, using the USB port of the computer. 9.1.4 Note Supplement. 1. After a long period of stagnation (more than 6 hours), first remove the tube from the extruder and select the pre-extrusion mode to extrude the hardened clay from the tube to ensure the softness and hardness of the clay during printing. -
Page 47: Appendix
APPENDIX References Some of the 3D Models used in this manual and other included materials were sourced from the below: https://www.thingiverse.com/... - Page 48 Eazao’s stringent quality specifi cations. If at any time you feel your repair is being handled unsatisfactorily, you may escalate your complaint. Please send us email at: support@eazao.com. Qingdao Eazao Intelligent Technology Co., Ltd. No. 397 Songling Road, Laoshan District, Qingdao Shandong, China (Operating Hours: Mon - Fri;...
Need help?
Do you have a question about the Zero and is the answer not in the manual?
Questions and answers