Table of Contents
Advertisement
Quick Links
Advertisement
Table of Contents

Subscribe to Our Youtube Channel
Related Manuals for LINCHR E-Series


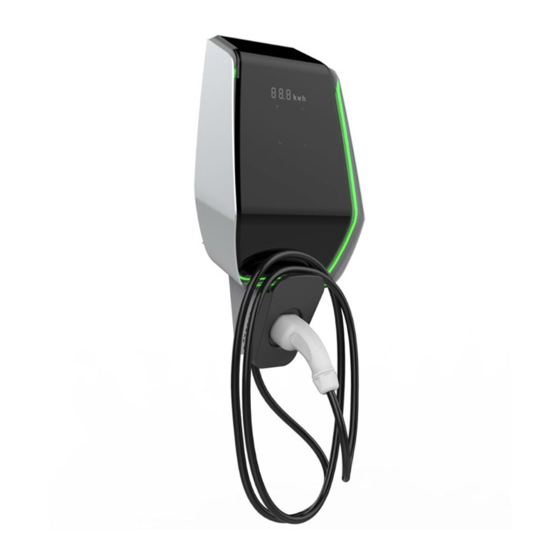
Summary of Contents for LINCHR E-Series
-
Page 2: Table Of Contents
E-series AC Charger Contents Introduction ..............................2 Representation of safety instructions ..................4 Requirements for installers ......................5 Guarantee ............................5 Notes on this manual ........................6 Installation ..............................7 Accessory list ............................7 Environmental requirements ......................7 Short circuit protection ........................8 Lightning protection ........................8 Supported power supply system ....................8 Installation steps ..........................9... -
Page 3: Introduction
Please read the instructions carefully before use, and follow the relevant steps of the instructions. E-series AC charger is a smart charger series, it has four models to meet your different using. The E-series AC charger has 6 digital tubes display and 4 state indicator lights,... - Page 4 E-series AC Charger Model ES-07-B ES-07-C ES-22-B ES-22-C 7KW(Single 7KW(Single 22KW(Three 22KW(Three Rated power phase) phase) phase) phase) Connection Socket(IEC Cable-5m(IEC Socket(IEC Cable-5m(IEC mode 62196-2) 62196-2) 62196-2) 62196-2) TN-S,TN-C- TN-S,TN-C- TN-S,TN-C- TN-S,TN-C- Grid system S,TT,IT S,TT,IT S,TT S,TT Power supply...
-
Page 5: Representation Of Safety Instructions
E-series AC Charger 1.1 Representation of safety instructions In this manual, you will find symbols used for warnings. The symbols used have the following meanings: Read these instructions carefully and examine the equipment to use. All the applicable local, regional and national regulations must be followed when you install, repair or maintain this equipment. -
Page 6: Requirements For Installers
You can also extend the warranty period by the different sales policy. Only the maintenance work expressly permitted by LINCHR may be performed. Any other manipulations to the device will also result in loss of warranty. -
Page 7: Notes On This Manual
E-series AC Charger As shown in the figure, drawing the × position means do not screw off. Opening this inner cover will break the warranty seal and void the warranty. if the warranty seal is broken, this proof can no longer be provided, whereby the warranty claim expires. -
Page 8: Installation
E-series AC Charger Installation This chapter mainly describes how to install the E-series charger. Please read it carefully. When installing, please install it in the manner specified in the manual, otherwise it may cause personal injury and equipment damage. Accessory list ●A user manual. -
Page 9: Short Circuit Protection
E-series AC Charger Short circuit protection The charger itself does not have a short-circuit protection function, and a short- circuit protection device needs to be installed at the upper level for short-circuit protection. It is recommended that the rated current of the supply circuit short- circuit protection device matching with the current used by the charger. -
Page 10: Installation Steps
E-series AC Charger Installation steps ●The mounting template is in the packing case easy for you to determine the position of bracket . Closed the mounting template to the wall. The height from the center of the template to the ground is determined according to your ideal height (1500mm is recommended). - Page 11 E-series AC Charger ●Open the black front cover of the charger, remove the anti-theft screw located on the top of the mounted bracket and fix the wall mount bracket on the wall with the expansion screws. ●Hang the charger on the wall mounted bracket, and then screw up the anti-theft screw.
- Page 12 E-series AC Charger ●Use scissors to cut the cross line of the rubber stopper and pass the cable through the rubber stopper. ●Place the cable through the hole in the bottom of the charger into the wiring position inside the charger and then put the rubber stopper in the hole position at the bottom..
- Page 13 E-series AC Charger ●Open the wire cover , insert the power supply cables into the bottom hole , and connect the cables according to the signs which on the wire cover. ( The cables should be wrapped in a bundle with tape for easy handling.) It should be noted...
- Page 14 E-series AC Charger ●Close the wire cover and screw up the wire cover with 4 screws. ●Close the front cover and the installation is finished. Configuration manual V1.3...
- Page 15 E-series AC Charger *If you have purchased a grounding post. You need to follow the steps below to install the grounding post. The installation screws and accessories are provided by the installer due to the different conditions on the construction site. These parts are not included in your purchase.
- Page 16 E-series AC Charger ■The depth of the bolts buried in the concrete is not less than 150mm, and the exposed length is recommended to be 15 to 30mm (maximum does not exceed 50mm). At the same time, the top of the concrete platform must be flat, otherwise the strength of the post will be affected after installation, and the post will break in serious cases.
- Page 17 E-series AC Charger ■Stand the post upright, and use M10 nuts and flat washers to secure the post base to the concrete platform. In this way, the post is installed. At the same time, an M6×20 bolt needs to be added to the stainless steel nut at the bottom of the base of the post to provide ground protection for the post.
- Page 18 E-series AC Charger ■When preparing to hang the charger, you need to first remove the wall- mounted metal plate that comes with the charger, and then remove the four M6×20 bolts on the post hanging plate. Finally, align the holes of the two metal plates and install M6×20 bolts.
- Page 19 E-series AC Charger ■Finally, hang the charger on the post, and each post can hang up to 2 chargers. Configuration manual V1.3...
-
Page 20: System Overview
④…The server controls and receives the the server of the charging station parameters of the charger E-series can only be connected via WLAN. If the router is connected to the Internet, a connection to an OCPP backend can be made. WLAN E-series connected to the Internet via WLAN. -
Page 21: Wlan Access Point
E-series AC Charger WLAN Access Point E-series can be connected to a mobile phone or computer via the build-in WLAN access point. With the device, the web interface can be easily accessed and the configuration of the charging station can be performed. -
Page 22: User Viewing Interface
E-series AC Charger 3.2.1 User viewing interface Remove the black cover, open the browser and scan the QR code on the display panel, you can see the current running status of the charger and the main configuration parameters. This can help you make a simple judgment when something goes wrong with the charger. -
Page 23: Installer View Interface
In order to protect the security of the user, the configuration webpage needs a random key matching to enter. The random key is calculated by the "check_sum_tools" which provided by LINCHR. ("Check_sum_tools" needs to be run on a computer, and the maintenance staff configured on site need to use the computer for authentication confirmation.) - Page 24 E-series AC Charger WARNING! Non-professionals, do not configure the device, otherwise the device will not work properly There are 10 configurable items on the configuration page. Select the item to be set and click the "Confirm" button to enter the setting submenu.
- Page 25 E-series AC Charger RFID Setting In the Wi-Fi configuration interface, select "3-RFID Setting" to enter the RF card parameter configuration group. This setting group consists of "RFID setting interface", "card number reading interface" and "RFID parameter report" interface. System Parameter...
-
Page 26: 1- Wi-Fi Access-Point Setting
E-series AC Charger ●1- WI-FI Access-Point Setting Fig.3-7: WI-FI Access-Point Setting interface The charger will show the Wi-Fi hotspot SSID name in this space on this page. You can select the hotspot name you want to access through the radio button, enter the password and click the "Connect"... -
Page 27: 2- Networking Parameters Setting
E-series AC Charger ●2- Networking Parameters Setting Fig.3-8: Networking parameter Setting interface On this page, you can configure information about the server used for the OCPP protocol connection, including what is shown in the table below. Setting item Description OCPP Address... -
Page 28: 3- Rfid Setting
E-series AC Charger ●3- RFID Setting Fig.3-9: RFID Setting interface The setting interface consists of two areas, BANK1 and BANK2. The BANK1 area displays the card numbers of the three built-in RFID cards, and the card number read only. The BANK2 area is used to set and modify the built-in card number. The “Read”... -
Page 29: 4- System Parameter Setting
E-series AC Charger digit card number in the card. Then, in the standby state, click "Read RFID" and follow the steps described above to write the card. ●4- System Parameter Setting Fig.3-10: System Parameter Setting interface Configuration Function Note item... -
Page 30: 5- System Time Setting
E-series AC Charger current. After clicking the "Confirm" button in the "System Settings Interface", the set charger system parameter information will be output in the form of a report. After confirming that the user is correct, click the "confirm" button again to complete the setting. -
Page 31: 7- Charging Record Report
E-series AC Charger ●7- Charging Record Report Fig.3-13: Charging Record Report interface This page is used to display the current charging status and historical charging history of the charger. You can check the charging start time, end time, charging capacity and end reason. -
Page 32: 8- System Parameter Report
E-series AC Charger ●8- System Parameter Report Fig.3-14: System Parameter Report interface This page mainly displays all the current configuration items of the current charger, and is used to check whether the configuration items are configured as required. Configuration manual V1.3... -
Page 33: 9- Run Data Report
E-series AC Charger ●9- Run Data Report Fig.3-15: Run Data Report interface This page mainly displays the current charger status and key parameters. Configuration manual V1.3... -
Page 34: 10- System Upgrade
E-series AC Charger ●10- System Upgrade Fig.3-16: System Upgrade interface This page is mainly used to upgrade the local system firmware. Use the mobile phone or computer to perform local upgrades. Please follow the instructions on the page during the upgrade. Otherwise, the upgrade may fail. - Page 35 E-series AC Charger When we upgrade the program or configure the background, we support the browsers in the following list. Browser Background Program upgrade configuration Support Not support Firefox Support Support Chrome Support Support (Recommend) (Recommend) Safari Support Support We recommend using a computer to upgrade.
-
Page 36: Wlan Station
E-series AC Charger 3.3 WLAN Station E-series can be networked, and networked control can be achieved through a server that supports the OCPP protocol. Currently the E-series only supports OCPP 1.6. If you want to connect the charger to the OCPP protocol, you need to configure a wireless router near the use of the charger, and not too far away from the charger. - Page 37 (You can find how to install the black cover in the 2.6 Installation steps“) ●E-series charger OCPP communication protocol can support the following messages. If you have other needs, please contact us.
- Page 38 E-series AC Charger a request. and execute Authorize The charger sends Interpret information a request. and execute Start Transaction The charger sends Interpret information a request. and execute Stop Transaction The charger sends Interpret information a request. and execute Meter Values...
-
Page 39: Function
E-series AC Charger Function The following chapters describe special functions of the charger. Display The charger has three display area, box1, box2, box3 as shown below, which are used to display the current status and charging status of the charger. - Page 40 E-series AC Charger card is currently operational. Around the charger Atmosphere remind light It used to display the current charger status ●Character display in normal state of charger Fig.4-2: The character display Character style displayed in Meaning of characters normal state...
- Page 41 E-series AC Charger device from high temperature.) ERR PP Unreliable connection fault ERR MIS Missing power phase fault ●Character display in charger program upgrade status Character style displayed during Meaning of characters program upgrade 100 UP Update successful E01 UP Upgrade unsuccessful ...
-
Page 42: Rfid And How To Use
RFID and how to use E-series charger supports tap RFID card to start and stop charging. When the charger is connected to the vehicle, the tap card area four corners will light up, indicating that the charger can use the RFID card to working. - Page 43 E-series AC Charger (3) When you hear a “DI” sound (About 1 second), and the ambient light changes from blue to flashing, it means the charger is active by the card. ⑷ If you want to stop charging, repeat step 2 and 3 .To stop charging, you can unplug the plug for stop charging.
-
Page 44: Current Limiting
E-series AC Charger Current limiting E-series charger supports charging current adjustment, adjustable from 6A to 32A, you can refer to "3.2.2 WLAN Access Point --- 4- System Parameter Setting" after installation. ●For single-phase charger, the current is the current between L and N. - Page 45 E-series AC Charger Made in China www.xaLINCHR.com Configuration manual V1.3...
Need help?
Do you have a question about the E-Series and is the answer not in the manual?
Questions and answers