Table of Contents
Advertisement
Quick Links
ClubHeat Series Sauna Heaters
Installation and Operation Manual
IMPORTANT! This manual must be left with owner, manager, or
operator of sauna after it is used by electrician!
MODELS
C1000/K10G-U1
C1250/K12.5G-U1
C1500/K15G-U1
C1000-3/K10G-U3
C1250-3/K12.5G-U3
C1500-3/K15G-U3
CONTROLS
HeatPad10
HeatPad15
ETL LISTED
CONFORMS
TO UL STD 875
CERTIFIED TO
CAN/CSA STD
E60335-2-53-05
Advertisement
Chapters
Table of Contents
Troubleshooting

Related Manuals for Hotass Saunas ClubHeat C1000/K10G-U1


Summary of Contents for Hotass Saunas ClubHeat C1000/K10G-U1
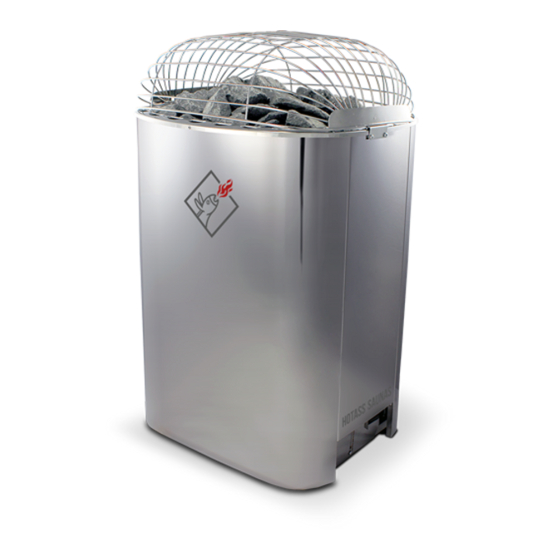
- Page 1 ClubHeat Series Sauna Heaters Installation and Operation Manual MODELS C1000/K10G-U1 C1250/K12.5G-U1 C1500/K15G-U1 C1000-3/K10G-U3 C1250-3/K12.5G-U3 C1500-3/K15G-U3 CONTROLS HeatPad10 HeatPad15 ETL LISTED CONFORMS TO UL STD 875 CERTIFIED TO CAN/CSA STD E60335-2-53-05 IMPORTANT! This manual must be left with owner, manager, or operator of sauna after it is used by electrician!
-
Page 2: Table Of Contents
PURPOSE OF THE ELECTRIC HEATER: The ClubHeat / KG-heaters are designed for the heating of large saunas to bathing temperature. It is forbidden to use the heater for any other purposes. Please read the user’s instructions carefully before using the heater. NOTE! These instructions for installation and use are intended for the owner or the person in charge of the sauna, as well as for the electrician in charge of the electrical installation... -
Page 3: Warnings
WARNINGS! Do not smoke, use alcohol, or exercise in the sauna! Do not exceed 30-minutes in the sauna at one time, as excessive exposure can be harmful to health. The sauna should not be used as an endurance test! Persons with poor health should consult their physicians before using the sauna! Avoid fire, do not place any combustible material over the sauna heater (towels, bathing suits, wooden bucket or dipper)! Use only clean water on the stones - do not use pool or spa water, as chlorine... -
Page 4: Instructions For Use
INSTRUCTIONS FOR USE PILING OF THE SAUNA STONES The sauna stones for an electric heater stones disintegrate with use. should be 2 - 4” in diameter. The heater Therefore, they should be rearranged at stones should be solid blocks of stone least once a year or even more often if the specially intended for use in the heater. -
Page 5: Heating Of The Sauna
HEATING OF THE SAUNA CONTROL UNIT OF HEATER Before switching the heater on always The ClubHeat / KG model heaters require a separate control unit to operate the check that there isn’t anything on top of the heater or inside the given safety heater. -
Page 6: Throwing Water On Heated Stones
THROWING WATER ON HEATED STONES The air in the sauna room becomes • Hardness most important dry when warmed up. Therefore, it is substances are manganese (Mn) and necessary to pour water on the heated calcium (Ca); stones to reach a suitable level of humidity •... -
Page 7: Instructions For Bathing
INSTRUCTIONS FOR BATHING • Be very careful when moving in the sauna, as the platform and floors may • Begin by washing yourself. be slippery. • Stay in the sauna for as long as you • Do not exceed 30-minutes in the feel comfortable. -
Page 8: Room Construction - General Information
ROOM CONSTRUCTION - benches; light bulb should not exceed 75 watts. GENERAL INFORMATION L. ACCESSORIES A. FRAMING Bucket, dipper thermometer 2” x 4” any suitable wood material, are essential. Thermometer should 16” o.c. be placed over the Sauna heater, 6” B. -
Page 9: Instructions For Installation
INSTRUCTIONS FOR INSTALLATION PRIOR TO INSTALLATION Prior to installing the heater, study the instructions for installation, as well as checking the following points: • Is the output and type of the heater suitable for the sauna room? The cubic volumes given in table 1 should be followed. - Page 10 TYPICAL SAUNA HEATER / CONTROL INSTALLATION Note: Control panel and power unit must be WIRE TO ROOM LIGHT installed in a dry place; away from spa, pool or #14 AWG 90°C shower; not outdoors. A receptacle shall not be installed inside the sauna room. 4”...
- Page 11 THE SAUNA ROOM SHALL BE PROVIDED WITH PROPER VENTILATION. HEATERS-MINIMUM CLEARANCES, MIN-MAX SPACE, AND ADEQUATE VENTILATION DESCRIBED BELOW. VENTILATION, MIN. SQ. IN. INLET AND OUTLET 10 kW 80 sq. in. 12.5 kW and 15 kW 45 sq. in. 6” AIR OUT 20”...
- Page 12 HEATER MIN. CLEARANCE FROM WALL AND FENCE 5” MIN. (10 kW) 6” MIN. (12.5 - 15 kW) 2-1/2” WOOD FENCE Figure 5. HEATER MIN. CLEARANCE FROM BENCHES 5” MIN. (10 kW) 6” MIN. (12.5 - 15 kW) BENCH Figure 6. C1000 / K10G-U1 C1250 / K12.5-U1 C1500 / K15G-1...
-
Page 13: Installation Of Control Panel And Sensor
INSTALLATION OF CONTROL SINGLE PHASE HEATER WIRING PANEL AND SENSOR AND HOOKUP (C1000/K10G-U1, C1250/K12.5G-U1, C1500/ Detailed instructions for the installation K15G-U1) of both the control panel and the sensor are delivered with the control panel. Refer to table 2 for proper wire size and amperage. -
Page 14: 3-Phase Heater Wiring And Hookup
3-PHASE HEATER WIRING AND AFTER INSTALLATION HOOKUP (C1000-3/K10G-U3, TESTING OF SAUNA HEATER C1250-3/K12.5G-U3, C1500-3/ K15G-U3) 1. After sauna heater has been properly wired, according to appropriate wiring Refer to table 2 for proper wire size and diagram and local codes, turn sauna amperage. - Page 15 MODEL INPUT FLOOR AREA SAUNA MIN. HEIGHT ROOM SPACING FROM Min. Max. Min. Max. ADJACENT Sq. Ft Sq. Ft Cu. Ft Cu. Ft SURFACES (INCHES) C1000/K10G-U1 10.0 6’ 5” C1000-3/K10G-U3 C1250/K12.5G-U1 12.5 6’ 5” C1250-3/K12.5G-U3 C1500/K15G-U1 15.0 6’ 5” 1000 C1500-3/K15G-U3 Table 1.
- Page 16 Overheating limiter Sensor Overheating limiter Sensor Figure 8. Electrical connections of 240 V 1-phase heaters without contactors (C1000/K10G-U1, C1250/ K12.5G-U1, C1500/KG15-U1) Overheating limiter Sensor Overheating limiter Sensor Figure 9. Electrical connections of 208 V 3-phase heaters without contactors (C1000-3/K10G-U3, C1250-3/K12.5G-U3, C1500-3/KG15-U3)
-
Page 17: Troubleshooting
TROUBLESHOOTING A. If the sauna heater does not operate 4. Check the placement of stones to after initial installation and wiring: make sure they are loosely spaced 1. Check circuit breaker in contactor to be around elements, to ensure good air sure that it has not been shorted out. -
Page 18: Maintenance Instructions
MAINTENANCE INSTRUCTIONS 1. Use only clean water on sauna stones. carpet promotes the spread of foot Do not use spa or pool water as it will diseases such as athlete’s foot. destroy your heater. 8. In new construction, a floor drain 2. - Page 19 includes the exchange of new parts supplied by the manufacturer or importer, after the faulty part has been returned to same. The replacement of parts under warranty does not extend the warranty period beyond the original...
- Page 20 Stone compartment Stone holder Base plate Top part Casing side L/R Casing FRONT / REAR Electrical casing Electrical casing R Electrical casing L Radiation shield Terminal block bracket Electrical casing cover Wireset 240V 1-phase heaters Wireset 208V 3-phase heaters 10 kW C1000/K10G-U1 Wiring diagram 1, 2, 3, 4, 5, 6...
-
Page 21: Warnings
WARNINGS! Do not smoke, use alcohol, or exercise in the sauna! Do not exceed 30-minutes in the sauna at one time, as excessive exposure can be harmful to health. The sauna should not be used as an endurance test! Persons with poor health should consult their physicians before using the sauna! Avoid fire, do not place any combustible material over the sauna heater (towels, bathing suits, wooden bucket or dipper)! Use only clean water on the stones - do not use pool or spa water, as chlorine... - Page 22 one-year. charge for parts if date of purchase is past The guarantee does not cover defects one-year. caused by normal wear and tear, defects caused by improper installation, This guarantee will be void if installation poor maintenance, or failure to follow and wiring is not carried out by a certified manufacturer’s instructions...
- Page 23 HeatPad Precision Sauna Environment Controllers Installation and Operation Manual MODELS HeatPad10/CX30-U1-U3 HeatPad15/CX45-U1-U3 ETL LISTED CONFORMS TO UL STD 875 CERTIFIED TO CAN/CSA STD E60335-2-53-05 IMPORTANT! This manual must be left with owner, manager, or operator of sauna after it is used by electrician!
- Page 24 NOTE! These instructions for installation and use are intended for owners of saunas, heaters, and control units, persons in charge of managing saunas, heaters and control units, and for electricians responsible for installing heaters and control units. Once the control unit is installed, these instructions of installation and use are handed over to the owner of the sauna, heater and control unit, or to the person in charge of maintaining them.
-
Page 25: Warnings
WARNINGS! Do not smoke, use alcohol, or exercise in the sauna! Do not exceed 30-minutes in the sauna at one time, as excessive exposure can be harmful to health. The sauna should not be used as an endurance test! Persons with poor health should consult their physicians before using the sauna! Avoid fire, do not place any combustible material over the sauna heater (towels, bathing suits, wooden bucket or dipper)! Use only clean water on the stones - do not use pool or spa water, as chlorine... -
Page 26: Heatpad Sauna Environment Controller
HEATPAD SAUNA ENVIRONMENT CONTROLLER GENERAL The control unit consists of a control Power Unit: panel, a power unit and a sensor. See • Supply voltage figure 1. HeatPad 10: 240V 1Ph, 208V 3Ph HeatPad 15: 240V 1Ph, 208V 3Ph The control unit regulates the temperature •... -
Page 27: Troubleshooting
TROUBLESHOOTING If an error occurs, the power to the heater Note! The overheat protector can be reset will be cut off and the control panel will by user. All other maintenance must be show an error message “E (number)” , done by licensed professional maintenance which helps troubleshooting the cause of personnel. -
Page 28: Instructions For Use
INSTRUCTIONS FOR USE LIGHTING The lighting in the sauna room can be set USING THE HEATER up so that it can be controlled from the control panel. (Max 100W.) WARNING! Before switching the heater on always check that there isn’t anything Switch the lights on / off by on top of the heater or inside the given pressing the button on the... -
Page 29: Remote Control
REMOTE CONTROL According to the product standard IEC/ EN 60335-2-53 regulating electrical sauna heaters, a control unit can be used to remotely control the heater once the heater is equipped with a safety switch. Using with a safety switch: The heater can be turned on remotely, if the safety switch circuit is closed. -
Page 30: Control Panel Lock
CONTROL PANEL LOCK Press and hold the heater and light buttons for three seconds. -CL- is shown on the display. Panel lock can be activated only in standby mode. Panel lock also prevents remote start. Basic Mode (heater on) The top row shows the temperature in the sauna room.The bottom row shows the remaining on time. - Page 31 ADDITIONAL SETTINGS Control unit standby Open the settings menu by simultaneously pressing the locations of the buttons -, MENU and +. Press for 5-seconds. The buttons do not glow when the control unit is already in stanby mode. Settings the remote use and safety switch Set the remote use (rc) ON/OFF with - and + buttons.
- Page 32 CONTROL UNIT GRADE SETTINGS (FOR EXAMPLE) TYPE LABEL WARNING! AVERTISSEMENT! DO NOT PLACE ANY OBJECTS ON HEATER. COVERING CAUSES FIRE RISK. NE PAS PLACER DES OBJETS AU-DESSUS DU POÊLE. IL Y A UN RISQUE D'INCENDIE SI LE POÊLE EST RECOUVERT. AN INADEQUATELY FILLED ROCK SPACE CAUSES FIRE RISK.
-
Page 33: Instructions For Installation
INSTRUCTIONS FOR INSTALLATION The electrical connections of the control Conductor tubing (1-3/16”) inside the wall unit may only be made by a licensed structure allows you to thread the data professional electrician and in accordance cable hidden within the wall - otherwise with the current regulations. -
Page 34: Optional Timeclock Operation
OPTIONAL TIMECLOCK ELECTRICAL CONNECTIONS OPERATION The heater and control unit may only be connected to the electrical network in HeatPad10/HeatPad15 control units can accordance with the current regulations be installed with an optional time clock by a licensed professional electrician. for customized on/off operation. -
Page 35: Instructions For Installation
INSTRUCTIONS FOR POWER UNIT BREAKER FAULTS INSTALLATION Replace a blown breaker by a new one with the same resistance. The replacement The power unit of the HeatPad10 and of the breakers in the power unit is shown HeatPad15 are controlled by the control in figure 6. -
Page 40: Installing The Temperature Sensor
INSTALLING THE TEMPERATURE SENSOR Floor-mounted heaters (see figure 8) Sensor • The temperature sensor is mounted A min. on the wall above the heater, along the vertical center line running parallel A min. to the sides of the heater, at a distance of 3-15/16”... -
Page 41: Spare Parts
Do not install the temperature sensor closer than 3’ 3-3/8” to an air vent. This air flow near an air vent cools down sensor, which gives inaccurate temperature readings to the control unit. As a result, the heater might overheat. See figure 10. -
Page 42: Warnings
WARNINGS! Do not smoke, use alcohol, or exercise in the sauna! Do not exceed 30-minutes in the sauna at one time, as excessive exposure can be harmful to health. The sauna should not be used as an endurance test! Persons with poor health should consult their physicians before using the sauna! Avoid fire, do not place any combustible material over the sauna heater (towels, bathing suits, wooden bucket or dipper)! Use only clean water on the stones - do not use pool or spa water, as chlorine... -
Page 43: Guarantee
GUARANTEE This HOTASS SAUNA heater is guaranteed This guarantee does not cover delivery for one-year from date of purchase, and costs of the faulty part or costs of the includes all heater parts such as heating person carrying out the repair in the elements, controls, contactors, etc.
Need help?
Do you have a question about the ClubHeat C1000/K10G-U1 and is the answer not in the manual?
Questions and answers