
Related Manuals for Malatech AMMOLITE

Summary of Contents for Malatech AMMOLITE
- Page 1 USER MANUAL AMMOLITE / IOLITE SOLAR SECURITY SMART CAMERA MANUFACTURER/IMPORTER: MALATECH WATER, LTD. 1/E Vanyi way, Alsonemedi, 2351 Hungary +36 30 377 8089 info@malatechsolar.com...
- Page 2 AMMOLITE 3 W Monocrystalline Silicone solar panel Solar panel: with 3 m cable Li-battery: Panasonic 10 Ah Lithium battery Charging methods: By solar energy or USB cable Discharged battery can be charged in 18 hours by solar panel, and in 12-15 hours by...
- Page 3 IOLITE 2 W Monocrystalline Silicone Solar panel: solar panel Li-battery: Panasonic NCR 18650B 3.4 Ah*2 pcs (Li-ion) Charging methods: By solar energy or USB cable Discharged battery can be charged in 20 hours by solar panel, and in 12-15 hours by Charging time: USB cable (assuming the camera is not in use during charging)
- Page 4 CAMERA STRUCTURE, CONTENT OF THE BOX ATTENTION! IF YOU INTEND TO CHANGE YOUR SMARTPHONE OR TABLET, PLEASE DO NOT FORGET TO REMOVE YOUR CAMERA(S) FROM THE APPLICATION ON YOUR OLD DEVICE/ PLEASE READ THIS MANUAL CAREFULLY, YOU FIND DETAILED DESCRIPTION ABOUT HOW TO REMOVE YOUR DEVICES FROM THE APP BELOW! ATTENTION! The life span of the battery depends on you as well! Please use the camera correctly as described in this manual.
- Page 5 CAMERA STRUCTURE, CONTENT OF THE BOX Content of the box: Iolite: Ammolite: Iolite solar smart camera Ammolite solar smart camera Mounting template Solar panel Screwdriver Screwdriver USB cable USB cable Li-ion batteries (2 pcs) Li-ion battery (1 pc) Screws, anchors...
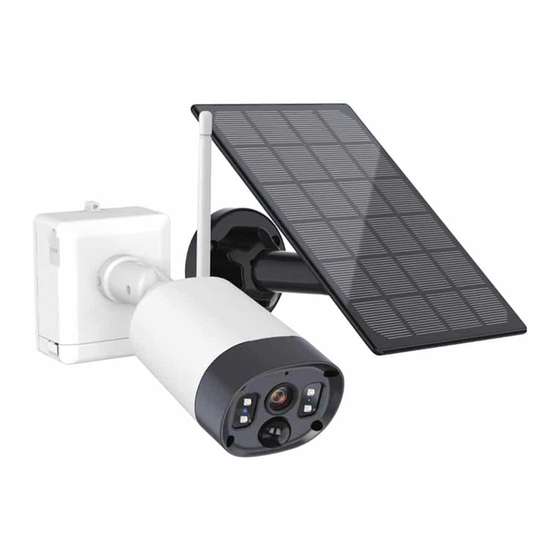
- Page 6 Iolite cameras with the 2 housing types. In case of Ammolite the difference is that the solar panel is not integrated, but supplied as a separate item, and can be connected to the camera by a cable with a plug.
- Page 7 CAMERA STRUCTURE, CONTENT OF THE BOX HF-S5 housing: Solar panel 5 dbi antenna Vertical adjustment (120 deg) Horizontal adjustment (355 deg) Metal Microphone housing HD lens Night vision Indicator lights (red: power, PIR motion sensor blue: record, green: battery charging) Reset button ON/OFF button DC 5V port...
- Page 8 USER INSTRUCTIONS First use - Start-up of the camera: Remove the bottom cover of the camera by removing the screws with the screwdriver. Insert the Micro-SD card correctly in the slot (ATTENTION! The Micro-SD card is not the part of the package! The camera supports Micro-SD cards up to 128 GB storage space) Press the ON/OFF button for 2-3 seconds.
- Page 9 USER INSTRUCTIONS Battery charging: ATTENTION! Full-charge the battery before first use by grid power using the supplied USB cable! Full-charge will require 10-18 hours! The green indicator light shows that the battery is charging. MUST DO HF-S5 HF-S4 Restoring factory settings: In case your camera does not connect to your smartphone or tablet, or you would like to connect it to a new router, restoring the factory settings can be a quick solution.
- Page 10 USER INSTRUCTIONS Downloading the application: Search for Tuya Smart app in App Store or Google Play. Download it to your device, and install the application on your device. Pair your device: Before downloading and installing the application please check whether your smartphone or tablet is connected to your Wi-Fi system.
- Page 11 USER INSTRUCTIONS Place the screen of your smartphone or tablet at a 10-20 cm distance right in front of the camera lens to let your camera recognize the code. Do not move or shake the devices during the process. The camera beeps when the pairing is done. Then tap “I Heard a Prompt”, and wait for finishing the pairing process.
- Page 12 USER INSTRUCTIONS Application Tutorial: Home Page HHome settings Add channels (up to 4) Voice Control Add Device All Devices Room Management Devices Home page Smart functions Preview page Setting Beállítások Signal Audio/ON/OFF HD/SD Video Full Screen Battery Display & Charge Level Screenshot Two-Way Audio Record to Your Smartphone...
- Page 13 USER INSTRUCTIONS Settings page SSecurity camera: Name/Location/ Change location Device Information Tap-to-Run and Automation Basic Function Settings: Flip screen (horizontal, vertical, 180-degree rotation), Time watermark ON/OFF Detection Alarm Settings: Human Body Filtering PIR sensitivity settings (High is recommended for outdoor applications) Power Management Settings Storage Settings - Format SD-Card...
- Page 14 USER INSTRUCTIONS How to check motion detection? KTap Me Tap Message Center Tap Device How to set up the DO-NOT-Disturb Schedule? Tap Me Tap Settings Tap App Notification Tap Do-Not-Disturb Schedule How to adjust PIR Settings? Tap Device Tap Setting Tap PIR How to share your device with family members &...
- Page 15 USER INSTRUCTIONS How to connect to smart speaker? Tap Me Tap More Services Tap Alexa or other (Alexa and Google Assistant both have video and text tutorials for installation) Al Filtered Get notifications that you really care about exclude Notification false alarms paid service, 30 days free, camera will upload Video Cloud...
- Page 16 USER INSTRUCTIONS How to remove the device? Solution 1: Tap Device then Setting then Remove Device If you intend to change your smartphone or tablet, please do not forget to remove the camera on your old phone or tablet like written above. If you forgot to do it, please choose Solution 2.
- Page 17 USER INSTRUCTIONS FAQ, problems & solutions: The device does not connect to Wi-Fi Please make sure that the Wi-Fi is set to 2.4 GHz. Make sure that the device is close to the Wi-Fi when you turn it on. Make sure that you typed in your password correctly. The user name and password for the Wi-Fi should not contain special characters.
- Page 18 USER INSTRUCTIONS Camera installation: Please only install your camera at its final location after you charged the battery completely, and you paired the device with your smartphone or tablet! Use the mounting template to sign the locations of the holes on the chosen surface.
- Page 19 USER INSTRUCTIONS...
- Page 20 The next chapter declares the right method of cleaning. Please always contact Malatech Water, Ltd, or a professional appointed by our company if you intend to disassemble the camera, remove any of its parts, or service the camera. Service attempts made by users are...
-
Page 21: Cleaning Instructions
CLEANING INSTRUCTIONS For preserving the aesthetical outlook, and maintaining the maximum functionality, and efficiency of your camera, cleaning is recommended from time to time. Since the camera can be charged by solar energy as well, keeping the solar panel clean & free of dust is key-essential to ensure its efficiency, and maximize discharging time. -
Page 22: Waste Disposal
Important information regarding the cameras distributed by Malatech Water, Ltd: • The Aluminium, steel, plastic (Acrylic, Polycarbonate) parts of the cameras do not cause environmental or health risk either in perfect or damaged condition of the camera. -
Page 23: Warranty Terms
For more information on electric, and electronic waste disposal locations, please visit www.electro-coord.hu, or www.malatechsolar.com. WARRANTY TERMS Malatech Water, Ltd. provides all-inclusive, attractive, customer-oriented warranty terms and services for its products during the warranty period for all of our customers in the following countries (by alphabetical order):... -
Page 24: Garanciális Feltételek
GARANCIÁLIS FELTÉTELEK video as a proof made by for example your cell phone about the issue. If you can do the video, please attach in low resolution to your e-mail, or upload it to a free file sharing platform, and send us the link. We examine your case as soon as possible, and contact you with a solution. - Page 25 Basic warranty terms: Warranty period / scope With the warranty, our company guarantees that the product does not have any material or workmanship defects at the time of the purchase. The warranty period varies between 1-3 years from the date of purchase depending on product.
- Page 26 Malatech Water, Ltd. 1/E Vanyi way, Alsonemedi, 2351 Hungary Customer service: +36 30 377 8089 info@malatechsolar.com www.malatechsolar.com Issue warranty claims: service@malatechsolar.com CE Confirmation: Malatech Water, Ltd. confirms that this light meets with the competent EU directives, legislation, and harmonized acts.
Need help?
Do you have a question about the AMMOLITE and is the answer not in the manual?
Questions and answers