
Related Manuals for TB-Electronics F-SCAN3


Summary of Contents for TB-Electronics F-SCAN3
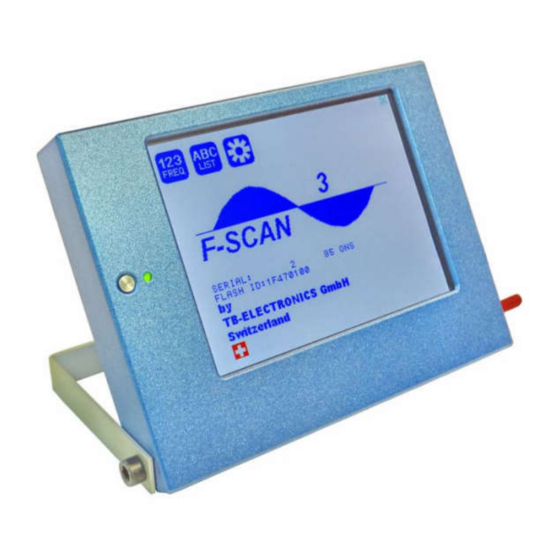
- Page 1 Frequency Synthesizer F-SCAN3 Firmware Version FSC V2.0x INSTRUCTION MANUAL This symbol identifies the equipment as type B Attention: CONSUL T A CCOMPANYING DOCUMENTS - 1 -...
- Page 2 - 2 -...
-
Page 3: Table Of Contents
Signal forms delivered to Multi-signal-output port..........- 7 - Signal forms delivered to Multi-signal-output port..........- 8 - Factory settings..................... - 9 - First steps to start F-SCAN3................- 10 - The menu “123“....................- 11 - How to select a program from the menu “123“..........- 13 - How to input a frequency value..............- 14 -... -
Page 4: Warning And Notes
Dr. H.R.CLARK. They are also suitable for applications commonly named after R.R.Rife. The F-SCAN3 is not a me dical device. It is used under the sole responsibility of it’s operator WITHOUT LIA BILITY TO THE MANUFACTURER. - Page 5 DIRP runs and EA P analysis, can be stored. In addition, up to 460 user defined frequency sets (up to 30 values each) can be saved in the F-SCAN3 memory.
-
Page 6: The Shipment From The Factory Includes
The shipme nt from the factory includes: F-SCAN3 Plug-in pow er supply w ith cord or USB charger for battery version Stainless steel electrodes Application cable for electrodes 2 sets of self-adhesive pad-electrodes DIRP sensor ... -
Page 7: Elements For Operation
Eleme nts for oper ation ON-OFF-button A brief contact switches the unit ON. A contact of about 3 seconds switches the unit OFF. LED flashes each second to confirm operation. CINCH2: PowerPort Power cord connector if NOT If type of device = battery version WIDE, then SINE Mini-USB... -
Page 8: Signal Forms Delivered To Multi-Signal-Output Port
Signal forms de livered to Multi-signal-output port 10Vpp SINE (DC-OFFSET) SQUARE, 0-symmetrical, Full Wav e 0Vpp to 24Vpp SQUARE, permanent positi ve, Half Wav e 0Vpp to 12Vpp (DC-OFFSET) SMART, permanent positive, Half Wave 0Vpp to 12Vpp (DC-OFFSET), a high frequency covering the application frequency. -
Page 9: Factory Settings
Factor y settings Language on screen: English or German Application time per frequency: 3:00 Minutes (adjustable betw een 0:30 and 59:59) Signal strength: 80% of maximum of 12Vpp (adjustable +/- in steps of 1%) Signal form: AUTO (Sine, Square Full Wave, Half Wave, SMART and OFF selectable). -
Page 10: First Steps To Start F-Scan3
First steps to start F-SCAN3 Connect the pow er cord to the device and plug the pow er supply into a w all outlet w ith a reading betw een 100 VAC and 240 VAC. Touch the ON- OFF button briefly. -
Page 11: The Menu "123
The menu “123“ The F-SCAN3 offers 100 storage positions f or programs of between 1 and 50 frequencies. The end of each program is a value of 0 Hertz (Hz). Each program can be named individually. - Page 12 A touch on the icon “123“ opens this menu: The background of the activated icon, and of the left small circle, turns green. Displayed are: - the program number “1“ - the program name “PROG 01“ - the position of the frequency w ithin the program – betw een 1 and 50 – here ”1“.
-
Page 13: How To Select A Program From The Menu "123
How to select a program from the menu “123“ A touch on “PROGRAM“, or on the name line underneath, opens the submenu to select a program from memory, to edit a program name, or to add or delete a program. 10 names of all progra ms stored in the memory block of 100 positions are... -
Page 14: How To Input A Frequency Value
How to input a frequency value The yellow arrows in the menu “123“ are used to select the position (1 to 50) f or the new frequency value to be inserted in the opened program. Next, the present frequency value has to be touched A numerical key block opens and the new value can be entered. -
Page 15: How To Start, Pause, Or Stop A Program
WOBBLE If WOBBLE is activated the softw are asks for a value to be used to sw ing the signal above and below the target frequency. A value of 0 deactivates the feature. The background color of the icon changes to green w hen activated. -
Page 16: The Menu Sweep
The menu SWEEP A second touch on the icon “123“ opens the screen to start the broad band frequency swing “SWEEP“. The green background moves from the left small circle under the icon to the right one. SWEEEP can be used to sw ing for a limited time (20 minutes) through a broad band of frequencies between a low er limit “Fmin”... -
Page 17: The Menu Dirp
The menu DIRP A touch on the icon “DIRP“ in the menu “123“ opens the screen for the automatic resonance analysis “DIRP“. “DIRP” stands for: Dual Integration Resonance Procedure “DIRP” registers resonances to frequencies applied in steps of “DELTA F” w ithin the limits betw een a low er value “Fmin”... -
Page 18: How To Prepare For A Dirp And Run It
The display on the screen shows all details of the recalled analysis, including the settings for “Fmin”, “Fmax”, “DELTA F” and the Clipping Level “CL = 22” (the violet line), w here it separates 10 HITS ( Measured Values of resonances) from the remaining graph. -
Page 19: Eap (Electro-Acupuncture) Measurements
The settings show n on page 18 of this manual can be used to perform a DIRP analysis in the frequency range betw een 80000 Hz and 560000 Hz: Attach the DIRP sensor f ollow ing the instructions shipped w ith Plug the CINCH connector of the application cable into the device’s output and connect the red w ire to the cylinder. -
Page 20: Eap- Functional Test
Preparat ion: Connect the EA P-cable to the sensor port of the F-SCA N3. Connect the EA P – Stylus to the red lead of the EA P-cable. Connect a handheld or foot electrode w ith the blue lead of the EAP-cable. Start the F-SCA N3, open the menu “123“, touch the icon “DIRP“, then touch the icon “EAP“... -
Page 21: How To Complete An Eap-Table
How to complete an EAP-table Starting w ith the left hand, each acupuncture point must be measured top dow n. Continue w ith the right hand, the left and right foot. If the micro- processor identifies a measured value as EAP-like, it appears in the table and the cursor-circle moves on to aw ait the next value. -
Page 22: The Menu Settings
The menu SETTINGS A touch on the TOOL – icon opens a menu for global settings. touch the arrow repeatedly to increase the intensity of the background light. touch the icon repeatedly to adjust the speaker volume. The number on its right shows the current level. Zero switches the speaker OFF. - Page 23 GLOBAL ENV ELOPE ON or OFF. If enabled the envelope settings will be incurred for all frequencies of a program. LOOP ON or OFF. If enabled a program w hich has been started from „123“ or „ABC“ w ill loop forever. The only w ay to Stopp it is with STOP icon.
-
Page 24: Chipcard Option
- Touch the second line to overwrite the 100 program positions of the F- SCA N3 w ith the data from an F-SCA N COMPACT. DIRP- or EA P-data sets previously stored in program positions in the F-SCAN3 w ill be lost. - 24 -... - Page 25 - Touch the third line to store the frequency values of the program position presently open in the F-SCAN3 on the ChipCard for use in a MinDevice. - Touch the fourth line to erase all data from the ChipCard. Removal of the Chip Card from the reader resets the F-SCAN3 to the menu active w hen the ChipCard w as inserted.
-
Page 26: Use Of The Chipcard Plus
ChipCard PLUS. - Touch the second line to overw rite the 100 program positions of the F-SCAN3 w ith the data from the Chip Card PLUS. Touch BACKUP ABC LIST to store the ABC list on the ChipCard PLUS. -
Page 27: How To Format, Integrate And Use Programs From Other Sources
How to form at, integrate and use programs from other sources A touch on the icon “ABC“ opens the menu to reach and operate frequency programs generated outside the F-SCAN3. Up to 460 sets, of up to 30 frequencies each, can be transferred to the “ABC” memory block using either the softw are F-SCANT3, or a co mmon terminal progra m. - Page 28 Few er properties than in the menu “123“ can be assigned to individual frequency values here. A change of the timer w ill be valid for all frequencies stored in the memory block of 460 progra ms. The amplitude of square signals can be adjusted up or dow n w ith touches on the blue arrows.
-
Page 29: Technical Data
Te chnical data Case Aluminum Dimensions 170 mm x 128 mm x 26 mm Color touch scre en 116 mm x 88 mm; 320 x 240 pi xel Min. frequency selectable 0.01Hz Frequency stability 30 ppm Memor y 100 open positions for up to 50 frequenc y values including indi vidual properties assigned to each value. -
Page 30: Declaration Of Conformity / Konformitätserklärung
CH-9443 Widnau dass das folgende Pr odukt mit der Bez eichnung/that the followi ng product wit h the mar king F-SCAN3 Frequency Synthesizer in alleiniger Verantwortung auf dass sic h diese Erklärung bezieht mit der folgenden Norm übereins timmt: dec lare under our sole responsibili ty to whic h this declaration relates is in conformity with the following standard:...
Need help?
Do you have a question about the F-SCAN3 and is the answer not in the manual?
Questions and answers