
Related Manuals for Particulate Systems NanoPlus

Summary of Contents for Particulate Systems NanoPlus
- Page 1 NanoPlus Zeta Potential/Nano Particle Analyzer Operator’s Manual V5.22 P09-42801-01 March 2014...
- Page 2 Teflon is a registered trademark of E.I. Du Pont de Nemours Company. Windows is a registered trademark of Microsoft Corporation. © Particulate Systems 2014. All rights reserved. Printed in the U.S.A. The software described in this manual is furnished under a license agreement and may be used or copied only in...
-
Page 3: Table Of Contents
NanoPlus AT ........ - Page 4 Table of Contents NanoPlus Data Acquisition ............. . . 3-34 Size Analysis .
- Page 5 NanoPlus Table of Contents Deleting an Analysis Data File..........4-15 Exporting an Analysis Data File .
- Page 6 6. CONSUMABLES A. NANOPLUS AT Precautions and Environment Specifications ......... A-1 Site Requirements .
- Page 7 NanoPlus Table of Contents Dielectric Constant............B-2 Other Liquids .
- Page 8 Table of Contents NanoPlus Editing Graph Axes ............D-23 Editing Graph Parameters.
-
Page 9: General Information
Since this manual describes how to operate and maintain all three configurations, ignore the information not specific to your analyzer. Operator’s Manual The NanoPlus operator’s manual is included on the Help menu as a PDF file. Use the Table of ... -
Page 10: Conventions
Provides a description and examples of graphical and tabular reports. Appendix E THEORY OF OPERATION Provides theory of operation for the particle sizing and zeta potential techniques used by the NanoPlus. Appendix F 21 CFR Part 11 Provides regulations for the CFR Part 11 electronic records and signature rule. -
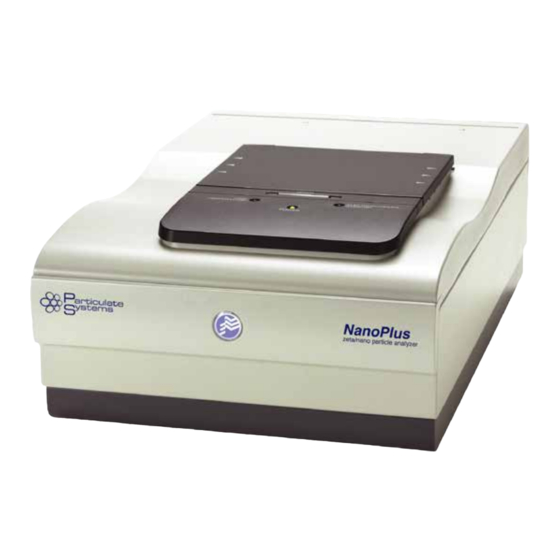
Page 11: Equipment Description
• zeta potential of sample suspensions in the -200 mV to +200 mV range with concentrations of 0.001% to 40% The NanoPlus is compact and easy to use with intuitive software as well as multiple sample cells to fit your application. -
Page 12: Specifications
NanoPlus AT 7 kg (15 lbs) Bench Dimensions Width: 90W x 60D x 90H (cm); 36W x 24D x 36H (in.) Add 60 cm (24 in.) to width when NanoPlus AT is installed Supportable Weight: 70 kg (l54 lbs) Electrical Voltage:... -
Page 13: User Interface
2. USER INTERFACE This chapter contains information to familiarize you with the hardware and software operations for the NanoPlus analyzer. It is recommended that you read this chapter before attempting to operate the NanoPlus. Controls, Connectors, and Indicators Top Panel... -
Page 14: Side Panel
Controls, Connectors, and Indicators NanoPlus Operator’s Manual Side Panel The On/Off switch is located on the left side panel of the analyzer. Front Panel The front panel contains a logo which is illuminated when the instrument is turned on. Rear Panel... -
Page 15: Labels
NanoPlus Operator’s Manual Controls, Connectors, and Indicators Labels The following labels are affixed on the NanoPlus: • Class 1 Laser Product Label, located on the rear panel • Class 3B Service Laser Label, located inside the sample area • Class 1 Laser Label, located on the rear panel •... -
Page 16: Precautions
• When using this equipment, pay attention to the instructions on the warning labels attached to the equipment. Refer to Labels on previous page. If the equipment malfunctions, immediately stop operations and contact Particulate Systems Field Service. After Use After using the equipment: •... -
Page 17: Turning The System On And Off
Allow approximately 30 minutes for the system to stabilize before taking measurements. To turn off the system: Select File > Exit to close the NanoPlus software; the Quit dialog is displayed. If your Security settings are set to Security or 21 CFR Part 11, you will be automatically logged out when you click OK. -
Page 18: Using The Software
Initial installation of the NanoPlus defaults to the No Security state. Commands Basic operations of the NanoPlus are performed using the SOP Designers and the Commands listed on the side bar. Refer to SOFTWARE COMMANDS, page for a description of the SOP Designers and of each command. -
Page 19: Main Menu
NanoPlus Operator’s Manual Using the Software Main Menu The Main menu bar and its drop-down menu items also contain commands. The commands available are based on the Security settings, as well as the current operation. Functions are self- explanatory. File Contains functions relating primarily to data files;... -
Page 20: Shortcut Keys
Using the Software NanoPlus Operator’s Manual Shortcut Keys Shortcut keys can be used to access a menu or any function that contains an underlined letter by pressing Alt plus the underlined letter in the command. For example, to change the display mode: Simply, press Alt + D to access the Display menu, then A (Advanced) or N (Normal) for the desired mode. -
Page 21: Software Commands
3. SOFTWARE COMMANDS This chapter provides information on the commands available for the NanoPlus analyzer. This button is added when a Titrator is installed. Listed below are the commands and the page numbers on which they can be found: •... -
Page 22: Sop Designer
SOP Designer NanoPlus Operator’s Manual SOP Designer The SOP Designers are not shown for a User assigned at the Operator level when in Security mode. The Size and Zeta SOP Designer tabs are used to create SOPs (standard operating procedures) for particle size analysis and zeta potential analysis. -
Page 23: Panel Task Options
NanoPlus Operator’s Manual SOP Designer There are five panels in the SOP designer: Panel Description SOP Listing Lists registered SOPs that have been created for each user. Measurement Parameters Displays measurement parameters (file name, temperature setting, etc.). Analysis Parameters Displays analysis parameters (analysis algorithm and the manner... - Page 24 SOP Designer NanoPlus Operator’s Manual Panel Task Option Description SOP Listing and Multi Delete Displays a dialog, allowing you to select the items you Parameters wish to delete. 2. Click MultiDelete 1. Select the files Parameters Add to SOP Adds the selected parameter to the current SOP.
- Page 25 NanoPlus Operator’s Manual SOP Designer Panel Task Option Description SOP Listing Import SOP Displays the Import Particle (or Zeta) dialog allowing you to choose the file(s) you wish to import. Refer to Importing SOPs, page for step-by-step instructions. Remove Enables you to remove a parameter from an SOP for editing.
- Page 26 SOP Designer NanoPlus Operator’s Manual Panel Task Option Description Cell Parameters Adjust Cell Displays the Cell Center Detection dialog allowing you Center to determine the position of the cell for optimum intensity measurement. You should perform this adjustment when a new cell...
- Page 27 NanoPlus Operator’s Manual SOP Designer Panel Task Option Description Diluent Diluent List Displays the Diluent List dialog allowing you to view diluent properties, add or delete a diluent or mixture. When you add a new diluent or new mixture, appropri- ate fields are shown for you to enter the properties.
-
Page 28: Sop Listing Panel
SOP Designer NanoPlus Operator’s Manual SOP Listing Panel The SOP Panel displays a list of Common (default) and registered SOPs that have been created for each User. Lists task options Displays name of selected SOP Lists SOP parameter details Selected SOP Name Displays the file you have selected in the list. -
Page 29: Measurement Parameters Panel
NanoPlus Operator’s Manual SOP Designer Measurement Parameters Panel Parameter Panels are unavailable for a User assigned at the Operator level when in Security mode. You can display Measurement parameters by category or alphabetically. Select the List icon to display parameters by category and the AZ icon to display them alphabetically. - Page 30 SOP Designer NanoPlus Operator’s Manual Group Parameter Description General Auto Print Allows you to have results printed automatically after the measurement is complete. Click Auto Print, a button is displayed. Click the button to specify print options (refer to Print Dialog Options for Particle Size...
- Page 31 NanoPlus Operator’s Manual SOP Designer Group Parameter Description General Manual Enables you to specify the measurement temperature. Temperature Setting Select Yes; a Temperature field is inserted so that (continued) you can enter a temperature. Enter a value between 5 and 90 C. If you specify a temperature less than 10 ...
- Page 32 SOP Designer NanoPlus Operator’s Manual Group Parameter Description General Manual Input Gradient Temperature/Equilibration panel Temperature Setting Specify a start temperature, an ending temperature, (continued) and an interval for the measurements. In the Gradient (continued) Equilibration field, specify how long to wait after reaching temperature before performing the next measurement.
- Page 33 NanoPlus Operator’s Manual SOP Designer Group Parameter Description Size Optimum Intensity This is the optimum intensity allowed in the Measurement (cps) automatic intensity adjustment. Enter a value between details 0 and 300,000. Sets the pinhole size. The default is 50 m and...
- Page 34 SOP Designer NanoPlus Operator’s Manual Table 3-1. Print Dialog Options for Particle Size Data Selection Description 1st Figure Select from Intensity Distribution, Volume Distribution, and Number Distribution. The item selected for the 1st figure is printed on the same sheet of paper with the 2nd figure and the Distribution Table (if selected).
-
Page 35: Zeta Parameters
NanoPlus Operator’s Manual SOP Designer Zeta Parameters Group Parameter Description General Condition name Identifies the measurement condition. Use a unique, easily recognizable name. You can use up to 40 characters. Equilibrating Select Yes when you have specified a temperature for your measurement. - Page 36 SOP Designer NanoPlus Operator’s Manual Group Parameter Description General Manual Enables you to specify the measurement temperature. Temperature Setting Select Yes; a Temperature field is inserted so that (continued) you can enter a temperature. Enter a value between 5 and 90 C. If you specify a temperature less than 10 ...
- Page 37 NanoPlus Operator’s Manual SOP Designer Group Parameter Description Zeta Equilibration (sec) Allows you to enter a delay time for the measurement Measurement to begin. You can enter up to 100,000 seconds. The equilibration time starts when the run begins; the...
- Page 38 SOP Designer NanoPlus Operator’s Manual Table 3-2. Print Dialog Options for Zeta Potential Data Selection Description Electrosmosis (EOS) Plot Displays a table of the speed of movement for all particles within the cell, including an electroosmotic profile. When you select the Distribution Graph check box, a graph of the true...
-
Page 39: Analysis Parameters Panel
NanoPlus Operator’s Manual SOP Designer Analysis Parameters Panel Parameter Panels are unavailable for a User assigned at the Operator level when in Security mode. Select the List icon to display parameters by category and the AZ icon to display them alphabetically. - Page 40 SOP Designer NanoPlus Operator’s Manual The following table lists analysis parameters in alphabetical order; Advanced ones are italicized for easy recognition. Group Parameter Description General Analysis Method Allows you to select the algorithm that will be used in the particle size distribution analysis. You can choose: CONTIN, Marquardt, or NNLS.
- Page 41 NanoPlus Operator’s Manual SOP Designer Group Parameter Description Display Graph X-axis Enables you to choose the range for the X-axis (particle size range) of the size distribution graph. (continued) You can select 1) Auto to have the range defined automatically, 2) one of the preset fixed ranges, or 3) Fixed to enter a specific range.
- Page 42 SOP Designer NanoPlus Operator’s Manual Group Parameter Description Display Size Dist. Table Select Yes to display the particle size frequency distribution table. (continued) Volume Distribution Select Yes to display the particle size distribution (volumetric conversion distribution) showing both differential and cumulative. Refer to...
-
Page 43: Zeta Parameters
NanoPlus Operator’s Manual SOP Designer Zeta Parameters Group Parameter Description General Comment Enables you to enter a comment about the analysis conditions. You can enter up to 40 characters. Condition name Identifies the analysis condition. Use a unique, easily recognizable name. You can use up to 40 characters. - Page 44 SOP Designer NanoPlus Operator’s Manual Group Parameter Description General Lorentzian Fit Used to set the number of peaks when making a Lorentzian fit with the zeta potential distribution. (continued) In the distribution graph, the Brownian motion of the particles is characterized by a Lorentzian peak cen- tered at a frequency shift that characterizes Electro- phoretic mobility of the particles.
-
Page 45: Cell Parameters Panel
NanoPlus Operator’s Manual SOP Designer Cell Parameters Panel Parameter Panels are unavailable for a User assigned at the Operator level when in Security mode. Select the List icon to display parameters by category and the AZ icon to display them alphabetically. -
Page 46: Common Parameters
SOP Designer NanoPlus Operator’s Manual Common Parameters The following table lists the common cell parameters for Size and Zeta Potential analyses. Parameters are listed in alphabetical order; Advanced ones are italicized for easy recognition. Group Parameter Description General Cell Center X (mm) -
Page 47: Size Parameters
NanoPlus Operator’s Manual SOP Designer Group Parameter Description General Cell Type Displays the type of cell that will be used. Comment Enables you to enter a comment about cell (continued) parameters. You can enter up to 40 characters. Condition name Identifies the cell condition. - Page 48 SOP Designer NanoPlus Operator’s Manual Group Parameter Description Accumulation Size Enter the number of integration cycles for the Measurement Times measurement; the default is 70. At this value, the software determines 70 ACFs and calculates 70 realtime diameters from each ACF, ultimately calculating one averaged ACF from 70 ACFs to give the mean diameter.
- Page 49 NanoPlus Operator’s Manual SOP Designer Group Parameter Description pH Titration pH Table The pH values can be entered from low to high or from high to low. Set the pH value to be adjusted. The Displays when pH range is 1 - 13.
-
Page 50: Zeta Parameters
SOP Designer NanoPlus Operator’s Manual Zeta Parameters The parameters listed here display when you select Zeta Potential for the measurement. Group Parameter Description General Measurement Type Enables you to choose the type of measurement. Type 1: measures base, then zeta potential. Base refers to the modulator frequency that acts as a refer- ence. - Page 51 NanoPlus Operator’s Manual SOP Designer Group Parameter Description Zeta Accumulation Times The number of times the Zeta potential is measured at Measurement a particular position. The default value is 10 for flow cell and flat surface cell, and 20 for the high concentration cell.
- Page 52 SOP Designer NanoPlus Operator’s Manual Group Parameter Description Zeta Polarity Select the polarity of the applied voltage from Measurement positive, negative, or automatic on the reference (Details) electrode. Select Auto if you aren’t sure what to use. Select Voltage (V) Displays when you select Fixed as the Applied Voltage so that you can enter a desired voltage.
-
Page 53: Diluent Parameters Panel
NanoPlus Operator’s Manual SOP Designer Diluent Parameters Panel Parameter Panels are unavailable for a User assigned at the Operator level when in Security mode. Select the List icon to display parameters by category and the AZ icon to display them alphabetically. -
Page 54: Data Acquisition
Data Acquisition NanoPlus Operator’s Manual Data Acquisition The components on the Data Acquisition screen enable you to prepare for and perform measurements. This screen is also considered the Default Display; it is shown when you click Restore Default Display on the Display menu. -
Page 55: Size Analysis
SOP Preview Lists the conditions specified in the selected SOP. Intensity Monitor The NanoPlus automatically adjusts the parameters in the Intensity Monitor to Optimum. Verify the contents of this section then click Start. Size Analysis The Size Analysis panel contains the following options: •... -
Page 56: Data Select Panel
Size Analysis NanoPlus Operator’s Manual Data Select Panel Panel Tasks Column Headings for File Data List of data files Open File Opens the selected file; results are displayed in the Results panel. Delete File Deletes the selected file; a confirmation dialog is displayed. - Page 57 NanoPlus Operator’s Manual Size Analysis Export File You can also export multiple data files into one exported file. Keep in mind that the more files included, the larger the Export file will become. (continued) Click the Ellipsis (...) button; the Save As dialog is displayed. Enter a name and select a location in which to save the file.
- Page 58 Size Analysis NanoPlus Operator’s Manual Import Previous Displays the Import Previous Version dialog, allowing you to import data Version files created with software from earlier versions of the analyzer. Select the version. The remainder of the steps are identical to...
-
Page 59: Results Panel
NanoPlus Operator’s Manual Size Analysis Results Panel Task Options File name Report tabs Displays graphical/ numerical data for selected reports. Results and measurement conditions Recalculate All Displays the Recalculate All dialog, allowing you to select the parameters you wish to recalculate. - Page 60 Size Analysis NanoPlus Operator’s Manual Print Displays the Print dialog so that you can choose the data you wish to print. Select the Print all opened data option to print all data. Refer to Print Dialog Options for Particle Size Data,...
-
Page 61: Data Select Panel
NanoPlus Operator’s Manual Size Analysis Select this option to view Statistical Summary data. Statistical summary data are generated when you select Yes for Statistical Summary in the measurement parameters. The window for the QC command also contains two panels: • Data Select Panel: displays list of files for which statistical data were requested •... -
Page 62: Results Panel
Size Analysis NanoPlus Operator’s Manual Results Panel This panel shows statistics for each data file included in the statistical summary. The example shown above shows 3 repetitions of the same measurement. Use the scroll bar to view all statistics. Details Displays details of the selected data file. -
Page 63: Temperature Gradient Analysis
NanoPlus Operator’s Manual Size Analysis Temperature Gradient Analysis Select this option to view data generated for an analysis performed at gradient temperatures. The window for this command contains two panels and when first opened contains no data. Displays the Gradient New Temperature Mode dialog, enabling you to create a new data table. - Page 64 Size Analysis NanoPlus Operator’s Manual Save Click this button to save any changes you have made in the open file or to save a new data table. Print Displays the Print dialog, allowing you to select Temperature Gradient Plot. If you selected Auto Print, the plot will be printed automatically.
- Page 65 NanoPlus Operator’s Manual Size Analysis Scale Click this button to edit the parameter for the Y axis and/or add a second Y axis; the Scale dialog is displayed. Select Temperature Marker to show a marker on the plot of the temperature at different points of the analysis.
-
Page 66: Zeta Analysis
Zeta Analysis NanoPlus Operator’s Manual Zeta Analysis The Zeta Analysis panel contains the following options: • Analysis: allows you to open and manipulate particle size data files. QC: enables you to view the statistical summary table when selected in ... -
Page 67: Low Conductivity Cell Analysis
NanoPlus Operator’s Manual Zeta Analysis Low Conductivity Cell Analysis Select this option to view data for analyses which require the low conductivity cell. The low conductivity cell is used for samples using non-aqueous liquids as the medium. The window for this command has two panels. When first opened, only the Open button is enabled. -
Page 68: Temperature Gradient Analysis
Zeta Analysis NanoPlus Operator’s Manual The Print, Print Preview, and Close buttons function in the same manner as on other windows. Temperature Gradient Analysis Select this option to view data generated for an analysis performed at gradient temperatures. Refer Temperature Gradient Analysis,... -
Page 69: Ph Maintenance
NanoPlus Operator’s Manual pH Maintenance pH Maintenance The pH Maintenance button is added to the software commands when you have an AutoTitrator installed. Refer to pH Maintenance Commands, page for a description of the commands located on the pH Maintenance panel. -
Page 70: Maintenance
Maintenance NanoPlus Operator’s Manual Maintenance The Maintenance Panel allows you to view and/or specify system configurations. You must be an Administrator or Supervisor to view or edit system configurations. The Maintenance panel does not display for other user levels when in Security mode. -
Page 71: System Parameters
Communication Main Body Port For communications with the NanoPlus interface ports (USB) board. Size Port For communications with the NanoPlus DSP board. Titrator Port For communications with the Titrator. Mar 2014 3-51... - Page 72 Description Options 21 CFR Part 11 Select Yes if you have the 21 CFR Part 11 option. High Sensitive All NanoPlus instruments are set at high sensitivity. Specification Titrator Select Yes if you have the Titrator configured with the NanoPlus.
-
Page 73: Cell Listing
NanoPlus Operator’s Manual Maintenance Cell Listing The Cell Listing folder (left pane) lists the cells registered in the software. To remove cells: Highlight the desired cell and click Remove Cell; the cells are removed from the folder view, but not from the registered list of cells in the right pane. -
Page 74: System Registration Information
Maintenance NanoPlus Operator’s Manual System Registration Information Displays the serial number, the Mac address, and whether or not the 21 CFR Part 11 option is enabled. 3-54 Mar 2014... -
Page 75: Security
NanoPlus Operator’s Manual Security Security The options in the Security panel enable you to specify security settings for users and data. User Management The NanoPlus software supports four user levels and permissions. Perform Edit their Edit System Change User User Level... -
Page 76: Buttons
Security NanoPlus Operator’s Manual Buttons All buttons are shown for the Administrator; the Edit User Profile button is shown for the Administrator and all users. Displays the New User Profile screen, allowing a User with Administrator rights to add a user. - Page 77 NanoPlus Operator’s Manual Security Displays the Edit User Profile screen for the selected User (Administrator) or for the logged-in User. All Users Administrator: Change the User’s password, permission level, or the viewing of SOPs and data. Logged-in User: Change password only.
-
Page 78: Window Contents
Security NanoPlus Operator’s Manual Window Contents Information for all Users is shown for the Administrator; the logged-in User sees his/her information only. The columns provide the: • name of the user • permission level granted to the user • date the user information was created or last edited •... -
Page 79: Data Mirroring
NanoPlus Operator’s Manual Security Data Mirroring Data Mirroring displays in the Security panel for a User with Administrator or Supervisor rights. Enable data mirroring on Saves the data only to the specified location. following location Back up setting files on ... -
Page 81: Operating Procedures
4. OPERATING PROCEDURES This chapter contains abbreviated, step-by-step procedures for NanoPlus operations. Detailed information for the commands used in these procedures are located in Chapter 3. If in a Security mode, some of the procedures contained in this chapter cannot be performed by a User assigned at the Operator level. -
Page 82: Copying Sops
Working with SOPs NanoPlus Operator’s Manual Copying SOPs Select the SOP in the SOP Listing Click Copy from the Task options, or right-click and choose Copy. An exact copy of the SOP (including all parameters) is created under the user name. -
Page 83: Exporting Sops
NanoPlus Operator’s Manual Working with SOPs Exporting SOPs Use this option for exporting an SOP; for example, you may wish to send it to another location. Click Export File in the SOP Panel Tasks; the Particle (or Zeta) Export File window is displayed. -
Page 84: Importing Sops
Working with SOPs NanoPlus Operator’s Manual Importing SOPs Use this option to import an SOP; for example, you may wish to import one that is used at another location. Click Import SOP in the SOP Panel Tasks; the Particle (or Zeta) Import File dialog opens. -
Page 85: Saving And Using Favorite Sops
NanoPlus Operator’s Manual Working with SOPs Saving and Using Favorite SOPs If you have SOPs created with conditions that you use on a regular basis, you can save them as Favorites and add to the measuring SOP when needed. This makes the task quick and easy. -
Page 86: Using The Sop Designer For Other Functions
Working with SOPs NanoPlus Operator’s Manual Using the SOP Designer for Other Functions You can also use the SOP Designer > Cell Parameters to detect the optimal cell position, and measure the cell constant and electrical conductivity. Detecting the Optimal Cell Position The measurement cell can be positioned in order to obtain an optimum intensity for measurement, and the value saved in the cell parameter. -
Page 87: Measuring The Cell Constant
NanoPlus Operator’s Manual Working with SOPs Measuring the Cell Constant Perform a cell constant measurement when: • you create a new cell parameter • a cell is used for the first time • the electrodes have been cleaned or replaced In the Cell Parameters panel, click Cell Const. -
Page 88: Measuring The Electrical Conductivity
Working with SOPs NanoPlus Operator’s Manual Measuring the Electrical Conductivity Perform a conductivity check when: • concentration of your sample changes • the sample type is unknown In the Cell Parameters panel, click Conductivity Check from the Task options; the Conductivity Measurement dialog is displayed. -
Page 89: Measuring Particle Size And Zeta Potential
NanoPlus Operator’s Manual Measuring Particle Size and Zeta Potential Measuring Particle Size and Zeta Potential This section describes how to: • prepare for measurement • start and stop the measurement • display and print measurement results Preparing for Measurement Select Data Acquisition, the Measurement pane is displayed (refer to... - Page 90 Measuring Particle Size and Zeta Potential NanoPlus Operator’s Manual Review the parameters in the Preview pane of the selected SOP. Using the Intensity Monitor group at the bottom of the Measurement pane: a. Check the Cell Parameters and Diluent Properties.
- Page 91 NanoPlus Operator’s Manual Measuring Particle Size and Zeta Potential b. Click Intensity Check to check the Intensity (Scattering Strength) Stability; the Intensity Check screen is displayed. Enter the Accum Times, select Auto Scale or Manual Scale, and click Start to perform the intensity measurement.
-
Page 92: Starting And Stopping The Measurement
Measuring Particle Size and Zeta Potential NanoPlus Operator’s Manual Starting and Stopping the Measurement Select the Measurement icon from the Data Acquisition function panel. Click Start in the upper left of the Measurement screen, or select Run > Start on the Main menu bar. -
Page 93: Viewing And Printing Measurement Results
NanoPlus Operator’s Manual Measuring Particle Size and Zeta Potential Viewing and Printing Measurement Results After the measurement is complete, the measurement results are displayed according to the analysis parameters you specified. To view the results for other graphs or tables, use the tabs located above the Results panel. -
Page 94: Working With Analysis Data
Working with Analysis Data NanoPlus Operator’s Manual Working with Analysis Data This section describes how to access, view, and work with the following types of analysis data: • Size and Zeta Potential analysis • Temperature Gradient analysis, page 4-23 • pH analysis, page... -
Page 95: Opening An Analysis Data File
NanoPlus Operator’s Manual Working with Analysis Data Opening an Analysis Data File In the Data Select panel, place a check mark next to the data file(s) you wish to open. Click Open File in the Panel Tasks; analysis results are displayed in the Results panel. -
Page 96: Exporting An Analysis Data File
Working with Analysis Data NanoPlus Operator’s Manual Exporting an Analysis Data File You can export particle size analysis data files to a folder or external memory. In the Data Select panel, place a check mark next to the data file(s) you wish to export. -
Page 97: Importing An Analysis Data File
NanoPlus Operator’s Manual Working with Analysis Data Importing an Analysis Data File Use the Import function to include exported data in a data file list. Click Import File in the Panel Tasks; the Import File dialog opens. Click this button... -
Page 98: Modifying Analysis Parameters
Working with Analysis Data NanoPlus Operator’s Manual Modifying Analysis Parameters Certain analysis data and diluent parameters can be modified and recalculated. In the Data Select panel, place a check mark next to the data file containing the parameters you wish to modify. - Page 99 NanoPlus Operator’s Manual Working with Analysis Data To save the recalculated data, click Save Recalculated Data at the top of the Results panel; the Save Recalculated Data dialog is displayed. Select the method you wish to use for saving the data. You can choose: •...
-
Page 100: Overlaying Analysis Data
Working with Analysis Data NanoPlus Operator’s Manual Overlaying Analysis Data You can select multiple data files in the Data Select Panel, analyze them, and overlay the results. In the Data Select panel, place a check mark next to the data files you wish to include in the overlay. -
Page 101: Printing Analysis Data
NanoPlus Operator’s Manual Working with Analysis Data Printing Analysis Data Analysis data can be printed automatically at the end of the measurement if selected in analysis parameters. To print analysis data manually after the measurement or if you wish to print recalculated data, perform the steps shown below. -
Page 102: Displaying Statistical Summary
Working with Analysis Data NanoPlus Operator’s Manual Displaying Statistical Summary A Statistical Summary is generated when you select Yes in the measurement parameters. To display the statistical summary: Select QC in the Size Analysis (or Zeta Analysis) panel. In the Data Select panel, place a check mark next to the data file(s) you wish to open Click Open File at the top of the Data Select Panel. -
Page 103: Temperature Gradient Data
NanoPlus Operator’s Manual Working with Analysis Data Temperature Gradient Data Select the Temperature Gradient Analysis icon to view data collected when you perform an analysis using gradient temperatures; the Temperature Gradient Analysis window is displayed. Click Open in the button bar at the top of the screen to select a file and populate the window. -
Page 104: Specifying A Second Axis
Working with Analysis Data NanoPlus Operator’s Manual Specifying a Second Axis Click the Scale button at the top left of the Temperature Gradient Plot; the Scale dialog is displayed. Select the Y2 Scale(sub) option and select the parameter for the axis. -
Page 105: Using The Temperature Marker
NanoPlus Operator’s Manual Working with Analysis Data Using the Temperature Marker The temperature marker allows you to view the temperature at different points in the analysis. Click the Scale button at the top left of the Temperature Gradient Plot; the Scale dialog is displayed. -
Page 106: Adding A New Data Table
Working with Analysis Data NanoPlus Operator’s Manual Adding a New Data Table Use the New button in the button bar at the top of the Gradient to create a table using manually entered data. Click New at the top of the Gradient Temperature Plot window; the Select Temperature Gradient Mode dialog is displayed. -
Page 107: Overlaying Analysis Data
NanoPlus Operator’s Manual Working with Analysis Data Overlaying Analysis Data Click Open in the button bar and choose the files you wish to use in the overlay. Click Overlay on the button bar; an Overlay tab is added containing the name of the files in the overlay. -
Page 108: Adding And Deleting Diluents
Adding and Deleting Diluents NanoPlus Operator’s Manual Adding and Deleting Diluents Adding a Diluent Use the Return to List option on the menu bar to discard entries and leave the dialog open to continue, or Cancel to discard entries and close the dialog. -
Page 109: Deleting A Diluent
NanoPlus Operator’s Manual Adding and Deleting Diluents a. Case 1: If the parameters of the diluent are known only at a certain temperature (for example, 30 °C), enter the temperature as 30 °C and the corresponding Refractive Index, Viscosity, and Dielectric Constant values of the diluent (use the fields in the Diluent Temperature List group). -
Page 110: Specifying Security Settings
Specifying Security Settings A User with Administrator rights is required for changing the security level. The NanoPlus software allows you to perform measurements at three different User levels: • No Security: allows any user to access the program and perform measurements. No password is required. -
Page 111: Adding Users
NanoPlus Operator’s Manual Specifying Security Settings Adding Users You must have Administrator rights to add users. Click the Security command, the User Management window is displayed. Click Add User in the button bar at the top of the window; the New User Profile dialog opens. -
Page 112: Deleting Users
Specifying Security Settings NanoPlus Operator’s Manual Complete the fields as described below: Name Requires at least six alphanumeric characters Password Requires at least six alphanumeric characters Confirm password Re-enter password Select the User Level Choose User level; refer to User Level,... -
Page 113: Editing A User Profile
NanoPlus Operator’s Manual Specifying Security Settings Editing a User Profile A User’s profile can be edited by the Administrator or by the User. All options are available for the Administrator, while the individual User can only change their password. Click the Edit User Profile button at the top of the window; the Edit User Profile dialog... -
Page 115: Troubleshooting And Maintenance
5-6). If the illuminate. problem persists, contact your Particulate Systems service representative. The power can be CPU does not start. Contact your Particulate Systems turned on, but the power service representative. LED does not illuminate. Power LED remains CPU does not start. - Page 116 Troubleshooting NanoPlus Operator’s Manual Symptom Probable Cause Corrective Action Communication failure Instrument power is not on. Verify that instrument is turned between the instrument and computer USB cable is not connected. Be sure USB cable is connected at the instrument and computer.
- Page 117 NanoPlus Operator’s Manual Troubleshooting Symptom Probable Cause Corrective Action Cell center adjustment The cell block is incorrectly set. Reseat cell block into cell has failed. compartment. Wrong type of cell block. Check SOP and correct. Error in assembly of cell block Verify cell block assembly.
- Page 118 Troubleshooting NanoPlus Operator’s Manual Symptom Probable Cause Corrective Action Measurement values of Bubbles are in the cell. Remove bubbles. standard samples do not Cell center is not adjusted Check SOP. Verify cell type and fall within the correctly. readjust cell center.
- Page 119 NanoPlus Operator’s Manual Troubleshooting Symptom Probable Cause Corrective Action Dissymmetric potential The stored calibration curve and Confirm the calibration history of of pH electrode has the current readings do not match pH electrode. exceeded the limit Exchange the inner KCl solution (when using the and recalibrate the electrode.
-
Page 120: Maintenance
Stop using the equipment if you suspect that it is not functioning normally. Replacing the Fuses The NanoPlus instrument is equipped with two fuses in the power socket on the rear panel. Follow these steps to replace the fuses for the NanoPlus and the AutoTitrator. -
Page 121: Cell Maintenance
5-23 • Low Conductivity Cell, page 5-26 The size measurement cells in the NanoPlus cell listing are as follows: • Size Cell (Glass); a glass cuvette (minimum 0.9 mL sample required) Measurement temperature range: 5 - 90 C • Size Cell (Disposable); a plastic cuvette (minimum 0.9 mL sample required)... -
Page 122: Flow Cell
Maintenance NanoPlus Operator’s Manual Flow Cell This section describes how to disassemble and assemble the Flow Cell, as well as how to wash the glass cell. Assembled Disassembled Cell Holder Cell Guide (2) Clamping Knob (2) Luer Fitting (2) O-ring (8); (6 spares) - Page 123 NanoPlus Operator’s Manual Maintenance Remove the electrode by turning the clamping knob counter-clockwise. Cell guide Electrode Clamping knob Repeat steps 1 through 4 for the opposite side. Holding the cell, remove the cell guides. Push the cell guides in while lifting the cell guide out of the cell holder.
-
Page 124: Assembling The Flow Cell
Maintenance NanoPlus Operator’s Manual Assembling the Flow Cell Install the electrode O-ring. O-ring Electrode Install the sealing rubber to the gutter of the cell guide, and insert the glass cell into the concave portion of the cell guide (refer to Step 7 on previous page). -
Page 125: Washing The Glass Cell
NanoPlus Operator’s Manual Maintenance Fill the cell with sample solution. Confirm that there are no bubbles in the glass cell and between the cell holder and the glass cell. Confirm there are no bubbles Cell guide Glass cell Set the cell stopper in the direction below; turn it counterclockwise, pushing lightly until it stops. -
Page 126: High Concentration Cell
Maintenance NanoPlus Operator’s Manual The glass cell can be immersed in concentrated sulfuric or hydrochloric acid for a few hours when the dirt inside the cell is extremely severe. Wash well with purified water afterwards. Take appropriate safety precautions when handling these type of acids. - Page 127 NanoPlus Operator’s Manual Maintenance Remove the transparent electrode holder. Electrode clamp Transparent electrode holder Knob B Pull the electrode rod from the transparent electrode holder, and remove the transparent electrode. Transparent electrode Optical surface Transparent electrode holder Surface of electrode Electrode rod Remove the heat conductive adapter upward, and remove the high concentration cell.
-
Page 128: Assembling The High Concentration Cell
Maintenance NanoPlus Operator’s Manual 10. If the high concentration cell will not be used for more than a day, store the transparent electrode in a safe place. 11. Reassemble the high concentration cell without the transparent electrode. Assembling the High Concentration Cell... - Page 129 NanoPlus Operator’s Manual Maintenance Set the transparent electrode holder, lining up the convex part with the concave port in the base. Concave port Convex port Insert the hooked clamp to the concave port in the base. Then, tighten the clamp by turning knob B clockwise.
-
Page 130: 12 Flat Surface Cell
Maintenance NanoPlus Operator’s Manual Insert electrode A into the cell, tilting the cell slightly so that air bubbles do not enter the cell, then turn knob A clockwise to install electrode A. Electrode A Knob A Do not confuse these sealing rubbers with those used for the other measuring cells. -
Page 131: Disassembling The Flat Surface Cell
NanoPlus Operator’s Manual Maintenance Disassembling the Flat Surface Cell Drain the sample solution from the cell. To do this, attach the silicone tube to one of the inlets and a syringe to the other inlet. Inject air into the cell. -
Page 132: Assembling The Flat Surface Cell
Maintenance NanoPlus Operator’s Manual Take out the flat surface cell, wash it, wrap it in lens paper, and store it in purified water. Do not dry the plane cell. Shaded areas = rough surfaces Handle the plane cell by the rough surfaces (indicated by shaded areas). Exact measurements may not be possible if other surfaces contain fingerprints or smears. - Page 133 NanoPlus Operator’s Manual Maintenance Install the two O-rings on both sides of the cell block, and set the Flat Surface Cell with the concave portion upward to the concave portion of the cell block. Cell block Concave Cell block portion...
- Page 134 Maintenance NanoPlus Operator’s Manual Set the sample and teflon sheet (or silicone sheet) on the Flat Surface Cell. Teflon sheet Sample Sample size: • Minimum: 33 x 14 mm • Maximum: 37 x 16 x 5 mm (recommended) Sheet selection: •...
-
Page 135: Washing The Flat Surface Cell
NanoPlus Operator’s Manual Maintenance Insert the silicone tube (with the Luer fitting) in one of the inlets. From the other inlet, slowly fill the cell with the monitoring particle solution using a syringe. Luer fitting Silicone tube Luer fitting Plug Be sure to fill the cell slowly to prevent introduction of air bubbles in the cell. -
Page 136: Coating The Flat Surface Cell With Polyacrylamide
Maintenance NanoPlus Operator’s Manual Coating the Flat Surface Cell with Polyacrylamide Read the Vendor’s Material Safety Data Sheet (MSDS) for the Acrylamide before starting the coating procedure. You will need the following: Reagents: • 3-Methylacryloxypropltrimethoxysilane (organosilane) • Acrylamide-HG (acrylamide HG) •... -
Page 137: Small Volume Disposable Cell For Zeta Potential
NanoPlus Operator’s Manual Maintenance Wash the Flat Surface Cell with the above solution approximately 10 times. Then, immerse the cell in the solution at approximately 30 °C overnight. Wash the cell with methanol to remove the silane reagent which has not reacted, then wash with water. -
Page 138: Disassembling The Disposable Cell
Maintenance NanoPlus Operator’s Manual Disassembling the Disposable Cell Disengage the fastener of the cell holder. Using a micropipette, transfer a sample into a disposable cell (130 L - 250 L) and put a dedicated cap on each of the opening of the cell. - Page 139 NanoPlus Operator’s Manual Maintenance Install the disposable cell in the holder. Note that the protrusion on the disposable cell is designed to fit into only one side of the holder (indicated with a circle). When installing the cell in the holder, be careful with the orientation of the cell, and gently insert the cell into the holder with the side of the cell (side with protrusion) titled downward as shown in the figure below.
-
Page 140: Low Conductivity Cell
Maintenance NanoPlus Operator’s Manual Low Conductivity Cell This section describes how to maintain the Low Conductivity Cell for Zeta Potential measurement. Cell holder Glass cell Electrode blocks Assembled Cell cap O-rings (P4 perfluro) In order to use an organic solvent, and since the structure of a cell is not a sealing system, use the Low conductivity cell at near ambient temperatures. - Page 141 NanoPlus Operator’s Manual Maintenance Insert the first electrode block from the side opposite the protrusion in the cell holder; turn clockwise to fully tighten. Cell holder Protrusion Electrode block Tighten the other electrode block on the other side. Both electrode blocks are identical. There is no left versus right orientation.
-
Page 142: Cleaning The Low Conductivity Cell
Maintenance NanoPlus Operator’s Manual Remove any bubbles and/or foam, and insert the cell cap. Ensure that there are no bubbles or foam below the plunger. Cell cap Plunger Follow the steps above in the reverse order to assembly the low conductivity cell. -
Page 143: Small Volume Size Cell
NanoPlus Operator’s Manual Maintenance Use a lens paper to wipe off water droplets from around the glass cell. Dry the glass cell in N flow or using a dryer. When you use N flow, it should be passed through a gas filter to reduce spots after drying. When an organic solvent is used for washing, rinse with acetone and dry the cell. -
Page 144: Assembling The Small Volume Size Cell
Maintenance NanoPlus Operator’s Manual Assembling the Small Volume Size Cell Using a micropipette, transfer at least 60 L of sample into the small volume size cell and put a cap on the cell. Inlet 2 mm x 2 mm Do not use a tool made of glass to transfer the sample. - Page 145 6. CONSUMABLES Consumables for the NanoPlus are listed in the table below. Consumables for the AutoTitrator can be found on page A-29. Use one of the following methods to order consumables: • Call our Customer Service Department at (770) 662-3636 •...
- Page 146 NanoPlus Operator’s Manual Part Number Item and Description Low Conductivity Cell P09-00001-06001 Cell, low conductivity P09-00001-06002 Pt electrode, low conductivity cell; set of 2 P09-00001-06003 Pt electrode block, low conductivity cell; set of 2 P09-00001-06004 Packing, low conductivity cell; set of 5...
-
Page 147: Nanoplus At Precautions And Environment Specifications
A. NANOPLUS AT Read this appendix completely before using the NanoPlus AT (AutoTitrator) so that you understand fully how to operate the instrument. Precautions and Environment Specifications Site Requirements Observe the following when selecting a location for and setting up the AutoTitrator: •... - Page 148 • Operate the instrument according to instructions printed on the labels attached to the instru- ment. If any problems occur, stop operation of the AutoTitrator immediately and contact your Particulate Systems service representative. Do not disassemble the instrument. Mar 2014...
-
Page 149: Equipment Components
NanoPlus Operator’s Manual Equipment Components Equipment Components AutoTitrator pH electrode Vial (glass) Vial (plastic) Syringe cover LED for stirrer Top panel Stirrer switch Air bubble trap (degasser) LED for titration Stirrer LED Indicators When the power is On, you can rotate the switch to the right (clockwise) to adjust the speed of the Stirrer from minimum (MIN) to maximum (MAX). - Page 150 Equipment Components NanoPlus Operator’s Manual pH Electrode Protective cap Connector protective cover Contact portion to solution Lead wire Responding glass membrane Connector for temperature sensor Rubber stopper for refill opening (inner solution) Electrode connector Mar 2014...
-
Page 151: Ph Maintenance Commands
NanoPlus Operator’s Manual pH Maintenance Commands pH Maintenance Commands The pH Maintenance button and its functions are added to the software commands when you have an AutoTitrator installed. Configuration Displays the Configuration dialog allowing you to specify titration solutions. Vial Position No.... - Page 152 Maintenance Commands NanoPlus Operator’s Manual pH Calibration Displays the pH Calibration dialog, enabling you to calibrate the pH electrode. Use commercially available standard solutions. A standard solution of pH6.86 (phosphate) is necessary for the 2- and 3-point calibrations. Calibration Points...
- Page 153 NanoPlus Operator’s Manual pH Maintenance Commands Priming Displays the Priming dialog allowing you to fill or wash the tubing for the selected vial. Consumable Check Enables you to check on the remaining life of the tubing and syringe. Use the Counter Reset when you have replaced either item.
- Page 154 Maintenance Commands NanoPlus Operator’s Manual Sample Circulation Displays the Sample Circulation dialog allowing you to begin circulation of the sample. Select the pump speed from the drop-down list. The larger the value, the faster the circulation speed. The recommended speed is...
-
Page 155: Preparing For Measurement
NanoPlus Operator’s Manual Preparing for Measurement Preparing for Measurement Inspecting the pH Electrode Remove the pH electrode by sliding it upward and rotating the vial (plastic) to the right (looking down). Confirm the volume of inner solution in the pH electrode. If the volume has decreased, refill the inner solution (3.33 mol/L KCl) by removing the rubber stopper from the refill opening... -
Page 156: Configuring Titration Solutions
Preparing for Measurement NanoPlus Operator’s Manual Configuring Titration Solutions You can set acid/base/other solutions such as additive for the titration. Select Configuration in the pH Maintenance window. Select the vial position number to which acid, base, or other solution is to be set and select the type of solution. -
Page 157: Filling The Titration Solution
NanoPlus Operator’s Manual Preparing for Measurement Filling the Titration Solution When the instrument is used for the first time, or when the titration solution is exchanged for another solution, fill the solution according to the procedures described below. Pour the titration solution into the glass (or plastic) vial; place a cap on the vial. - Page 158 Preparing for Measurement NanoPlus Operator’s Manual Select the Priming option from the pH Maintenance panel; the Priming dialog is displayed Select the vial number, and click Start; the solution will start filling. Click Stop after confirmation that no air remains in the tube. After completion of filling, click Close to close the dialog.
-
Page 159: Loading And Circulating The Sample Solution
NanoPlus Operator’s Manual Preparing for Measurement Loading and Circulating the Sample Solution Place the stirrer into the vial and pour in the sample solution. Set the vial, and slide the electrode holder down until it reaches the bottom. Electrode holder... -
Page 160: Degassing The Tube
Preparing for Measurement NanoPlus Operator’s Manual Degassing the Tube Tilt the air bubble trap, holding the outlet side upright while the sample solution is circulating. Outlet side Air bubble trap Sample solution Return the air bubble trap to a horizontal, level position. When you see no bubbles in the outlet, place the trap on the holder. - Page 161 NanoPlus Operator’s Manual Preparing for Measurement Return the cell to a horizontal, level position when you see no bubbles in the outlet. Outlet side Remove the cell stopper and confirm that there are no bubbles inside the glass cell and between the cell holder and glass cell.
-
Page 162: Performing A Measurement
Performing a Measurement NanoPlus Operator’s Manual Performing a Measurement When measurement preparations are complete, you can start the measurement. First, confirm the parameters used for the measurement. Setting Measurement Conditions Confirm the parameters listed in the following table prior to starting a measurement. -
Page 163: Preparing For Ph Titration
NanoPlus Operator’s Manual Performing a Measurement Preparing for pH Titration The following modes are available for Titration: • pH Titration: adjust pH as prescribed for measurement of Zeta Potential • Pipetting: add additive(s) as prescribed for measurement of Zeta Potential •... -
Page 164: Reviewing Ph Analysis Results
Reviewing pH Analysis Results NanoPlus Operator’s Manual Set the appropriate measurement type. The measurement types available for use with the AutoTitrator are types 3 and 4. After modifications are complete, insert the modified cell parameter into a Zeta SOP to be used in a measurement. -
Page 165: Calibrating The Ph Electrode
NanoPlus Operator’s Manual Calibrating the pH Electrode Calibrating the pH Electrode Calibration is not required for each measurement, but it should be done once a day, for example, before the first titration. Use commercial pH standard solutions to calibrate the pH electrode. Two or three kinds of pH standard solutions are used for pH calibration (2-point or 3-point calibration). - Page 166 Calibrating the pH Electrode NanoPlus Operator’s Manual After the end of measurements with the three standard solutions, the results display on the lower part of the pH Calibration dialog Results Click Registration to save calibration results; otherwise, the results are not saved.
-
Page 167: Resetting Temperature Constants Of Ph Electrode
NanoPlus Operator’s Manual Resetting Temperature Constants of pH Electrode When a value out of the specified range for the following items is found in the calibration history, an abnormality may have occurred in the electrode. • Asymmetry Potential: Specified range of potential: ± 30 mV at pH 7 •... -
Page 168: Maintenance
Maintenance NanoPlus Operator’s Manual Maintenance Cleaning the Instrument Use a soft cloth dampened with water or neutral detergent to wipe the outside of the instrument and the inside of the cover when needed. The outside of the instrument is coated with a synthetic resin. Wipe off any solution spills immediately. -
Page 169: Replacing The Fuses
Maintenance Replacing the Fuses The instrument is equipped with two fuses in the power socket on the rear panel. Fuses are replaced in the same manner as the NanoPlus; refer to Replacing the Fuses, page 5-6. Replacing the Syringe O-ring Drain the titration solution from the tube and syringe before starting this procedure. -
Page 170: Ph Electrode
Maintenance NanoPlus Operator’s Manual Disconnect the piston from the cylinder. Syringe Seal holder O-ring Piston Turn the seal holder counterclockwise and remove it from the cylinder. Remove and discard the O-ring; replace with a new one (4DP4). Replace the seal holder, turn clockwise to tighten. -
Page 171: Daily Maintenance
NanoPlus Operator’s Manual Maintenance Refill the inner solution. Rubber stopper for opening or refilling of inner solution. Less than approximately 1 cm Wash the tip of the electrode with purified water, and wipe with a soft cloth If the inside of the protective cap dries out, wash the cap and then refill with distilled water until the sponge is immersed. -
Page 172: Improving Response Time
Maintenance NanoPlus Operator’s Manual Improving Response Time If the response time or reproducibility is decreasing, follow the steps below to improve response time. Remove then reinstall the rubber stopper. Do not close the stopper; the stopper should remain open during operation and closed when in storage. - Page 173 NanoPlus Operator’s Manual Maintenance Connection with pH Titrator Replace the Luer fitting on the titrator with the one provided with the size flow cell. Replace the Teflon tubing that connects to the Luer fitting with the Teflon tubing with the small-diameter tubing provided with the size flow cell.
- Page 174 Maintenance NanoPlus Operator’s Manual Measurement Setup for the Size Flow Cell using AutoTitrator Set the Measurement step for the size flow cell with Titrator as follows: Inset the cell into the cell block. Select Size Cell (Flow) as a cell name in the Cell Parameter of the Size SOP Designer.
-
Page 175: Consumables
NanoPlus Operator’s Manual Consumables Consumables Consumables are listed below. Contact your Particulate Systems representative to reorder consumables according to the exchange limit and life span information shown. Item Approximates Exchange Limit or Life Span Tubes (1) and (2) Every exchange of titration solution... -
Page 176: Tubing
Consumables NanoPlus Operator’s Manual Tubing A-30 Mar 2014... -
Page 177: Detail
NanoPlus Operator’s Manual Consumables Detail Be careful not to lose the inner Teflon tube in the case of tube (3), decomposition of tube (8), and an assembly. Mar 2014 A-31... -
Page 178: Identification And Schematic
Consumables NanoPlus Operator’s Manual Identification and Schematic Tube Length Connector Connector (model number) (mm) Teflon 1 x 2 SM5-1020L Teflon (08-066) SM5-1020L Teflon 1 x 2 SRA-2-L 2.4 x 5.5 ... -
Page 179: Diluent Physical Constants
B. DILUENT PHYSICAL CONSTANTS There are several types of physical constants used in particle characterization using light scattering technologies, including laser diffraction, photon correlation spectroscopy, and electrophoretic light scattering. The physical constants include values of refractive index, viscosity and dielectric constant for different substances. -
Page 180: Viscosity
Water NanoPlus Operator’s Manual 0.0065438 t 1.75648 0.013414 – -------------------------------- - 0.00204976 – – 0.11512 3 – 0.000005 t 0.124 t 20 –... - Page 181 NanoPlus Operator’s Manual Other Liquids Other Liquids Liquid T(°C) R.I. Dielectric (CP) Constant 1,1,2,2-Tetrabromoethane 9.00 1.6380 1,1,2,2-Tettrachloroethane 1.844 1.4944 1,2-Dichloroethane 25/50 .464/.362 1.4443 1,2-Propanediol 40.4 1.4324 1-Octanol 25/50 7.288/3.232 1.4293 1-Propyl Alcohol 20/30 2.231/1.72 1.3854 2,2,4-Trimethylpentane 1.3916 1.94 2-Ethoxyethanol 1.72...
- Page 182 Other Liquids NanoPlus Operator’s Manual Liquid T(°C) R.I. Dielectric (CP) Constant Cyclohexanol 25/50 47.5/12.3 1.4655 Cyclohexanone 15/30 2.435/1.803 1.451 18.3 Cyclohexene 20/50 .696/.456 1.4451 2.02 Cyclopentane 1.406 1.97 Delphi Liquid 1.2718 Dibutyl Phthalate 25/50 16.6/6.47 1.4900 Dichloromethane 15/30 .449/.393 1.4244...
- Page 183 NanoPlus Operator’s Manual Other Liquids Liquid T(°C) R.I. Dielectric (CP) Constant Glycerin (94wt%) 1.4644 Glycerin (93wt%) 1.4629 Glycerin (92wt%) 1.4614 Glycerin (91wt%) 1.4599 Glycerin (90wt%) 1.4584 Glycerin (89wt%) 1.4569 Glycerin (88wt%) 1.4554 Glycerin (87wt%) 1.4539 Glycerin (86wt%) 1.4524 Glycerin (85wt%) 1.4509...
- Page 184 Other Liquids NanoPlus Operator’s Manual Liquid T(°C) R.I. Dielectric (CP) Constant Glycerin (60wt%) 1.4130 Glycerin (59wt%) 1.4115 Glycerin (58wt%) 1.4100 Glycerin (57wt%) 1.4085 Glycerin (56wt%) 1.4070 Glycerin (55wt%) 1.4055 Glycerin (54wt%) 1.4041 Glycerin (53wt%) 1.4026 Glycerin (52wt%) 1.4011 Glycerin (51wt%) 1.3996...
- Page 185 NanoPlus Operator’s Manual Other Liquids Liquid T(°C) R.I. Dielectric (CP) Constant Glycerin (26wt%) 1.3654 Glycerin (25wt%) 1.3640 Glycerin (24wt%) 1.3627 Glycerin (23wt%) 1.3614 Glycerin (22wt%) 1.3601 Glycerin (21wt%) 1.3588 Glycerin (20wt%) 20/25 1.769/1.542 1.3575 Glycerin (19wt%) 1.3562 Glycerin (18wt%) 1.3549...
- Page 186 Other Liquids NanoPlus Operator’s Manual Liquid T(°C) R.I. Dielectric (CP) Constant Isopropyl Ether 25/50 .396/.304 1.3680 3.85 Iso-Propylacetate .525 1.377 m-Bromoaniline 6.81 1.6260 Methanol 20/25 .597/.547 1.3312 33.6 Methyl Acetate 20/40 .381/.320 1.3614 Methyl Cyclohexane 25/50 .679/.501 1.4253 Methyl Ethyl Ketone 20/50 .42/.31 1.
-
Page 187: Other Liquids
NanoPlus Operator’s Manual Other Liquids Liquid T(°C) R.I. Dielectric (CP) Constant Pyridine 1.5102 12.5 Sec-Butyl Alcohol 25/50 3.096/1.332 1.3954 15.8 Styrene (Vinyl Benzene) 20/50 .749/.502 1.55 Sulphuric Acid .254 1.8430 Tert-Butyl Alcohol 2 5/50 4.312/1.421 1.3847 11.5 Tetrachloroethylene 1.5044... -
Page 189: Alpha / Beta Values
C. ALPHA / BETA VALUES Table of Values Alpha () and beta () constants are determined separately for each component. The following table provides a list of and values for a select number of polymers. Sample Solvent Temp. Alpha Beta ( C) -
Page 190: Determining Alpha And Beta
If the literature values are not available, and can be obtained experimentally with the NanoPlus using the following procedure, provided that two (or more) samples of known molecular weight are available. -
Page 191: References
NanoPlus Operator’s Manual Appendix C Obtain two or more (preferably monodisperse) samples of the same type with known molecular weight values. These samples are going to be used as the “standards.” The molecular weight range of these standards should be wider than, or similar to, the range of the unknown samples. -
Page 193: Graph And Table Examples
D. GRAPH AND TABLE EXAMPLES This appendix includes descriptions and examples of the following: 3D Graph, page D-17 ACF Listing, page ACF (Base), page D-15 Condition Summary, page D-12 Cumulative Intensity Distribution Graph, page Cumulative Number Distribution Graph, page Cumulative Size Distribution Table, page Cumulative Volume Distribution Graph, page Distribution Graph with Mobility of the Sample, page D-14... -
Page 194: Real-Time Size Displays
Real-time Size Displays NanoPlus Operator’s Manual Real-time Size Displays Real-time Size Monitor Shows the stability of the sample during measurement. Real-time Size Table Shows the realtime size data (raw) in tabular form. Mar 2014... -
Page 195: Intensity Distribution Graphs
Photon correlation spectroscopy (PCS) directly measures intensity (weighted) size distributions, displayed as intensity histograms in the NanoPlus. In these histograms, the magnitude of each peak is proportional to the percent (% amount) of the total scattered intensity due to particles. For example, in the Differential Intensity Distribution graph shown below, the intensity distribution peak average is shown as 6.6 ±... -
Page 196: Cumulative Intensity Distribution
Volume Distribution Graphs NanoPlus Operator’s Manual Cumulative Intensity Distribution Volume Distribution Graphs Volume distributions (same as weight distributions) give the relative volume of particles of each size in a sample. In addition, intensity results are dependent on scattering angle; volume results are not. -
Page 197: Differential Volume Distribution
NanoPlus Operator’s Manual Volume Distribution Graphs Differential Volume Distribution Cumulative Volume Distribution Mar 2014... -
Page 198: Number Distribution Graphs
Number Distribution Graphs NanoPlus Operator’s Manual Number Distribution Graphs Number percentage (%) distributions are determined by dividing the volume percentage results by the cubed diameter of the particles in the distribution. The Differential Number Distribution graph represents the number distribution for the same sample shown in the Differential Intensity Distribution graph shown earlier (page D-3). -
Page 199: Cumulative Number Distribution
NanoPlus Operator’s Manual Ln(G1(t)) Plot Cumulative Number Distribution Ln(G1( )) Plot Shows the natural logarithmic graph of G1 vs. decay time. This indicates if there is any noise in the signal. The curve should be smooth where the ACF exists and become noisy where the ACF touches the baseline. -
Page 200: Size Distribution Tables
Size Distribution Tables NanoPlus Operator’s Manual Size Distribution Tables The differential and cumulative graphs are available in tabular form. In this form, the data are separated into a select number of bins spaced along your selected size range. The listings give the size corresponding to each bin and the relative amount of scattered intensity in each bin. -
Page 201: Cumulative Size Distribution Table
NanoPlus Operator’s Manual AutoCorrelation (ACF) Function Cumulative Size Distribution Table AutoCorrelation (ACF) Function ACF Listing This presents the Autocorrelation Function (ACF) raw data in tabular form. Normal and abnormal correlation functions are shown in the examples that follow. Mar 2014... -
Page 202: Normal Linear Acf
AutoCorrelation (ACF) Function NanoPlus Operator’s Manual Normal Linear ACF ACF with Short Sampling Time In the ACF with short sampling time, the sampling time has to be increased. D-10 Mar 2014... -
Page 203: Normal Log Acf
NanoPlus Operator’s Manual AutoCorrelation (ACF) Function Normal Log ACF ACF Noisy - Low Sample Concentration Mar 2014 D-11... -
Page 204: Acf For Small Particles (Less Than 10 Nm
Condition Summary NanoPlus Operator’s Manual ACF for Small Particles (Less than 10 nm) Condition Summary This presents the summary of the measurement, analysis, cell, and diluent conditions. D-12 Mar 2014... -
Page 205: Distribution Graph
NanoPlus Operator’s Manual Distribution Graph Distribution Graph The Distribution graph is plotted between Intensity, Mobility/Zeta Potential, and Frequency. You can view the graph at all positions at which the zeta potential/mobility is measured. The positions are set in the Cell Parameters of the Zeta SOP Designer. See Cell Parameters Panel, page 3-25. -
Page 206: Distribution Graph With Mobility Of The Sample
Distribution Graph NanoPlus Operator’s Manual Distribution Graph with Mobility of the Sample The values displayed in this graph represent the mobility of the sample. D-14 Mar 2014... -
Page 207: Acf (Base
NanoPlus Operator’s Manual ACF (Base) ACF (Base) The Electrophoretic Mobility of the sample is determined by using heterodyne type of measurement. The measurement requires a reference signal; the Base, whose frequency is compared with the scattered laser light frequency from the sample; and the Doppler Shift (modulator signal) is calculated. -
Page 208: Test Measurement
Test Measurement NanoPlus Operator’s Manual Test Measurement This is a preliminary test the instrument performs to determine the sign of the polarity to be applied to the sample. The test measurement consists of ACF and Power Spectrum. After analysis, the test results are displayed. For example: •... -
Page 209: 3D Graph
NanoPlus Operator’s Manual 3D Graph 3D Graph Provides the electroosmotic velocity profile of the sample. This graph is plotted between Intensity, Mobility/Zeta Potential, and Frequency. It can be viewed at all positions at which the zeta potential/mobility is measured. The positions can be set in the... -
Page 210: With Mobility And 3D View
3D Graph NanoPlus Operator’s Manual With Mobility and 3D View The Lorentzian Peak represents the Brownian motion of the particles. 3D View Lorentzian Peak D-18 Mar 2014... -
Page 211: Peak Value Table
NanoPlus Operator’s Manual Peak Value Table Peak Value Table Provides the mobility, zeta potential of the sample, and the electric field applied. Also provides apparent mobility and zeta potential peak values at the locations specified in the cell condition of the Zeta SOP Designer (for example, 5 locations for flow cell). -
Page 212: Temperature Gradient Plot
Temperature Gradient Plot NanoPlus Operator’s Manual Temperature Gradient Plot The Temperature Gradient analysis enables you to perform measurements on the same sample at different temperatures. With Second Axis D-20 Mar 2014... -
Page 213: With Temperature Marker
NanoPlus Operator’s Manual Temperature Gradient Plot With Temperature Marker Mar 2014 D-21... -
Page 214: Graph Options
Graph Options NanoPlus Operator’s Manual Graph Options You can edit graph parameters using Pop-up menus accessed by right-clicking in specific graph areas. Using the Pop-up Menus Some pop-up menu options are toggle switches. You select the option to turn it on and select it again to turn it off. -
Page 215: Editing Graph Axes
NanoPlus Operator’s Manual Graph Options Editing Graph Axes Place your cursor on the X- or Y-axis to edit axes properties. Place your cursor specifically on the title to edit only title properties. These options also display on the general axis pop-up menu shown above. -
Page 216: Editing Graph Parameters
Graph Options NanoPlus Operator’s Manual Editing Graph Parameters Place your cursor in the graph area to edit graph properties. If you select Toolbar on this menu, graph options are displayed as icons at the top of the graph. Hover your cursor over the icon to display its function. -
Page 217: Theory Of Operation
E. THEORY OF OPERATION Particle Sizing by Dynamic Light Scattering Particles in Brownian Motion Particles suspended in liquids are in Brownian motion due to random collisions with medium or diluent molecules. This motion causes the particles to diffuse through the medium. The diffusion coefficient, D, is inversely proportional to the particle size according to the Stokes-Einstein equation: --------------- -... -
Page 218: The Autocorrelation Function
Particle Sizing by Dynamic Light Scattering NanoPlus Operator’s Manual Figure 1. Determination of Particle Size by Dynamic Light Scattering Since particles in Brownian motion move about randomly, the scattered intensity fluctuations are random. The fluctuations occur rapidly for smaller, faster moving particles and more slowly for larger, slower moving particles. - Page 219 NanoPlus Operator’s Manual Particle Sizing by Dynamic Light Scattering For random intensity fluctuations, it can be noted that signals close to each other in time (small or narrow value) are also close to each other in value and can be said to have high correlation.
-
Page 220: Correlator
Particle Sizing by Dynamic Light Scattering NanoPlus Operator’s Manual is the relative intensity of light scattered by a particle with decay constant Here, A and is related to relative amount of such particles. Figure 2. Intensity Autocorrelation Function Correlator Two correlators are included in the instrument. -
Page 221: The Time Domain Method
NanoPlus Operator’s Manual Particle Sizing by Dynamic Light Scattering The Time Domain Method In the Time Domain (TD) method, the number of photon pulses between sampling times is collected. The calculation of TD is a straightforward application of equation (2). -
Page 222: Particle Size/Size Distributions
Particle Size/Size Distributions NanoPlus Operator’s Manual Particle Size/Size Distributions The Cumulants Method For monodisperse particles, it can be seen from equation (4) that the logarithm of G ( becomes a straight line. For polydisperse samples, the logarithm of G ( exhibits a curved line. -
Page 223: The Nnls (Non-Negative Least-Squares) Method
NanoPlus Operator’s Manual Molecular Weight Analysis The NNLS (Non-Negative Least-Squares) Method This is a least-squares algorithm which solves the matrix so that only positive values for A ’s are obtained (in the Marquardt algorithm, negative values of A may be obtained but the values are set to ’0’... -
Page 224: Zeta Potential Determination By Electrophoretic Light Scattering
Zeta Potential Determination by Electrophoretic Light Scattering NanoPlus Operator’s Manual Zeta Potential Determination by Electrophoretic Light Scattering Electrical Double Layer Most particles dispersed in a liquid have positive or negative charge. In a liquid, the ions that have opposite charge to the particle surface gather close to the particle to keep an electric neutrality. - Page 225 NanoPlus Operator’s Manual Zeta Potential Determination by Electrophoretic Light Scattering If zeta potential is high, the particles are stable due to high electrostatic repulsion between particles. On the contrary, a low zeta potential value (approaching zero) increases the probability of particles colliding and thus forming particle aggregates. Thus, zeta potential is used as an index of the dispersion stability of particles.
-
Page 226: Electrophoretic Light Scattering
Laser Doppler Method. Figure 5. Brief Schematic of Electrophoresis The optical path of the NanoPlus is shown in Figure 6. When measuring zeta potential, the NanoPlus detects the scattered light from the particles by combining incident light (reference light) with the scattered light. -
Page 227: Power Spectrum For Zeta Potential Measurements
NanoPlus Operator’s Manual Zeta Potential Determination by Electrophoretic Light Scattering The amount of frequency shift of scattered light is related to the mobility of particles, U: q n --------- - -- - ----- - (10) ... - Page 228 Zeta Potential Determination by Electrophoretic Light Scattering NanoPlus Operator’s Manual Figure 8. ACF and Power Spectrum of Test Measurement Raw Data Fitted Data 1 is the Lorentzian fit Figure 9. ACF and Power Spectrum of Sample Zeta Potential Measurement E-12...
-
Page 229: Zeta Potential Measurement Using Electrophoretic Light Scattering
NanoPlus Operator’s Manual Zeta Potential Determination by Electrophoretic Light Scattering Zeta Potential Measurement Using Electrophoretic Light Scattering Most colloidal particles have an electrical charge on their surface when dispersed in liquids. The particles move towards the electrode that has an opposite charge if an electric field is applied to the cell that contains the particle suspension. - Page 230 Zeta Potential Determination by Electrophoretic Light Scattering NanoPlus Operator’s Manual to W in the Z direction on the sides of the cell. x z (12) where = apparent mobility = particle true mobility (x,z)
- Page 231 NanoPlus Operator’s Manual Zeta Potential Determination by Electrophoretic Light Scattering Zeta potential of a flat surface sample can be determined from Equations (14) to (16) using a flat surface cell (Figure 12) in which the surface of the sample is the upper wall component of the cell.
-
Page 233: 21 Cfr Part
Make a note of the instrument serial number and the Mac address. Contact your Particulate Systems representative and provide this information to him. He will give you the code for activating the 21CFR Part 11 software, and a text file, typically named passdata.dat. -
Page 234: Applying The Authentication Code
After receiving the authentication code and passdata.dat file from your Particulate Systems representative, proceed with the steps shown below. Using Windows explorer, navigate to the directory into which the NanoPlus software is installed. The default directory is: C:\Program Files\Micromeritics Instrument Corporation Paste the passdata.dat file into the directory. -
Page 235: Enabling Cfr Part 11
You must restart for the changes to take effect. Click File > Exit to close the program. Restart the NanoPlus software. Enabling CFR Part 11 The Security Settings must now be changed to complete activation. A user with Administrator rights is required for this procedure. -
Page 236: Software Additions
Software Additions NanoPlus Operator’s Manual Software Additions Most CFR Part 11 operations are performed exactly as those in the standard software. For example, creating SOPs, performing analyses, and so on. Use the TABLE OF CONTENTS or the INDEX to locate those operations. -
Page 237: Using The Cfr Part 11 Functions
NanoPlus Operator’s Manual Using the CFR Part 11 Functions Using the CFR Part 11 Functions Adding Users You must have Administrator rights to add users. If you have worked in the Security environment before activating CFR Part 11, the Users should carry over. -
Page 238: Disabling And Enabling Users
Using the CFR Part 11 Functions NanoPlus Operator’s Manual Complete the fields as described below: Name Requires at least six alphanumeric characters Password Requires at least six alphanumeric characters Confirm password Re-enter password Select the User Level Choose User level; refer to... -
Page 239: Editing A User Profile
NanoPlus Operator’s Manual Using the CFR Part 11 Functions Editing a User Profile A User’s profile can be edited by the Administrator or by the User. All options are available for the Administrator, while the individual User can only change their password. -
Page 240: Generating Electronic Signatures
Using the CFR Part 11 Functions NanoPlus Operator’s Manual Generating Electronic Signatures All data modifications require an electronic signature; this example shows recalculated data. Open a Size or Zeta Potential data file that was obtained using the CFR Part 11 security option. -
Page 241: Viewing Audit Trails
NanoPlus Operator’s Manual Using the CFR Part 11 Functions Viewing Audit Trails There are four types of audit trails included on the Audit Trail menu: • Error Audit Trail stores and records errors associated with the system; for example, date/ time, user name, communication errors, details, and so on. -
Page 242: Changing Audit Trail Options
Using the CFR Part 11 Functions NanoPlus Operator’s Manual Changing Audit Trail Options Audit trail options are the same for all viewer windows. Select the desired audit trail from the Audit Trail drop-down menu; the applicable audit trail viewer is displayed. - Page 243 NanoPlus Operator’s Manual Using the CFR Part 11 Functions Select the desired condition. Exports details for all users and dates (date range fields are not shown) Date Exports details for a specified range for all users. Click the down-arrow to the right of each field to display a calendar.
-
Page 244: Viewing File History
Using the CFR Part 11 Functions NanoPlus Operator’s Manual Viewing File History Open the file for which you wish to view its details. Select Option > 21 CFR Part 11 > File History on the Main Menu bar (or History Tracking at the top of the Results pane);... -
Page 245: Using Playback
NanoPlus Operator’s Manual Using the CFR Part 11 Functions Using Playback When the CFT Part 11 feature is activated, a directory named Playback is automatically created in the C:Program Files\Micromeritics Instrument Corporation directory. When an analysis is performed, the parameters used in the analysis are saved to this directory. The file is given the same name as the SOP appended with Par (particle size) or Zeta (zeta potential). - Page 247 INDEX Numerics Audit trails, F-9 editing options, F-10 21 CFR Part 11, 2-6, 3-58, F-1 exporting details, F-10 applying authentication code, F-2 Autocorrelation function, E-2 enabling, F-3 example graphs, D-9 obtaining authentication code, F-1 See also ACF playback, F-13 AutoTitrator software additions, F-4 applying grease to pump...
- Page 248 Index NanoPlus Condition summary, 3-14, D-12 Consumables Electrical AutoTitrator, A-29 conductivity, measuring, 4-8 NanoPlus, 6-1 double layer, E-8 Contin method, E-6 specifications, 1-4 Controls, E-15 Electronic recordss, F-1 Controls, connectors, and indicators, 2-1 Electronic signature, F-8 labels, 2-3 Electroosmotic flow, E-13, E-14, E-15...
- Page 249 3-30 Maintenance consumables, 6-1 AutoTitrator, A-22 disassembling, 5-8 cell, 5-7 Fuses, replacing, 5-6 cleaning cell temperature adjustment block, 5-6 NanoPlus, 5-1 replacing fuses, 5-6 Maintenance command, 3-50 G2(t) vs t Plot, 3-14 cell listing, 3-53 Glass cell, washing, 5-11...
- Page 250 5-29 Pop-up menu, 2-8 Software Power spectrum, E-11 operating modes, 2-6 Precautions using, 2-6 AutoTitrator, A-1 NanoPlus, 2-4 copying, deleting, renaming, 4-2 Print dialog creating, 4-1 particle size data, 3-10, 3-14 editing parameters, 4-2 zeta potential datat, 3-16, 3-18...
- Page 251 User Management window, 3-55 displaying, 4-22 requesting, 3-12 viewing, 3-41 Stern layer, E-8 Viscosity, B-2 Stokes-Einstein equation, E-1 Storage NanoPlus, 2-4 pH electrode, AutoTitrator, A-25 Warnings, defined, 1-2 Syringe packing, replacing, A-23 Water, physical properties, B-1 System configuration, 3-50 cell...
Need help?
Do you have a question about the NanoPlus and is the answer not in the manual?
Questions and answers