
Related Manuals for spherag ATLAS 2


Summary of Contents for spherag ATLAS 2
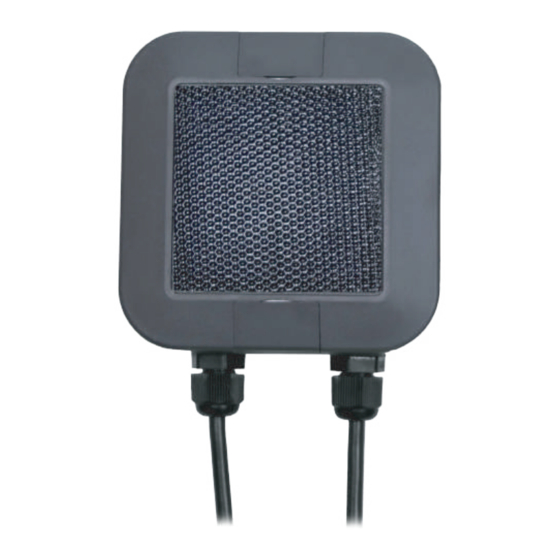
- Page 1 IRRIGATION CONTROLLER WITH A SELF-SUFFICIENT SOLAR CELL USER MANUAL G ET IT O N...
-
Page 2: Table Of Contents
Content DEVICE MANUAL ....................... 2 Description ......................2 Specifications ......................2 Events ........................3 Water meter ......................3 Types of graphs ......................3 Total consumption ....................3 Temporary consumption ................... 3 Device states ......................4 Power modes ......................5 PSM (Power Save Mode) ................... 5 ECO ........................ - Page 3 Figures List Figure 1 States switching in the PSM mode..................5 Figure 2 States switching in the ECO mode ..................6 Figure 3 States switching in the Real Time mode................6 Figure 4 Switching flow chart between power modes and the states implicated......7 →...
-
Page 4: Device Manual
. LTE technology enables the devices to communicate without the need for an additional connectivity deployment. From SPHERAG platform you can control, manage and record irrigation. The platform includes a tool that provides daily, monthly, and annual irrigation reports. 2. Specifications... -
Page 5: Events
3. Events Events occurring in ATLAS trigger a recording and update of the following parameters: water meter, battery level and signal. The events are listed below: 1. Opening/Closing both manual and automatic. 2. Solenoid synchronization. 3. Communication test 4. State transition from “Sleep” to “Awake” and vice versa 5. -
Page 6: Device States
5. Device states The device can be identified in 5 different states. Through the LED at the bottom, it is possible to identify its current state. While, from the platform, it can also be identified the “Awake” and “Sleep” states. The rest of the states will be displayed as “No communication”. -
Page 7: Power Modes
➢ CRITICAL BATTERY: LED shines twice each 15 seconds. In section “No communication”. o It occurs when the battery level is below 5 %. o The behavior of the device is identical to the “Sleep” state, but the correct opening/closing operation of the solenoid is not assured because the power supply of the device is low. -
Page 8: Eco
2. ECO The transition to the “Awake” state is performed randomly within the time slot from 05: 00 am – 07:00 am (see Figure 2) and it remains “Awake” until 10:00 pm. When it wakes up, it will launch a first publication of data in the platform. Then it will send time information until 09:30 pm. - Page 9 Figure 4 Switching flow chart between power modes and the states implicated.
-
Page 10: Types Of Scheduling
7. Types of scheduling The device has two types of scheduling, which in turn have different scheduling modes: 1. BASIC: it allows valves to be scheduled separately. The scheduling modes are: a. Days of the week: you must select the day(s) of the week on which you want to irrigate. - Page 11 c. Windows: consists of an irrigation to which you assign a start time, the duration and the ON/OFF time of the valve (must be higher than 10 seconds). For example, schedule an irrigation at 10 am for 2 hours, an ON time of 5 min and an OFF time of 10 min.
-
Page 12: Installation
8. Installation Please read carefully the following instructions and follow them in the order described below. The effect of the guarantee cannot be assured if the instructions of this manual are not followed. NOTE: None of the 8 wired of the device must be electrically connected. And in case you do not use the output of any of the solenoids (red and black wire) or any of the inputs of the counters (white and blue), each of them must be electrically insulated. -
Page 13: Warranty
This Limited Warranty only applies to physical items purchased through one of SPHERAG’s authorized distributors or retailers. SPHERAG products are warranted to be free of defects in material and its production from a period of one year from the day the purchase is made. The warranty covers the... -
Page 14: Troubleshooting Guide
Follow the installation guidelines (Step 5). Send the device to its supplier or directly to Driver failure due to Spherag’s facilities for analysis. If the failure is due bypassing the red and black to manufacturing defects, it will be repaired. If it is... -
Page 15: Product Recycling
11. Product recycling According to the directive 2012/19/UE, the following product is framed inside the category ”IT AND TELECOMMUNICATION EQUIPMENT” in accordance with Annex I. This product must not be disposed in household waste or in the street. For its adequate treatment, it must be disposed in your city’s clean points or returned to your supplier. -
Page 16: Platform
PLATFORM 1. Platform access • Open your browser and search https://portal.spherag.com. • Enter your credentials (Username and Password) (See Figure 10). • Press the “ENTER” button. Figure 10 Username and password entry 2. Create a new farm Login to the platform with your username and password (Section 1). You can create the farm in two ways: 1. - Page 17 Note: Both options lead you to the same window (see Figure 11 ). Then: (1) Write the name you want for the farm. (2) Write the name of the location where the farm is located. (3) Specify the time zone of the place where the farm is located. (4) If desired, enter a description of the farm.
-
Page 18: Access To An Existing Farm
Figure 12 Setting the location of the farm 3. Access to an existing farm • Login to the platform with your username and password (Section 1). • In the left menu you can access your farms from the “Control Panel” and from “My farms”, as shown in the Figure 13. -
Page 19: Add A New Device - Valve
4. Add a new device - Valve • Login to the platform with your username and password (Section 1). • Enter in an existing farm (Section 3) or create a new farm (Section 2). • Press the button “Add device” •... - Page 20 (3) Select the measuring unit (cubic meters or liters). (4) Specify the value of the associated volume to a pulse (1, 10, 100). Your measuring unit will depend on the one you selected in point 3. Figure 16 Device-valve settings Press the “Next”...
-
Page 21: Add New Device - Station
Note: You can also modify or eliminate the selected area. (2) Press the button and mark in the map the location of the valve, see Figure 18. Figure 18 Valve location Note: You can also modify or eliminate the valve icon. (3) Confirm the area selection and the valve location. -
Page 22: How To Eliminate A Farm
How to eliminate a farm • Login to the platform with your username and password (Section 1). • Enter in the farm you want to edit (Section 3). • Press and select 8. How to eliminate your device • Login to the platform with your username and password (Section 1). •... -
Page 23: How To Schedule Valves
Figure 20 Available devices • With the AUTOMATIC mode turned off, press the button CONTROL to open or close a valve MANUALLY. 10. How to schedule valves • Login to the platform with your username and password (Section 1). • Enter in the farm where you want to create a schedule (Section 3). •... - Page 24 • Fill in the date with the desired schedule. In case of a basic schedule, the parameters shown in Figure 22 will be requested. Figure 22 Basic schedule press the “AUTO” button of the scheduled valve, see Figure On the tab Figure 23 Valves in Automatic...
- Page 25 NOTES ___________________________________________________ ___________________________________________________ ___________________________________________________ ___________________________________________________ ___________________________________________________ ___________________________________________________ ___________________________________________________ ___________________________________________________ ___________________________________________________ ___________________________________________________ ___________________________________________________ ___________________________________________________ ___________________________________________________ ___________________________________________________ ___________________________________________________ ___________________________________________________ ___________________________________________________ ___________________________________________________ ___________________________________________________ ___________________________________________________ ___________________________________________________ ___________________________________________________ ___________________________________________________ ___________________________________________________ ___________________________________________________ ___________________________________________________ ___________________________________________________ ___________________________________________________...
- Page 26 NOTES ___________________________________________________ ___________________________________________________ ___________________________________________________ ___________________________________________________ ___________________________________________________ ___________________________________________________ ___________________________________________________ ___________________________________________________ ___________________________________________________ ___________________________________________________ ___________________________________________________ ___________________________________________________ ___________________________________________________ ___________________________________________________ ___________________________________________________ ___________________________________________________ ___________________________________________________ ___________________________________________________ ___________________________________________________ ___________________________________________________ ___________________________________________________ ___________________________________________________ ___________________________________________________ ___________________________________________________ ___________________________________________________ ___________________________________________________ ___________________________________________________ ___________________________________________________...
- Page 28 WWW.SPHERAG.COM...
Need help?
Do you have a question about the ATLAS 2 and is the answer not in the manual?
Questions and answers