
Related Manuals for haTmed Q50B

Summary of Contents for haTmed Q50B
- Page 1 Small Steam Sterilizer User Manual (Internal Water Tank) Q50B/Q70B 2460 HӓTmed (Wuxi) Co., Ltd V01 version...
- Page 2 Application HӓTmed Small steam sterilizer for sterilizing medical and laboratory equipments, The product design conforms to the YY/T 0646‐2015 standard and is a Class B sterilizer.Process evaluation system according to EN13060. Do not sterilize any liquid,Violating the use of this product to sterilize liquids will damage the product and the loads. Symbols description : Symbols Indication Description Identifies danger points or conditions and Warning the correct procedures that must be ...
- Page 3 Name and address of authorized agent of this product in the European Union. Service should be performed by qualified technicians only. Observe all local and national directives related to service and safety standards. The function and life span of this product are directly related to whether the user follows the operating specifications and maintenance requirements in the installation and use manual. Manufacturer confirms that this product complies with the European Union Medical Device Specification. Draw user's attention to important matters. Safety instruction Identifies danger points or conditions and the correct procedures that must be followed to avoid injury. Liquid sterilization Do not sterilize any liquid Professionals The operator who use sterilizers and fabric must be got a trained professional. ...
- Page 4 Do not use or operate this product at sites where there is a risk of explosion. The electrical connection of this product and the connection of the inlet and outlet pipes should be carried out by professionals. This product should not be in direct contact with the patient. Place this product outside the range of at least 1.5 meters (radius) in the treatment area. If an external printer is configured for this product, the printer should not be placed in a location where there is a risk of contact with liquid. Emergency door Do not use this device to open the door under normal conditions. opening device Pretreatment and sterilization of instruments and fabrics should follow the regulations of the instrument and fabric manufacturers. Sewage pretreatment Strictly follow the relevant standards for disinfection and sterilization,e.g.WS506‐ and sterilization 2016,WS310‐2016. ...
- Page 5 If the same fault message appears repeatedly in this product, please turn off the power. malfunction Repair must be performed by a professional authorized by the manufacturer of this product. Sterilization Program Introduction Standard Standard Quick Name of sterilization Quick B 134+ Fabric 134 121 S Class of sterilization B B B S B B Dynamic pressure monitoring √ √ √ √ √ √ Air leak √ ...
-
Page 6: Table Of Contents
TABLE OF CONTENTS 1 Device Description ............................ 1 1.1 Delivery list ............................ 1 1.1.1 Standard delivery list ........................ 1 1.2 Product view ............................ 1 1.2.1 Front view ............................. 2 1.2.2 Front view ............................. 2 1.2.3 Side view ............................ 3 1.2.4 Rear view ............................ 3 1.2.5 ... - Page 7 5.3 Helix test ............................. 2 0 5.4 Drainage program .......................... 2 1 6 System settings ............................ 2 1 6.1 Time setting ............................ 2 1 6.2 Date setting ............................ 2 2 6.3 Language settings .......................... 2 2 6.4 Warm‐up setting .......................... 2 3 6.5 ...
-
Page 8: Delivery List
Device decription Delivery list 1.1.1 Standard delivery list The standard accessories sent with sterilizer are listed in the table below. Please check the list when unpacking. 1.1.1 Standard delivery list Accessory Accessory name Q’ty Description Picture Air level is placed above the sterilizer during installation. Two foot pads at the front is higher than Air level 1 the back end. The angle between the bottom of sterilizer and countertop is around 5‐10°. Aluminum tray with holes at the bottom for placing Tray 3 sterilized items. Tray handling 1 Tool to take out the tray Chamber rack 1 Rack to hold the tray Fuse 2 220V/16A fuse Air filter to ensure that the air entering the Air filter 1 sterilization chamber is highly filtered to reduce bacteria and dust entry. ... -
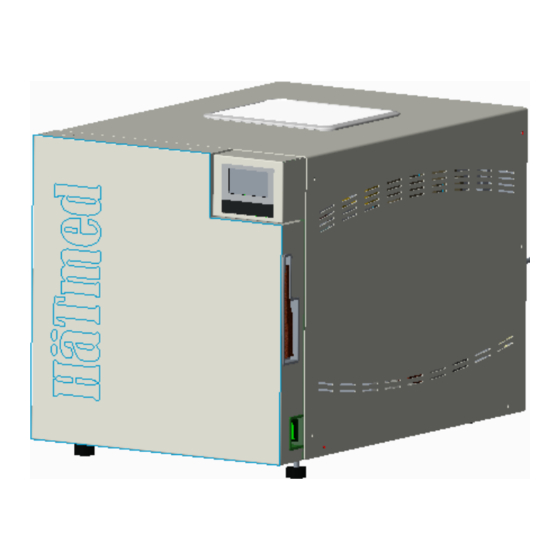
Page 9: Side View
Display Fig 1.1 front view 1.2.2 Side view Door handle Power switch Fig 1.2 side view - 2 -... -
Page 10: Rear View
1.2.3 Rear view Printer interface Test interface USB interface Emergency door opening device Safety valve Power cable Air filter Cooling fan Wastewater drainage interface A (empty) Fig 1.4 Rear View Wastewater drainage interface B (half drainage) 1.2.4 Inside View Power Switch Fig 1.5 inside view - 3 -... -
Page 11: Top View
1.2.5 Top View Distilled water tank (Internal) Fig 1.6 Top view Technical parameters parameter name Q50B Q51B Q70B Q71B External size 570mm*450mm*470mm 680mm*450mm*470mm Packaging size 688mm*576mm*688mm 806mm*576mm*688mm Chamber size Φ253mm*355mm Φ253mm*475mm Capacity of Sterilizer 18 L 23 L Pressure vessel weight 4.8 kg 6.2 kg Equipment weight 59.6 kg 71.6 kg 64.8 kg 66.8 kg Built‐in clean water tank 3.8L volume Built‐in waste water tank 4.5L ... -
Page 12: Loading Method
Working environment 70 Kpa ~ 106 Kpa pressure o o Working temperature C ~ 40 C Storage and transportation o o ‐20 C ~ 55 C environment temperature environment humidity ≤ 85% Maximum wastewater o C temperature Maximum noise 70 dB(A) Compliance with GB/T18268.1‐2010; Works properly in its electromagnetic environment, but does not constitute an unacceptable electromagnetic Electromagnetic harassment of anything in the environment。At the same time, it has the compatibility ability to resist electromagnetic interference. According to GB 4824‐2013,Electromagnetic radiation meets Group 1 Class B requirements. Standards compliant YY/T 0646‐2015; GB4793.1‐2007; GB4793.4‐2001; Note 1:The maximum operating voltage range :198V ~ 242V Note 2: Anti‐electromagnetic interference is the ability of the sterilizer to work properly in the presence of electromagnetic interference Loading method The ... -
Page 13: Operation Buttons
1.5.1 Operation buttons and Identification The use of 4 buttons in different situations is as follows: 1 2 3 4 Button position (Face up from left to right) When the program is Previous return Next option Select selected option standby mode Open the door Startup Program runtime Stop When setting Confirm There is an icon in the interface to display the door lock status. Status Identification Description Door lock status ... -
Page 14: Vacuum Test
1.7.2 Vacuum test The purpose of the vacuum test is to test the leak rate of the sterilizer. No sterilization of the items in the chamber during the process. Please run the vacuum test in a cold and dry chamber without loads. Process name Description The air in the chamber is evacuated till the pressure in the chamber reaches 1.Vacuum the set value of the vacuum test After waiting for 5 minutes, the vacuum everywhere in the chamber tends to 2.Balancing time be uniform. 3. Test holding Test holding time is 10 minutes, The device continuously monitors the time pressure in the chamber during the period After the test is over, the screen displays the test results: vacuum and leak 4.End of test rate. Installation and handling instructions Unpacking precautions Installation, setup, and commissioning should be performed by a professional authorized by the manufacturer of this product. This product is taken out of the box and transported must be operated by 2 people. Total weight:Q50B 59.6 kg; Q51B 61.6 kg; Q70B 64.8 kg; Q71B 66.8 kg - 7 -... -
Page 15: Installation Site Requirements
an authorized dealer or logistics company immediately. Please check the packing box and the random accessories inside the sterilizer. A list of standard accessories can be found in section 1.1 of this manual. Installation site requirements This product should be placed in a dust‐free and dry environment。Surrounding humidity is less than 85%, o o Temperature between 5 C and 40 C. Do not use or operate this product at a site where there is a risk of explosion. Countertop must be able to support the weight of this product : Q50B 59.6 kg; Q51B 61.6 kg; Q70B 64.8 kg; Q71B 66.8 kg Each surface of the device (except the bottom) must have a gap of 10 cm outward. Too small a gap will result in heat buildup, shorten the life of the equipment, reduce the performance of the equipment and extend the running time of the program. Device height adjustment Take out air level and put it in the horizontal position at the top of the product and adjust the two foot pads at the front end to make sure the front is higher than the rear side. The angle between the bottom of sterilizer and countertop is around 5‐10°. It is beneficial to realize the drying of the loads and saves distilled water. Rear end Front end Fig 2.1 Device height adjustment ... -
Page 16: Connection Requirements
Connection requirements 2.4.1 Electrical connections 220V/50Hz power supply. The maximum power supply fluctuation range is 198V ~ 242V. Use a separate 16A power circuit. Provides 30mA leakage protection. Make sure the power cable is not knotted or pressed. Do not use force to pull the power cable, Do not place the power cable near a heat source. Do not touch the power cable with a sharp object. Do not replace the power cable or power plug. Do not use a damaged power cable or power plug Do not use this device if the power cable or power plug is damaged. The power cable or power plug must be replaced by a ... -
Page 17: Wastewater Connection
This product has water quality monitoring device,it will not work properly when unqualified water and will give warning that water quality cannot reach the standard.When you see this message, please replace high quality distilled water in time. If you need to use the water purifier, please consult the manufacturer of this device first. It is best to tilt and secure all the water pipes connected to the back of the device are not bent or knotted. 2.4.3 Wastewater connection ... -
Page 18: First Time Operation
First time operation Startup Turn on the power switch, the power switch position is in the lower right corner of the device inside view (Figure 1.4). Make sure to remove the latex plug from the air filter mounting hole at the back of the device and install the air filter from the accessories included. After Startup After startup at the first time, please set up language and carry out pressure test. After the pressure verification is successful, the initial setting is completed. The date and time can also be set as required. See Chapter 6 system settings in this manual. Steps of pressure verification is as follows: Door open to complete pressure verification press button and open up the door ... -
Page 19: Distilled Water Injection
Door open up operation:Please press button at standby mode,you will see door lock icon will change its status on the display to indicted the door is opened. At this time, open the door handle on the right side of the device upwards by about 90 C and then open the door outward. Closing operation:Close the door of sterilizer,The door handle is turned down to the end。 When closing the door, please press the door handle down to the end. The strength required after using for a period of time may increase Don’t slam the door at any time. Failure to comply with the above requirements may affect the function and reliability of the door lock device Open the door only when loading and unloading, Keeping the door closed at other times is beneficial to energy saving Distilled water injection Inject qualified distilled water into the distilled water tank and make sure the water level is between the lowest ... -
Page 20: Drainage
Packaging materials for packaged sterilization products shall comply with GB/T 19974 standard. Sterilized items packed in paper and plastic bags, The paper must be faced up and laid flat in the tray. For mixed load for sterilization, fabric is on the top and the metal is on the lower layer. There must be a gap between the sterilization bags. Metal bags and dressing bags cannot be attached together. The load capacity must not exceed 90% of the chamber capacity. Select sterilization program This product has 7 preset sterilization programs. Please select the appropriate sterilization program according to the load type and packaging material. The parameter setting of the sterilization program and the typical load description are as follows. The maximum load of Q50B/Q51B is 6kg instruments or 2kg fabric.The maximum load of Q70/Q71B is 7kg instruments or 2.5kg fabric. - 13 -... -
Page 21: Auxiliary Option
Table 4‐1 Sterilization program and parameter settings Drying Holding Name of T time Sterilization load time Sterilization (℃) (min) (Min) , 121 a small amount of fabric 121 >15 1‐99 program Heat‐resistant instrument. 134 Mixed load,long and hollow >3 134 1‐99 ... -
Page 22: Automatic Printing
The chamber will automatically heat up to 110 °C when the automatic preheat setting is turned on. Please be careful of burns! 4.3.2 Automatic printing Turn on the automatic printing function and the sterilizer is properly connected to the printer to automatically print the sterilization record after the program ends. See section 6.5 for details 4.3.3 Extra drying Additional drying settings based on user preferences, extend the drying time of the preset sterilization program based on the drying time in Table 4‐1 to achieve good drying results for loads, especially cotton fabrics. See section 6.6 for details. Running a program 4.4.1 Start sterilization After selecting sterilization program,pleaes press to start up program.Sterilizer will ensure that the door is locked and the water quality of the distilled water is monitored after the start of the program. 07/25/2017 09:23:58 ... -
Page 23: Manual Stop
Manual stop A running program can be manually stopped at any stage. If the sterilization process is stopped before the start of drying, the loaded items are not sterilized. If the sterilization procedure is manually stopped after the start of drying, the loaded items have been effectively sterilized, but not fully dried. In the case of fully loaded packages, the possibility of wet bags is very high and these items cannot be stored because Because aseptic storage places high demands on the dryness of the packaged items. After the program is manually stopped, there may be high temperature steam coming out and causing burns when the door is opened! Do not touch the product, loaded items, chamber or door cover with bare hands. Be sure to use the tray handle to take the loaded items. Manually stopping the sterilization process at an earlier stage may cause an infection! ... - Page 24 Fig 4.3 Manual stop Sterilization procedure completed When the sterilization process ends normally, the program end interface and program running success information are displayed on the screen. If the automatic printing function is set and the printer is connected, the product will automatically print the sterilization record. Please press to open the door. Careful burns! Do not force the door to open. Failure to do so may result in damage to the product and/or hot steam coming out of the chamber. After the sterilization is finished, wait for a while until the sterilizer is fully cooled before opening the door. ...
- Page 25 the cycle is 134 ° C, the holding time should be not less than 3 minutes. Chemical monitoring should be performed for each sterilization cycle,by observing the color change of the chemical indicator to determine whether the sterilization requirement is met compliance with the information and requirements provided by the manufacturer of the chemical indicator. ...
-
Page 26: Functional Testing And Other Procedures
Functional testing and other procedures Vacuum test When first installed, unused for a long time, moved, or periodically tested,vacuum test is recommended to detect leakage in the system of this sterilizer: 1 –Sterilization program 2 – Test program 3 – System setting 4 – File record press to select Vacuum test program B&D test program HELIX test program press to enter 07/25/2017 09:23:58 Vacuum test program 15Min T: 25.0℃ P: 0.00 Bar Door status press to start up ... -
Page 27: B&D Test
After the vacuum test program is started, when the pressure in the chamber reaches the standard required relative vacuum value, the vacuum system stops, and the equilibration time of 5 minutes is turned on. After the balancing time elapses, the vacuum test is started for 10 minutes. After the test is completed, the system returns to normal pressure. After the vacuum test is finished, the system will prompt the result on the program end interface and save the record in the memory. If the automatic printing function is set and the printer is connected, the test result will be printed at the same time. When the vacuum test is passed, the message is “vacuum test success”. Indicates that the system's leak rate meets the design requirements. Print the information as follows: ‐ ‐ ‐ ‐ ‐ ‐ ‐ ‐ ‐ ‐ ‐ ‐ ‐ ‐ ‐ ‐ PROGRAM PROPERLY EXECUTED! Vacuum Test Success! Leakage rate: <0.13Kpa/min Leak rate:<0.13Kpa/min Your system is steady! ‐ ‐ ‐ ‐ ‐ ‐ ‐ ‐ ‐ ‐ ‐ ‐ ‐ ‐ ‐ ‐ When the vacuum test fails, the message is “Vacuum Test Failed”. Print the information as follows: ‐ ‐ ‐ ‐ ‐ ‐ ‐ ‐ ‐ ‐ ‐ ‐ ‐ ‐ ‐ ‐ PROGRAM ERROR EXECUTED Vacuum Test Failed! Vacuum Test Fail! ‐ ‐ ‐ ‐ ‐ ‐ ‐ ‐ ‐ ‐ ‐ ‐ ‐ ‐ ‐ ‐‐ ... -
Page 28: Helix Test
Helix Test The Helix test is used to verify the steam penetration and saturation for A type hollow instruments, such as dental handpieces. Select the Helix test in the test program interface (Figure 5.1). Test methods and test results are judged in accordance with the information and requirements provided by the test package manufacturer. Drainage program This product allows users to perform drainage procedures when needed. This procedure is used to drain water remaining in a small steam sterilizer. When the water in the chamber is obvious after opening the door, it is recommended to use the drainage program before loading the item for sterilization. Especially when the program is abnormally stopped, this situation is easy to occur. Please open the door for inspection. Please carry out the drainage program before handling this product. System setting Enter the system settings interface (Figure 6.1) for time, date, language, warm‐up, automatic printing, additional drying settings, and system reset. ... -
Page 29: Date Setting
Completion Fig 6.4 Time Setting Date Setting Date setting operation is as follows: Time setting Press to select date Date setting setting.Press to enter Language setting date setting. Warm‐up setting Press and to set up Time setting ... - Page 30 Completion Fig 6.2 Language Setting Warm‐up settings Warm up setting operation is as follows: Time setting Press to select warm‐up Date setting setting.Press to enter Language setting into warm‐up setting. Warm‐up setting Warm‐up setting Press to adjust. Automatic warm‐up: Press to exit warm‐up setting Close after completion. Back Confirm ...
-
Page 31: Warm-Up Setting
Fig 6.6 Automatic print setting Additional drying setting Additional drying setting operation is as follows: Press to select additional Warm‐up setting Printer setting drying setting. Press to enter to set up additional Additional drying setting drying. System reset Additional drying setting Press and to enter into additional drying setting. Additional drying:close Press to exit additional drying ... -
Page 32: System Reset
Press and to select System rest whether to perform a system reset. Press to exit after the Yes No setting is completed. Completion Fig 6.9 System reset interface System Information System information operation is as follows: Water supply setting System reset Press to select system Administrator setting. -
Page 33: Log Export
Log export For long‐term storage of sterilization records, sterilization records can be exported via USB interface to a computer or portable storage device. Specific operation: Insert the USB flash drive into the USB interface and export the record as follows. After the export is completed, the interface displays the export completion prompt. Please remove the USB flash drive. 1 –Sterilization program 2 –Test program 3 –System setting 按 键 进 行 记 4 – File record 录导出。 File export Export all records? ... -
Page 34: Log Interpretation
Log interpretation The format of the sterilization record for printer output and internal memory storage is as follows. - - - - - - - - - - - - - - - - Quantus Sterilizer Product Number - - - - - - - - - - - - - - - - ... -
Page 35: Small Steam Sterilizr Maintenance
Small Steam Sterilizer Maintenance Cleaning of loaded items prior to sterilization Before sterilization, the load of handpiece must be thoroughly cleared. Dust and contaminants separated from the load will cause blockage of filters, valves and piping, therefore, the sterilization load without cleaning is not allowed to enter the device for sterilization. Follow all regulations for cleaning, disinfection, and sterilization provided by the device manufacturer. Small steam sterilizer maintenance 8.2.1 Cleaning and maintenance Regular cleaning and maintenance can effectively extend the life of the sterilizer and ensure a good working condition. Maintenance item Maintenance cycle Special tool Maintenance operation Replace the seal Sterilize 1000 times Open the door and check whether the seal is deformed or wrinkle, etc. If it is deformed or wrinkled, it is recommended to replace it. Seal maintenance 2 weeks Remove the seal.Please rinse it with water and wipe it dry with a soft cloth.After that replace the lid. ... -
Page 36: Regular Maintenance
Clean the filter at Wrench Unscrew the filter with a wrench and wash it the bottom of the Sterilize 200 times with clean water. sterilization chamber Rinse it with clean water, if stained, clean it Clean trays Sterilize 100 times with toothpaste Wipe the sterilization chamber with a clean and wet medical cotton cloth,then wipe the Sterilization chamber Every week chamber with a clean and dry medical cotton cloth 8.2.2 Regular maintenance WS310‐2016 and WS506‐2016 require a comprehensive maintenance of the small steam sterilizer every year to ensure ... -
Page 37: No Distilled Water
Solution: Please check if the foot pad adjustment is correct. Under normal circumstances, the front side is slightly higher than the back side. Open the door and check if the filter at the bottom of the sterilization chamber is blocked. None of the above can help reduce the consumption of distilled water, please contact professional distributor authorized by HӓTmed. The drying effect is not good Faulty description: Drying cannot achieve satisfactory results Solution: Please check if the foot pad adjustment is correct. Under normal circumstances, the front side is slightly higher than the back side. Open the door and check if the filter at the bottom of the sterilization chamber is blocked. Please check if the load exceeds the maximum loading capacity(especially textiles) and if the load is placed correctly in the chamber(do not touch the wall of the pressure chamber directly) and if the standard trays and tray rack are used for loading. Activate automatic warm‐up. Open the left side cover and check if the filter is clogged None of the above can help improve the effect of drying, please contact professional distributor authorized by HӓTmed. No distilled water Faulty description:No distilled water Solution: Please check if there is water in distilled water tank. Please check if the distilled water pipe is bent or knotted and inserted into place. Unable to open the door Faulty description: The door cannot be opened even if the emergency button is activated. Solution: ... -
Page 38: Leakage At The Door Or Dripping Underneath
Return the silicone tube to the original position and clamp. Turn on the vacuum test to check for leakage. Leakage at the door or dripping underneath Faulty description: Air leakage and water dripping are obvious. Solution: Please check if the seal is installed correctly(the long side with the word "H" is exposed outside). Please check if the seal is damaged. Appendix 1 Safety Device Description Preheating system over temperature protection switch: The preheating system has an over‐temperature protection switch that automatically disconnects the preheating system power supply circuit when the temperature exceeds the limitation of protection switch threshold temperature to realize the protection function of the preheating system. ... -
Page 39: Appendix 3 Electrical Schematic Diagram
Piping system schematic Appendix 3 Electrical schematic diagram - 32 -... - Page 40 Small steam sterilizer electrical schematic diagram ...
Need help?
Do you have a question about the Q50B and is the answer not in the manual?
Questions and answers