
Related Manuals for Anyuta Werfer Granate BR21 Launcher

Summary of Contents for Anyuta Werfer Granate BR21 Launcher
- Page 2 Feel free to ask any help or info during your model building process. You allready got the assembling instructions in your hands, but we'd like you to know that Anyuta 3D will be always next to you for anything you might need in order to build a realistic scale model for your showcase.
- Page 3 Additional diorama accessories are not included and should be purchased separately from “ANYUTA 3d” online products catalog. For additional info, building instructions & directions, contact with us and we ‘ll be happy to help.
- Page 4 The scale model kit contains eight (8) parts, 3D printed with Frosted Ultra Detail matte translucent plastic material. Please check & identify each part closely before proceeding to building process. Cyanoacrylate glue is recommended for best results.
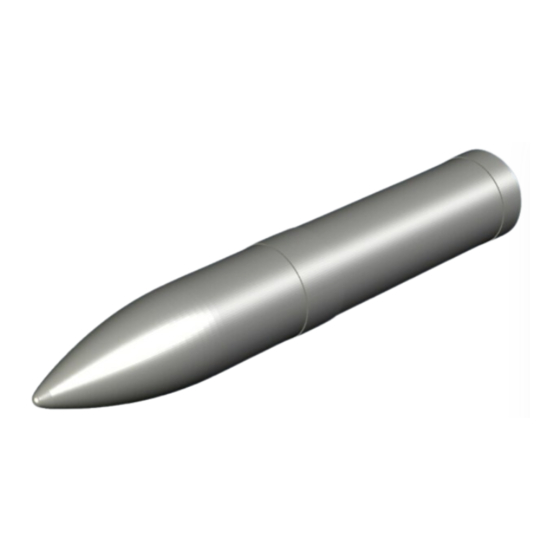
- Page 5 Insert the disc shaped rear cap and close the hollowed ammunition shell as shown on above picture. Use extra caution while installing rear cover & avoid violent moves to prevent plastic fracture & secure in place by adding a cyanoacrylate superglue drop.
- Page 6 As soon as the ammunition shell is built, place it into launcher. Align the shell onto the launching tube and slide backwards (marked with red arrow) carefully, as shown on above picture. Then, secure in place by adding a drop of cyanoacrylate super glue.
- Page 7 The kit contains two pairs of different lengthed cylindrical shaped supporting bars. These bars will be installed on selected points on launching tube as marked with red arrows. Secure supporting bars in place by adding cyanoacrylate super glue drops.
- Page 8 The kit contains one central bolt equiped with hook, which is the main underwing suspension point. Hook’s beam head should be aligned onto bolt’s slot (marked with red arrow). Avoid violent moves while installing the hook on bolt to prevent damage.
Need help?
Do you have a question about the Werfer Granate BR21 Launcher and is the answer not in the manual?
Questions and answers