Table of Contents
Advertisement
Quick Links
Advertisement
Table of Contents

Related Manuals for AON Inni-Robo

Summary of Contents for AON Inni-Robo
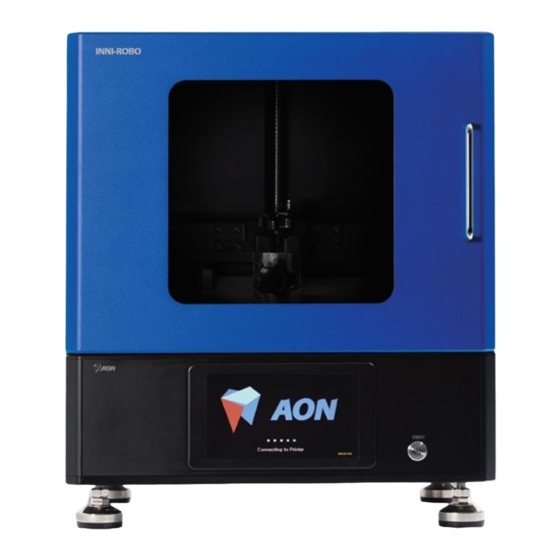
- Page 1 INNI-ROBO_USER MANUAL_191225PS BIO-CERAMIC DLP 3D PRINTER INDUSTRIAL User Manual...
-
Page 2: Table Of Contents
TABLE OF CONTENTS Chapter 1 Safty Precautions Chapter 2 Introduction to INNI-ROBO 3D Printer (ACP-M11B) What is INNI-BORO 3D Printer? Special features List of components Accssories Chapter 3 INNI-ROBO 3D Printer Usage Guide 9~23 Setting Up the Printer 10~13 Setting Up the Network... -
Page 3: Chapter 1 Safty Precautions
※ Please follow safety instructions at all times. Read the following precautions carefully and familiarize yourself with the INNI-ROBO 3D Printer User Manual before setting up and using the printer. Failure to comply with the given warnings can lead to serious injury, fire, or equipment and/or property damage. -
Page 4: Chapter 2 Introduction To Inni-Robo 3D Printer
INNI-ROBO 3D Printer is especially designed to produce artificial teeth. Using ROBO-ICM (ICM-W500), a zirconia slurry designed exclusively for INNI-ROBO 3D Printer, and digital light processing, any industrial configuration can be recreated before your very eyes, one layer at a time. -
Page 5: Special Features
3D Modeling Bed Film Another key feature of INNI-ROBO 3D Printer is the special modeling bed film that makes up the base of the modeling bed. Detachable and reversible, it allows for optimized light refraction to achieve higher durability in the printed output and is designed to release the finished product cleanly and easily. -
Page 6: List Of Components 6~7
2. Introduction to INNI-ROBO 3D Printer List of components Outer components ⑨ ⑦ ⑥ ⑧ Air vents Power socket Main power Handle switch ⑤ Ethernet port ③ ① ⑩ ② ④ Main door LCD console Main door panel Power button... - Page 7 INNI-ROBO_USER MANUAL_191225PS Internal components ① LM GUIDE ⑨ Ball screw ② Knob-L30 ⑩ Z-axis main stage arm ⑪ Z-axis stage ③ Blade support ④ Knob-Blade ⑤ Blade ⑫ Knob-L20 ⑥ Modeling bed ⑦ VR15 ⑧ Knob-L15 Name Description LM GUIDE Guide for the z-axis stage Knob-L30 Fixture for the build platform...
-
Page 8: Accssories
Build platform AB11-40000A Used to connect a computer AB11-40000A to INNI-ROBO 3D Printer Accessories (for purchase) The following is a list of the extra accessories available for INNI-ROBO 3D Printer. Item Item Hex key (2.5mm) Safety glasses Used to change... -
Page 9: Inni-Robo 3D Printer Usage Guide 9~23
Note: INNI-ROBO 3D Printer is only compatible with Windows 7 or higher. 3) Upload the printing file to Aon Slicer program as the form of a file (* .stl) for manufacturing industrial products with INNI–ROBO 3D printers and ROBO-ICM (Zirconia slurry). - Page 10 1) Add Zirconia slurry at least 150g to the modeling bed. 2) Preheat : AON Slicer → Set up → Position control → Preheat 10min * When preheat, a light will turn on inside the printer on the left side and platform moves to the home position.
-
Page 11: Setting Up The Printer 10~13
• To disconnect, pull on the main body of the plug, not on the cable. 2. Press the power button next to the touch screen console on the front of the printer for 3~4 sec. Hold and wait for the AON logo to appear. - Page 12 3. INNI-ROBO 3D Printer Usage Guide Setting up the printer 3. Click the icon you are going to use. ※ After 10 seconds has elapsed from the main screen, the screen moves to Home Position setting screen automatically. 4. Position Control screen Home Position Setting •...
- Page 13 Choose file → Check model → Print Turning off the printer After pressing the power button (ON/OFF) on the front of the printer, check that the AON screen turns off. (Press and hold the power button for more than 3 seconds.) ※...
-
Page 14: Setting Up The Network 14~15
3. INNI-ROBO 3D Printer Usage Guide Setting up the network (Access to AON Slicer) Recommended : Use an Ethernet(Wired) connection when connecting the 3D printer and the PC. • When connecting the 3D printer to the PC for the first time, make sure to use the Ethernet connection and you may connect Wi-Fi additionally. - Page 15 INNI-ROBO_USER MANUAL_191225PS Printer IP address After connecting the printer and the PC, check the IP address, enter it into a web browser, and access AON Slicer (Software). 1. Check via 3D printer 2. Check via IP Scanner Touch Screen of the printer → Click WiFi icon Access to www.advanced-ip-scanner.com →...
-
Page 16: Using The Slicer Program 16~17
3. INNI-ROBO 3D Printer Usage Guide Using the slicer program 1. AON Web Browser : Click on the ‘INNICERA Profile’ button to bring up the Settings page and check that the printer’s profile. * DO NOT change these settings or else malfunction may occur. - Page 17 Click on "Plates". The following screen will appear. For the selected file output, be sure to click the ‘Regenerate’ button to rework the slicing. The file can be reliably used after refreshing. For more details, please refer to the AON Slicer user manual and video, www.aoninni.com...
-
Page 18: Using The Touch Screen Functions 18~23
3. INNI-ROBO 3D Printer Usage Guide Using the touch screen functions 1. The display below appears when the power is turned on. 2. Home screen appears after system start-up. Select printer functions from this screen. • Selection of stacked layers (Printing files) •... - Page 19 INNI-ROBO_USER MANUAL_191225PS Plates 3. To use functions Touch the 'Plates' icon to begin. 3-1. File selection screen • Return to the previous screen • Return to Home screen • Add files (*.stl) from external storage (USB or Hard Disk) 3-2 Add new printing file screen ❶...
- Page 20 3. INNI-ROBO 3D Printer Usage Guide Using the touch screen functions 3-3. Choose the file you want to print ❶ • After clicking the Plate file blank, choose file. 3-4. Choose INNICERA Profile condition after selecting file. ❸ • After clicking INNICERA Profile blank, choose the condition.
- Page 21 INNI-ROBO_USER MANUAL_191225PS INNICERA Profiles 4. To use functions Touch the icon to begin. 4-1. Check the file condition settings 4-2. Check the details of file condition...
- Page 22 3. INNI-ROBO 3D Printer Usage Guide Using the touch screen functions Projector 5. To use functions Touch the icon to begin. A variety of patterns on the printer’s inner panel can be checked and displayed (ON) Turns off the inner panel...
-
Page 23: Software & Firmware Update
Download the relevant update (requires at least 8G of memory space) to your computer or other external drive and install it to INNI-ROBO 3D Printer. Please contact our Call Center (+82 70 4304 4996) or send us a message through our Support page if any problem occurs during the update. -
Page 24: Chapter 4 Troubleshooting
4. Troubleshooting 4. Troubleshooting Useful tips for troubleshooting an issue when using INNI-ROBO Printer (ACP-M11B) For more detailed support, call AON Call Center (+82 70 4304 4996) or visit the homepage http://aoninni.com Issue Solution I can’t download the software from Internet Use Microsoft Edge or Chrome to download. -
Page 25: Product Specifications
INNI-ROBO_USER MANUAL_191225PS 5. Product Specifications Product name AON 3D Printer Model name INNI-ROBO Product code ACP-M11B KC Registration No. R-R-AON-ACPM11 SPECIFICATIONS Product Dimension (W x D x H) 480mm x 370mm x 543mm Product weight 46kg Box Dimension / Weight (W x D x H) -
Page 26: Product Warranty
6. Product Warranty 6. Product Warranty - This product is guaranteed in accordance to the 「Consumer Compensation Regulations of South Korea」. - The warranty period is calculated from the date of purchase. (If the actual purchase date cannot be confirmed, the warranty period is calculated from one month since the date of manufacture.) - The warranty period of this product is 1year. - Page 27 - When replacing consumable parts (projector lamp, transparent film, filter, etc.) that are worn during normal use - Product failure due to an external cause, not a defect in the product itself - When replacing the UV LCD (replacement cycle for INNI-ROBO 3D Printer is 5 months)
- Page 28 www.aoninni.com INNI-ROBO_USER MANUAL_191225PS #2201,2508 A-dong, Gunpo IT Valley, 17 Gosan-ro, 148 Beon-gil, Gunpo-si, Gyeonggi-do, Republic of Korea +82 (0)31 689 5012 +82 (0)31 689 5019 Call Center. +82 (0)70 4304 4996...
Need help?
Do you have a question about the Inni-Robo and is the answer not in the manual?
Questions and answers