
Related Manuals for POWATEC Expert II

Summary of Contents for POWATEC Expert II
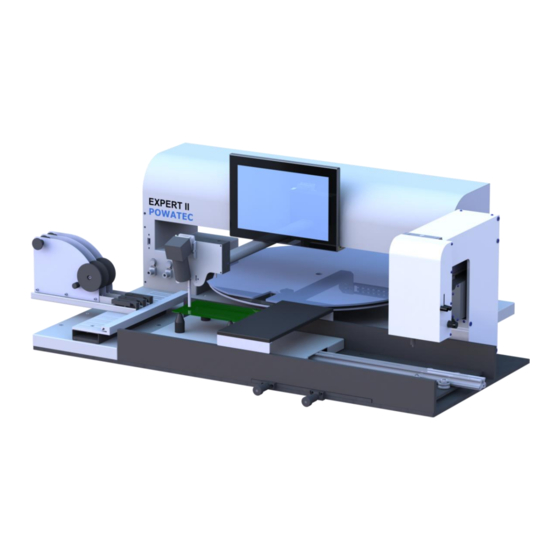
- Page 1 Expert II User manual M Expert II_V02.04_EN 2020-08 POWATEC GmbH • Rothusstr. 5a • 6331 Hünenberg • Switzerland www.powatec.com • info@powatec.com...
- Page 2 Expert II Your Expert II device has been produced in accordancein a with the most stringent quality guidelines. All functions were thorougly checked before delivery. The use of this unit is very simple, however, we recommend that you read this manual before using it for the first time. If you have any questions that are not...
-
Page 3: Table Of Contents
Expert II TABLE OF CONTENTS A TABLE OF CONTENTS Introduction ..............................1 Installation ..............................1 Unpacking and set-up ......................... 1 2.1.1 Space requirements ........................1 Connections on the back of the device ....................2 PCB fixtures ............................2 Pressure settings ............................3 Front of the device .......................... - Page 4 Error message «Waiting for controller connection» ................. 25 Possible options and extensions ........................ 26 Spare parts Expert II ............................. 1 Pick Up Needles for EXPERT, MPL, EXPERT II and MPL II ................2 Spare Parts Micro Placer MPL-II ........................4 Block Diagram Expert II ..........................5 Block diagram MPL II ............................
-
Page 5: Introduction
Introduction 1 Introduction The POWATEC EXPERT-LINE is a modular device for the assembly of printed circuit boards with SMD components. It is suitable for the production of prototypes and the assembly of small to medium batches. Furthermore, it is available in different versions for manual or semi-automatic production as well as with and without finepitch assembly aids. -
Page 6: Connections On The Back Of The Device
Installation Expert II Connections on the back of the device Connect the device as follows: Operating medium Specification Mains current 110-230V, 50/60Hz Compressed air 5-6 bar oil-free, dry and clean PCB fixtures All PCB fitures have the following functions: ▪... -
Page 7: Pressure Settings
Expert II Pressure settings 3 Pressure settings Front of the device Pull out the knob to adjust the pressure regulator. To fix it, push it back in. Adjust the pressure support of the pick and place head so that it rests at the top when not in use. -
Page 8: Working Without Software
Working without software Expert II 5 Working without software Manual placement With "Manual" you change to manual placement. ▪ Pick your component. Vacuum switches on automatically. ▪ Move to the placement position. ▪ Align the component. ▪ Place the component on your PCB. -
Page 9: Placement With Mpl (Microplacer)
Expert II Working without software Placement with MPL (Microplacer) Click on "MPL" to switch to the MPL display. ▪ Pick your component. ▪ Lift the placement head with «▲ Head». ▪ Pull the optics forward. The superimposed camera view appears. -
Page 10: Settings On The Mpl
Working without software Expert II Turn on both lights and adjust the intensity so that you see both crosses. If the crosses are shifted like on the left picture, you have to calibrate the device. Loosen the M5 screw of the suspension on both sides. -
Page 11: Mounting The Dispenser
Processing data For mounting with the Expert II, a placement list and a picture of the PCB to be mounted is required. These data must be prepared on a PC in advance as described below and then copied to a USB stick. -
Page 12: Circuit Board Picture "Pcb Image
AssemblyList.txt opened with Excel AssemblyList.txt opened with text editor Hinweis: A tabular assembly list can be edited in Excel and then saved in the format "Text (tab-delimited) (*.txt)". This format is suitable for the Expert II import. 6.1.2 Circuit board picture «PCB Image»... -
Page 13: Feeder Inventory
Expert II Software-led project Feeder inventory The feeder inventory menu can be found in the settings on the main screen. Select "Feeder Inventory". You will see the existing feeders. The device is delivered with the shown empty feeders. If you select a feeder, you will see the feeder type with parameters and the component slot assignment. -
Page 14: Registering Components
Software-led project Expert II Parameter description Not all feeders require the same parameters. «Name»: The name of the feeder is displayed in the feeder selection, it must be unambiguous. Short names ease the overview especially if a part is available in multiple feeders. -
Page 15: Adjusting The Turntable Pick Position
An assembly list must be assigned to the project with «Open». Insert the USB stick with the prepared data into the front port of the Expert II. The USB stick will be displayed in the quick selection on the left. If not, you will find it under «media/Expert/UsbStickName». -
Page 16: Reference List
Note: Are only the first twelve rows shown, you are working with the trial version of the placer software. You can purchase a licence at Powatec. If you have fiducials in your parts list, you have to set the filter «Reference Dot Prefix» on the right side, because you won’t place any components on the fiducials later on. -
Page 17: Defining The Reference Dots "Pcb Ref-Dot 1&2
Expert II Software-led project The circuit board image is now displayed. Use «Rotate» to rotate the picture as it should be fixed on the Expert II. Define the coordinate alignment in the dropdown menu under «Origin». Continue with «Next». 6.3.4 Defining the reference dots «PCB Ref-Dot 1&2»... -
Page 18: Defining Components "Component Stock
Software-led project Expert II 6.3.6 Defining components «Component Stock» Here you assign a feeder slot to each component. There are four different feeder types: ▪ Turntable (RotationFeeder) ▪ FeederBank ▪ Manual feed ▪ ▪ Parts already assigned in previous projects are automatically assigned to this feeder. -
Page 19: Placement
6.4.3 Initializing axes The axes of the placement head must be reinitialized each time the Expert II is started. The device shows the view on the left. ▪ Move the placement head to the rear left into the mechanical stops. As soon as this position is reached, the... -
Page 20: Reading In The Reference Dots 1 & 2
Software-led project Expert II 6.4.4 Reading in the reference dots 1 & 2 ▪ Move the placement needle to the indicated position and lower the needle as exactly as possible to the mark. The lowering of the needle is confirmed acoustically. - Page 21 Expert II Software-led project The component must be placed in the orange marked zone. ▪ Move the needle into the orange zone. ▪ If the needle is in the zone, the device switches to the zoom view. You can drop the component everywhere outside of the orange zone and pick it again.
-
Page 22: Feeder Change
Acces the Expert II by PC The device name of the Expert II is «ExpertII-SN» where SN is the serial number of the electronics. You will find it under settings → «About» in row... -
Page 23: Access A Network Resource From The Expert Ii
Write «smb://Devicename» into the adressbar. 8 Accessories Turntable All Expert II units can be equipped with turntables with 45 or 90 storage containers or 22 small pallets. The turntable can be operated manually or with motor drive. Axis of rotation of the plate... -
Page 24: Traytables
Accessories Expert II Traytables Trays can be mounted over the slide-in bar on the left side of the tray table E532, between Expert and PCB holder or on magnetic stands on the right side of the PCB. Feeder base plates The base plate E530 is suitable for up to 12 tape or bar feeders of all sizes. -
Page 25: Mounting The Tapes
Expert II Accessories 8.4.1 Mounting the tapes E540/E541/E542 – 8, 12, 16mm tape feeder 7″ Tape roll Cover tape winding- and feed wheel Tape guide Exit of the tape waste E551 narrow 8mm tape feeder with roll holder (EXP552) E552 roll holder, can be placed behind the machine Tapes on 7"... -
Page 26: Glass Prism For Parallax Error Free Placements
Accessories Expert II E553-1 Tape strip feeder for mounting directly on slide-in plates. Pull back plate. If the tape strips are too long cut them at the front side of the feeder. E553-2 Tape strip feeder for mounting on feeder base plates... -
Page 27: Mechanical Settings
Expert II Mechanical settings 9 Mechanical settings All machines are precisely adjusted and tested before delivery. Nevertheless, vibrations during transport and wear and tear can make certain mechanical adjustments necessary. Parallelism adjustments In order for an SMD component to be placed precisely, the component and the circuit board must be exactly parallel. -
Page 28: Adjusting The X-Axis
Maintenance Expert II 9.2.2 Adjusting the X-axis Remove the back of the device Insert the wrench into the gap between the roller and the carriage plate. Tighten or loosen the eccentric screw. Check that the arm can be moved easily. -
Page 29: Firmware Update
On the home screen under Settings the current firmware version on our homepage www.powatec.com. ▪ Save the current firmware version on a USB-Stick or via network directly on the Expert II. ▪ → «Firmware Update». Start the firmware update under Settings ▪... -
Page 30: Possible Options And Extensions
12 Possible options and extensions The EXPERT system has a modular design. Many options can be retrofitted to already installed systems. Please contact POWATEC or your nearest POWATEC representative. UP5001 Time/pressure-dispenser, mounted on the placement head for the application of adhesive or solder paste, incl. -
Page 31: A Spare Parts Expert Ii
Expert II Possible options and extensions A Spare parts Expert II Article No. Description SPX100.022 Solenoid Valve XY-Brake SPX100.021 Solenoid Valve 3/2 Ways SPX100.001 Control Board SPX100.023 Vacuum Generator SPX100.006 Turntable Sensor Board SPX100.011 Camera SPX100.012 Objective SPX100.002 Head Cover Print with Lighting SPX100.010... - Page 32 SPX100.015 Roll Set, 6 pieces each SPX100.004 X-Sensor Board SPX100.005 Y-Sensor Board B Pick Up Needles for EXPERT, MPL, EXPERT II and MPL II # Description m/c Type Picture Dimension / includes Powatec Part No. 1 Standard pick up needles EXPERT II needle blue 0.4mm...
- Page 33 Expert II Possible options and extensions 6 Needle no.4 comes with MPL/MPL II MPL/MPL II AD 4mm, ID 3mm 0PL500A-S004 7 Needle no. 6 comes with MPL/MPL II MPL/MPL II AD 10mm, ID 8mm 0PL500A-S010 Pick Up Needle 0.15 mm EXPERT Pick Up Needle 0.15...
-
Page 34: C Spare Parts Micro Placer Mpl-Ii
Possible options and extensions Expert II C Spare Parts Micro Placer MPL-II Print Rückwan Print Rückwand Article No. Description SPX100.025 Camera SPX100.007 Motor SPX100.026 Linear Guide Optics SPX100.027 Guide Carriage Optics SPX100.028 Linear Guide Head SPX100.029 Guide Carriage Head SPX100.030 Beam Splitter SPX100.031... -
Page 35: D Block Diagram Expert Ii
Expert II Possible options and extensions D Block Diagram Expert II... -
Page 36: E Block Diagram Mpl Ii
Possible options and extensions Expert II E Block diagram MPL II... -
Page 37: F Pneumatic Scheme
Expert II Possible options and extensions Pneumatic scheme... -
Page 38: G General Information Regarding Dispensing
Possible options and extensions Expert II G General information regarding dispensing G.1 Handling cartridges First remove the protective cap over the outlet opening. Squeeze a quantity of solder paste (about the size of a pea) from the cartridge to ensure that all dried particles are removed before the dispensing needle is attached. -
Page 39: H Country Specific System Settings (Language, Keyboard)
Expert II Possible options and extensions H Country specific system settings (Language, Keyboard) Close the placer application in the settings. Go to Startmenu > Preferences > Raspberry Pi Configuration. Type the password: password Go to the tab «Localisation» and chose «Set Locale».
Need help?
Do you have a question about the Expert II and is the answer not in the manual?
Questions and answers