Advertisement
Quick Links
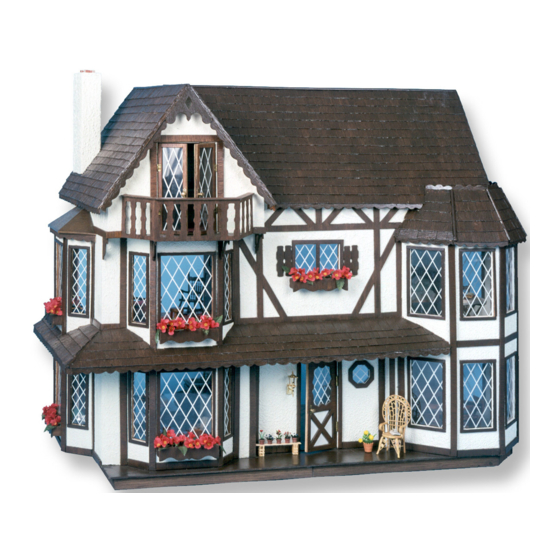
The Harrison
Dollhouse Kit
ASSEMBLY INSTRUCTIONS
• Note: Save kit box for photos.
Welcome to the exciting world of miniatures Enjoy building
your Harrison dollhouse kit and look forward to a fascinating
and rewarding hobby that you and your family can enjoy now
and for generations to come.
Before you begin building, read the instructions carefully. Pay
particular attention to the "Warm- up Sheet." It will give you
many important tips and should help you to "get off on the
right foot!" Before beginning, check to see that you have
everything you need. Good luck and have fun!
THIS KIT CONTAINS:
• 30 pre-cut wood sheets
• 3 silkscreened plastic window sheets
• Sandpaper
• Instructions
• Schematic diagrams
You'll also Need:
• A soft lead pencil with an eraser.
• Glue. We strongly recommend a hot melt glue gun and
glue sticks (available in most craft hardware, or miniature
shops), A glue gun will save you considerable time, but if
you prefer, it is possible to use any household glue which
is suitable for bonding wood. We suggest that you have on
hand white or clear household glue for affixing the windows
because the glue gun can melt the acetate
• Masking tape, empty cans or containers. The "Warm-
Sheer explains how to use tape for applying shingles, and
the containers will help keep things organized as you go.
• Extra sandpaper.
• A straight edge or ruler.
• A razor, exacto knife, or, best of all, anvil type pruning
shears for cutting shingles and siding.
For putting a finish on your house, you will need:
•
Wood fill
•
Use a high-quality latex primer. If you paint your house,
you'll require less paint to cover, and sealing helps
prevent warping. If you don't paint your house, the seal
will keep the wood from drying out. Do not seal the
wood if you plan to stain it as the stain won't take.
•
Paint, stain, and miniature wallpaper if you choose to
finish your house.
Note the following abbreviations:
• R &P means remove and prepare.
• Numbers in parentheses (4) indicate sheet
number.
• (G) means permanently glue.
• "Tack Glue" means glue lightly.
• "Face up" means good side of wood
facing up.
• "Face down" means good side
of wood facing down.
• "Square" means align two pieces at 90°
to each other.
ASSEMBLY
A. FOUNDATION
1. Label, remove and prepare FIRST FLOOR from Sheet 1.
Turn it smooth side down and label slots on the back as
illustrated.
2. Remove and prepare FOUNDATION STRIPS lettered A-
K from Sheets 2 and 8.
See what's new and find
accessories to go with
your dollhouse... visit us at
shop.greenleafdollhouses.com
10 KEYS TO SUCCESSFUL ASSEMBLY OF
YOUR ARTHUR DOLLHOUSE
1. Set up a comfortable work area with all supplies
handy. A table or smooth surface about 36" by 48" would
be great.
2. Carefully follow the instructions in order.
Don't jump ahead of yourself! Complete one step before
going on to the next.
3. Keep all the wood sheets together in the kit
box until they are asked for in the instructions. Return
them to the box after needed parts are removed.
4. Don't remove any wood pieces from the sheets
until instructed to do so. You will have a hard time
figuring out what is what if you have lots of loose pieces
around! When you do punch out the pieces, do so
up
CAREFULLY or you may break a part!
5. Follow the schematic diagrams. It will be helpful to
lightly write the name of each part in pencil directly
on the wood pieces and sheet. This can easily be
erased later on.
6. When
you
see
the
CAREFULLY PREPARE in the instructions it means:
(1) "Punch the piece out CAREFULLY from the front to
the back. (The front is the side of the wood where the
cut marks are clearly visible.) (2) Sand all edges lightly
and (3) paint, wallpaper, stain, or otherwise decorate, if
desired.
7. ALWAYS work with the smooth finished front side of
the wood (the side where the cut marks are visible)
facing up or towards the outside of the house unless
directed otherwise.
8. Don't glue until instructed to do so! This will give
you flexibility in working with the parts. Always check
the fit of the pieces before applying the glue.
9. If you plan to paint the trim a different color than the
rest of the house, paint the house and the parts
separately and glue the trim to the house LAST!
Again, read the "Warm-up Sheet" before you begin
building!! It will give you many important suggestions for
wallpapering, painting, electrifying, shingling, and siding
your dollhouse.
10. ENJOY yourself. Building a dollhouse is not
something that you can complete all in one evening, but
it is a craft project of which you will be proud!
3. Insert tabs and glue FOUNDATION STRIPS A-1 into
slots on underside of FIRST FLOOR, with letter on
strips corresponding with those on slots.
4. Glue FOUNDATION STRIPS J and K as crossbars to
underside of FIRST FLOOR as shown on diagram, then
turn right side up.
B. BASIC HOUSE ASSEMBLY
1. Remove
and
prepare
PARTITION from Sheet 3a and glue to FIRST FLOOR
using tabs and slots. Doorway is towards house front.
2. Remove and prepare RECESSED FRONT from Sheet
4. Label and set aside FRONT DOOR BACKING. Glue
RECESSED
FRONT
appropriate slots.
3. Remove SECOND FLOOR SUPPORT from Sheet 4
and glue tab in place on FIRST FLOOR with the support
wing pointing back.
4. Remove and prepare SECOND FLOOR from Sheet 5.
5. Remove and prepare HOUSE FRONT from Sheet 4.
6. Remove and prepare SECOND FLOOR FIXED
7. Remove and prepare THIRD FLOOR from Sheet 6.
words
REMOVE
AND
8. Remove and prepare RIGHT SIDE from Sheet 7. Glue
FIRST
FLOOR
FIXED
9. Remove and prepare LEFT SIDE from Sheet 8,
to
FIRST
FLOOR
using
C. TOWER
1. Remove and prepare TOWER SIDES from Sheets 9a,
#8006
Discard STAIRWELL and label and set aside triangular
ROOF TRUSS Glue SECOND FLOOR to top edges of
FIRST FLOOR FIXED PARTITION. RECESSED
FRONT and SECOND FLOOR SUPPORT, lining up
tabs and slots.
Set aside two BAY WINDOW SEATS. Check the fit of
HOUSE FRONT into slots on FIRST FLOOR, then glue
in place. Next, glue HOUSE FRONT to front edge of
SECOND FLOOR and SECOND FLOOR SUPPORT.
PARTITION from Sheet 3b. Glue to SECOND FLOOR
in appropriate slots, with doorway facing toward
HOUSE FRONT.
Glue to HOUSE FRONT and then to top edge of
SECOND FLOOR FIXED PARTITION.
to FIRST FLOOR and then to edges of SECOND and
THIRD FLOOR.
labeling and setting aside FRONT DOOR PANEL.
Glue tabs to FIRST FLOOR and then to edges of
SECOND and THIRD FLOOR.
9b and 7.
Advertisement

Related Manuals for Greenleaf The Harrison Dollhouse Kit

Summary of Contents for Greenleaf The Harrison Dollhouse Kit
- Page 1 The Harrison Dollhouse Kit #8006 ASSEMBLY INSTRUCTIONS • Note: Save kit box for photos. 4. Remove and prepare SECOND FLOOR from Sheet 5. Welcome to the exciting world of miniatures Enjoy building See what's new and find Discard STAIRWELL and label and set aside triangular your Harrison dollhouse kit and look forward to a fascinating ROOF TRUSS Glue SECOND FLOOR to top edges of and rewarding hobby that you and your family can enjoy now...
- Page 2 When in the proper position, run a line of glue along the top edge of BAY WINDOW ROOF where it meets the LEFT SIDE wall. Copyright 2019 Greenleaf Dollhouses All rights reserved Made and printed in the USA see what's new and find accessories to go with your dollhouse... visit us at shop.greenleafdollhouses.com...
- Page 3 place so it covers the front edge of BALCONY FLOOR. H. TOWER ROOF 2 on LEFT SIDE of hour. Slide the HIP ROOF SIDE up Do the same with SIDE BALCONY RAILINGS. against 1 and 2 at glue line, and rest in place on bay window section.
- Page 4 X. SHINGLES Greenleaf shingles (available at your craft store) are the perfect touch to completing your Harrison Dollhouse. Set and glue TREADS in place on RISERS and STAIR They will cover the slots which show on the house roof.
Need help?
Do you have a question about the The Harrison Dollhouse Kit and is the answer not in the manual?
Questions and answers