Table of Contents
Advertisement
Quick Links
Advertisement
Table of Contents

Related Manuals for DAGON SPL-3

Summary of Contents for DAGON SPL-3
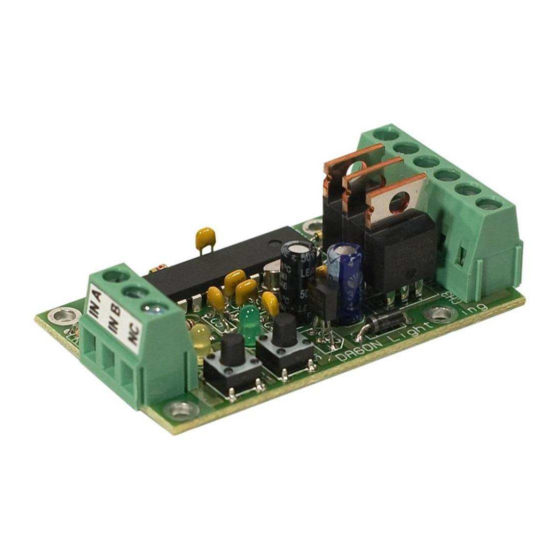
- Page 1 DAGON Company 64-100 Leszno Jackowskiego 24 Street tel. +48 664-092-493 dagon@iadagon.pl www.dagonlighting.com DAGON Lighting series SPL-3 DIODES and RGB LED STRIP DRIVER works alone or controlled by: DMX-512 / 2 buttons / 2 analogue signals 0-10V MANUAL...
-
Page 2: Table Of Contents
2.2. Methods of entering the codes to SPL-3 controller. 2.3. Preview of DMX address SPL-3 driver. 2.4. Description of configuration codes control the operation of SPL-3. 2.5. An example of typical configuration of the driver SPL-3 for working with DMX-512. 3. Modes of SPL-3 works. 3.1. BUTTONS mode. -
Page 3: Main Description About Spl-3 Controller
Driver (controller) SPL-3 is very functional and easy-to use tool designed for control colorful diodes or RGB LED strips, as well as the monochrome LED diode in 3 independent channels. LED Lighting Control using the SPL-3 can be done in several different ways (depending on the selected mode driver): via DMX-512 signal... -
Page 4: Configuration Spl-3
2. Configuration SPL-3. The main rule of SPL-3 controller is that the way of work is decide by “controller codes” which can be set in by a user in any time. The set of “controller codes” (see table 1 and 2.4 point) is very wide, which ensure the high variety of the way of work and to control the LED lightning using SPL-3 driver. -
Page 5: Methods Of Entering The Codes To Spl-3 Controller
Yellow diode light off and the green diode will light on – the code is already accepted. After entering the code SPL-3 goes to regular work - to control the diodes LED RGB in the way described by actual configuration – via control codes. -
Page 6: Preview Of Dmx Address Spl-3 Driver
Yellow diode will turn off - address is read and accepted. After 2 seconds since the end of read and showing the DMX address, the SPL-3 controller goes to the regular work, means controlling RGB LED diodes in the way described by actual... -
Page 7: Tabel 1. List Of Configuration Codes And Their Associated Control Functions For Spl-3
DAGON Lighting SPL-3 – RGB LED strip driver – DMX-512 and others Tabel 1. List of configuration codes and their associated control functions for SPL-3. CODE Function / Parameter / Value Address DMX controller SPL-3 in mode DMX or 001 … 512... -
Page 8: Description Of Configuration Codes Control The Operation Of Spl-3
If one of the DMX mode of work was chosen (code 554, 555 or 556) also the address of DMX SPL-3 controller have to be enter, so one code from 001 to 512. Chosen any code from 001 to 512 will change automatically previous code and remember new address DMX in memory controller. - Page 9 Code 651 activate WHITE BALANCE. This function have an important meaning in diodes LED RGB and tapes, where despite of the fully controls, it’s not possible to receive white colour. It is also useful in few controllers SPL-3 which has a different shade of white color.
-
Page 10: An Example Of Typical Configuration Of The Driver Spl-3 For Working With Dmx-512
RGB colors for 799, 899, 999 codes. Function WHITE BALANCE works in all SPL-3 modes of work. Codes 660 and 669 determine the way of SPL-3 reaction for lack of DMX-512 signal in all modes of work. After one second of decay DMX-512 signal controller response in defined code entered. -
Page 11: Modes Of Spl-3 Works
3.1. BUTTONS mode. In BUTTONS modes the LED light control take place by using two buttons connected between IN A and IN B inputs, and the Voltage (V+) of SPL-3 controller is describe by draw on Fig 3. The main function of these buttons is to change the brightness and the colour of LED diodes which are connected to the SPL-3 outputs. -
Page 12: Fig.3. The Method Of Connecting Brightness And Color Buttons To Spl-3
SPL-3 – RGB LED strip driver – DMX-512 and others Fig.3. The method of connecting BRIGHTNESS and COLOR buttons to SPL-3 in BUTTONS mode. A – basic system B – Zener diode circuit for high power voltage SPL-3 to 24V C –... - Page 13 After a simultaneous hold on buttons BRIGHTNESS and COLOR for more than 1 second, the SPL-3 driver starts automatic, smoothly colour changes. Colors will change in the same way as during the continuous holding-on the COLOR button. Automatic colour change will go on since another simultaneous hold on two buttons, which stop the color changes.
-
Page 14: Tabel 2. List Of Functions Spl-3 Controller - Brightness And Color Buttons
That’s why pressing PLUS at least once after the color setting is recommended. Please remember the function memorizing the color and brightness through the button PLUS press works only during SPL-3 work in BUTTONS mode, and only where there is no automatic color changes. Selection of control buttons. -
Page 15: Analogue Mode
3.2. ANALOGUE mode. In the ANALOG mode, LED light control is using two analog 0-10 V inputs connected between IN A and IN B, and the ground supply (screw terminal V-) driver, SPL-3 according to the diagram in Figure 4. -
Page 16: Random Mode
Additionally the hues of the colors can be changes by using WHITE BALANCE which is available in all modes of work. Every from 5 pallets in SPL-3 controller has the same colors, by there are arranged in different sequences – see table 3. -
Page 17: Example Configuration Of The Controller Spl-3 For Random Mode
561...569 and 571...579, and 560 and 570 codes to control analog 0-10V at the inputs IN A and IN B SPL-3 driver. 3.3.1 Example configuration of the controller SPL-3 for RANDOM mode. -
Page 18: Example Configuration Of The Controller Spl-3 For Random Mode
565 - average speed of the smooth change of color 570 - the brightness control by signal 0-10V analog in input IN B These 8 codes must be entered into the controller SPL-3, to work in a desired manner. The order of input codes is optional. -
Page 19: Dmx Color 1 Mode
If you activate the function STROBO without function DIMMER, an active channel for the STROBE function is DMX control channel again after the color of glow. Thus, SPL-3 driver working in DMX COLOR 1 mode, one can use the COLOR of 1, 2 or 3 channel DMX-512, those sequence is as follows: 1 –... -
Page 20: Dmx Mix (Color 1 + Rgb) Mode
The ground of the GND (shield wire) DMX-512 can be connected to the input terminal of free SPL-3 (Fig. 6.) or to the power supply terminal V-, if there is a need to compensate for the potential ground of the transmitter DMX-512 signal and controller SPL-3. -
Page 21: Conditions Of Safety And Correct Use Of Spl-3 Controller
Dimensions: 65 x 37 x 25 mm 16-bit PWM output resolution used in the SPL-3 provides a linear signal for the human eye, adjust brightness RGB LEDs connected to the outputs CH1, CH2, CH3. High frequency of PWM signal (244Hz) causes the flicker effect (generated by controlled RGB LED PWM pulse signals) is not visible to the human eye, the light is seen as stable (continues).
Need help?
Do you have a question about the SPL-3 and is the answer not in the manual?
Questions and answers