Table of Contents
Advertisement
Quick Links
NeXGen Gilbarco/Bennett - Installation and Start Up Guide
ALLIED ELECTRONICS, INC
NeXGen Controller
Installation and Start Up Guide
NeXGen-to-Gilbarco/Bennett
ALLIED ELECTRONICS, INC
1414 Radcliffe St., Suite 120
BRISTOL, PA 19007-0624
PHONE: 215.785.6200
FAX: 215.785.0230
COPYRIGHT 2018 BY ALLIED ELECTRONICS, INC.
Copyright 2018 by Allied Electronics, Inc.
I
October 18, 2018
Page
Advertisement
Table of Contents

Related Manuals for ALLIED ELECTRONICS NeXGen

Summary of Contents for ALLIED ELECTRONICS NeXGen
- Page 1 NeXGen Gilbarco/Bennett - Installation and Start Up Guide ALLIED ELECTRONICS, INC NeXGen Controller Installation and Start Up Guide NeXGen-to-Gilbarco/Bennett ALLIED ELECTRONICS, INC 1414 Radcliffe St., Suite 120 BRISTOL, PA 19007-0624 PHONE: 215.785.6200 FAX: 215.785.0230 COPYRIGHT 2018 BY ALLIED ELECTRONICS, INC.
-
Page 2: Table Of Contents
NeXGen Gilbarco/Bennett - Installation and Start Up Guide Table of Contents General Information......................1-1 1.1 Installation Environment ..................... 1-1 1.2 Wiring ..........................1-1 1.2.1 Field Wiring ......................... 1-1 1.2.2 Internal Wiring ......................1-1 1.2.2.1 Introduction ......................1-1 1.2.2.2 Planning ....................... 1-1 1.2.2.3 Execution...................... - Page 3 NeXGen Gilbarco/Bennett - Installation and Start Up Guide 2.3.8.2 Future Media Displays Fuel Price Sign.............. 2-20 2.3.8.3 PWM Fuel Price Sign..................2-20 2.3.8.4 Skyline Fuel Price Sign ..................2-21 Programming......................... 3-1 3.1 Gilbarco Addressing ......................3-1 3.1.1 Gilbarco CRIND Jumper Settings................3-1 3.1.2 Gilbarco Distribution Box Jumper Settings..............
-
Page 4: General Information
All cabling must comply with Local, State, and Federal building codes. c. Data connections between the Forecourt Controller (SSC or NeXGen) are to be made with CAT-5 Cable compliant with TIA/EIA-568-B or better. d. Proper cable installation techniques go a long way to preventing data loss. -
Page 5: Execution
NeXGen Gilbarco/Bennett - Installation and Start Up Guide required. 1.2.2.3 Execution a. Maintain the natural twist of the cable. i. The cables have four pairs of twisted wires that can very easily lose their ability to reject electromagnetic interference when unraveled. -
Page 6: Power And Data Line Protection
NeXGen Gilbarco/Bennett - Installation and Start Up Guide 1.3 Power and Data line protection Allied Electronics recommends that the controller be installed with the appropriate power and data line protection devices in order to protect against power surges, transients, low voltage (brown outs), and lightning. -
Page 7: Overview
NeXGen Gilbarco/Bennett - Installation and Start Up Guide 1.6 Overview The NeXGen controller interfaces to the following devices: Gilbarco Dispensers & CRINDs 1. Gilbarco dispensers via the 20/30/45 mA current loop & RS485 4-port board, which is connected to the manufacturer’s Universal Distribution Box. -
Page 8: Installation Information
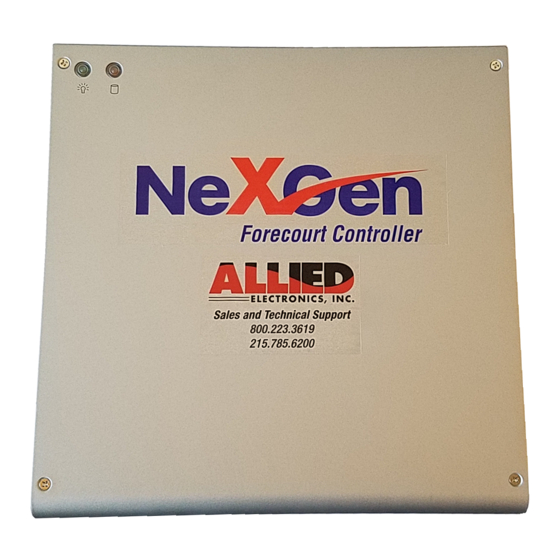
2 Installation Information 2.1.1 Procedures Hardware Installation a. Attach the two mounting brackets to the NeXGen controller as shown in figure 2. b. Mount the NeXGen controller unit to the mounting area using the mounting holes as shown in figure 2. Underwriters Laboratories (UL) requires that NeXGen be mounted horizontally to the floor on a shelf perpendicular to the wall. - Page 9 NeXGen Gilbarco/Bennett - Installation and Start Up Guide Startup and System Beep Sequence Once the NeXGen system is powered up, the controller will beep indicating the following events have been successful: a. One beep- the NXG operating system is starting up.
-
Page 10: Configuration Diagram
NeXGen Gilbarco/Bennett - Installation and Start Up Guide 2.2 Configuration Diagram 2.2.1 NeXGen to Gilbarco/Bennett This figure describes the NeXGen to Gilbarco/Bennett system installation with the OPT and the IPT. * Note: denotes alternative POS connectivity options (RS232 vs. Ethernet) Communication Ports... -
Page 11: Communication Cable And Rj45 Pin Assignments
2.3 Communication Cable and RJ45 Pin Assignments 2.3.1 POS Communication The NeXGen controller supports up to 8 POSs. The POS is a PC based computer which runs the Point-Of-Sale software. The serial port on the POS can be either a DB-25 or a DB-9 connector. -
Page 12: Gilbarco Pump And Crind Communication
NeXGen Gilbarco/Bennett - Installation and Start Up Guide 2.3.1 Gilbarco Pump and CRIND Communication Up to 16 fueling positions may be connected to the NeXGen on each dispenser communications channel (CH5 and CH6). Up To 32 CRINDs may be connected to the NeXGen on CH7. -
Page 13: Gilbarco Security Module Communication
Brown -------------- 8 (Wht) 7 GND Note: The GSM cable supplied by Gilbarco will not work with the NeXGen controller. The Allied GSM cable shown above must be used. Copyright 2018 by Allied Electronics, Inc. 2-10 October 18, 2018... -
Page 14: Bennett Dispenser Communication
2.3.4 Bennett/Verifone CAT Communication Up to 16 Bennett or Verifone CATs may be connected to the card reader communication Channel (12). They will connect to NeXGen via the Bennett Distribution box. NeXGen (CH12) RJ45 adapter to Bennett D box (Part #N9301V-ADP) -
Page 15: Opw Opt
2.3.5 OPW OPT NeXGen uses Channel 8 to interface to the OPW OPT’s. Note: Software Version 18.01A, or newer, must be installed in the OPT and it must be configured as follows: Baud Rate: 9600, Data Bits: 8, Parity: None, Stop Bits: 1 Up to 16 OPT’s may be connected via the Allied Isolation box. -
Page 16: Tank Gauge Communication
NeXGen Gilbarco/Bennett - Installation and Start Up Guide 2.3.6 Tank Gauge Communication The NeXGen uses Channel 2 to interface to a Veeder-Root or equivalent tank gauge system. Configure the tank gauge communication parameters as follows: Baud Rate: 9600 Parity: Odd... -
Page 17: Red Jacket St
NeXGen Gilbarco/Bennett - Installation and Start Up Guide 2.3.6.3 Red Jacket ST NeXGen (CH 2) RJ45 adapter to the Red Jacket “ST” NeXGen RJ45 Red Jacket CAT 5 Cable Adapter RJ45 DB9 Female (T568B Spec.) Pins Pins Pins Wht/Grn... -
Page 18: Omntec
TXD 5 3 RXD -------------- Brown -------------- 8 (Wht) GND 8 5 GND 2.3.6.5 OPW EECO NeXGen (CH 2) RJ45 adapter to the OPW EECO #1500, 2000, 3000 (Part #N9396-ADP) NeXGen RJ45 EECO CAT 5 Cable Adapter RJ45 DB9 Male (T568B Spec.) -
Page 19: Incon Tank Sentinel
NeXGen Gilbarco/Bennett - Installation and Start Up Guide 2.3.6.6 Incon Tank Sentinel NeXGen (CH 2) RJ45 adapter to the Incon Tank Sentinel (Part #N9389-ADP) RJ45 NeXGen Incon/Comm 1 CAT 5 Cable Adapter RJ45 DB9 Male (T568B Spec.) Pins Pins... -
Page 20: Car Wash Communication
1 CTS 4 DCD 2.3.7.2 Ryko IV (S/N less than 166600), Unitec POS 4000, Portal Ti, Exacta & DRB NeXGen RJ45 adapter to the Ryko Code A Wash IV, Unitec POS 4000, Portal Ti, Exacta & DRB (Part #N9344-ADP) NeXGen... -
Page 21: Unitec Enterlink, Smart Terminal And Ryko Iv (S/N 166600 Or Greater)
NeXGen Gilbarco/Bennett - Installation and Start Up Guide 2.3.7.3 Unitec Enterlink, Smart terminal and Ryko IV (S/N 166600 or greater) NeXGen (CH 3) RJ45 adapter to the Unitec/Enterlink (Part #N9352-ADP) RJ45 NeXGen Enterlink CAT 5 Cable Adapter RJ45 DB9 Female (T568B Spec.) -
Page 22: Kesseltronics Advanced Dual Bay Via The Mux Pap Isolator Box
NeXGen Gilbarco/Bennett - Installation and Start Up Guide 2.3.7.5 Kesseltronics Advanced dual bay via the MUX PAP isolator box NeXGen (CH 3) RJ45 adapter to the Kesseltronics “Advanced Dual bay” via MUX PAP isolator box /DB9 (Part #N9352-ADP) RJ45... -
Page 23: Fuel Price Sign Communication
NeXGen Gilbarco/Bennett - Installation and Start Up Guide 2.3.8 Fuel Price Sign Communication The NeXGen controller uses an RS232 channel to interface to the Fuel Price Sign. 2.3.8.1 Daktronics Fuel Price Sign (Minimum version required is 5.8) NeXGen (CH-RS232) RJ45 adapter to the Daktronics Fuel Price Sign... -
Page 24: Skyline Fuel Price Sign
NeXGen Gilbarco/Bennett - Installation and Start Up Guide 2.3.8.4 Skyline Fuel Price Sign NeXGen (CH-RS232) RJ45 adapter to the Skyline Fuel Price Sign (Part #N9446-ADP) NeXGen RJ45 CAT 5 Cable Modular Jack RJ45 DB9 Male (T568B Spec.) Pins Pins... -
Page 25: Programming
NeXGen Gilbarco/Bennett - Installation and Start Up Guide 3 Programming 3.1 Gilbarco Addressing 3.1.1 Gilbarco CRIND Jumper Settings The following is a list of the jumper settings for the Gilbarco Advantage Series CRINDs. Jumper Description Setting Watchdog Installed JP14... -
Page 26: Gilbarco Distribution Box Jumper Settings
The NeXGen controller communicates with the Gilbarco dispensers and CRINDs via two wire communications and uses 45mA current loop ports. Channel 5 and Channel 6 on the NeXGen can each communicate with up to sixteen fueling positions. Channel 7 can communicate with up to 32 CRINDs. -
Page 27: Gilbarco Dispenser, Crind And Opw Opt Addressing
The NeXGen controller uses Channel 7 to communicate with the Gilbarco CRINDS. The CRIND device address must be one less than the fueling position number. The NeXGen controller uses channel 8 to communicate with the OPW OPT. Up to 16 OPT’s can be supported oftware Version 18.01A, or newer, must be installed. The and s OPT uses decimal address 32 –... -
Page 28: Gilbarco Blending Dispensers
NeXGen Gilbarco/Bennett - Installation and Start Up Guide 3.1.4 Gilbarco Blending Dispensers Gilbarco Variable Blenders The NeXGen interfaces to the following Gilbarco variable blenders: A variable blender without diesel, or 3+0, will have position 1, grade 1 on the left on both sides of the pump. - Page 29 NeXGen Gilbarco/Bennett - Installation and Start Up Guide Product to Position Mapping for Gilbarco Variable Blenders In the Gilbarco system, the product type to product # assignment can be in any order. For the 3+0 and 3+1 variable blenders, the following will be used:...
- Page 30 NeXGen Gilbarco/Bennett - Installation and Start Up Guide Model 3 + 1 Variable Blender The table below lists the proper product to position assignment for each blender type which is set via the POS fueling point configuration menu. The blender type setting is not used and should be set to zero (0).
-
Page 31: Gilbarco Security Module (Gsm) For Debit
NeXGen Gilbarco/Bennett - Installation and Start Up Guide 3.1.5 Gilbarco Security Module (GSM) for Debit The Gilbarco Security Module (GSM) must be ordered from Gilbarco for a specific network application. It should be configured by Gilbarco for the location. There are no switches or jumpers to be set. -
Page 32: Bennett Dispenser And Card Reader Addressing
NeXGen Gilbarco/Bennett - Installation and Start Up Guide 3.1.6 Bennett Dispenser and Card reader Addressing Channel (11) has been designated to communicate with the Bennett dispensers. This Channel can accommodate up to 16 fueling positions. The address of the first fueling position on Channel 15 will be set to address “1”, the second to address “2”... -
Page 33: Nexgen Parameters Values And Options
NeXGen Gilbarco/Bennett - Installation and Start Up Guide 3.2 NeXGen Parameters Values and Options The NeXGen configuration is provided and sent to the controller by the POS. The POS has to download all required parameters to the NeXGen. The controller will start polling the dispensers, CRINDs and other peripheral devices only after the POS has downloaded all necessary station configuration data. -
Page 34: Gilbarco Keypads
NeXGen Gilbarco/Bennett - Installation and Start Up Guide 3.3 Gilbarco Keypads Please note that the keypads listed below are predefined within the controller. All other keypad types can be configured via the POS to NeXGen interface using the “DPT Configure Keyboard” command. Type 1... - Page 35 NeXGen Gilbarco/Bennett - Installation and Start Up Guide Type 3 Outside Outside Debit Credit Inside Inside Cash Credit Receipt Clear Enter Help Cancel Type 4 Outside Inside Help Clear Enter Cancel Copyright 2018 by Allied Electronics, Inc. 3-11...
- Page 36 NeXGen Gilbarco/Bennett - Installation and Start Up Guide Type 5 “Info Screen (Virtual Pay Inside only) Type 6 “Info Screen (Virtual Pay inside Cash & Pay Inside Credit) Note: Outside Debit and Outside Cash is also supported Advantage with Monochrome...
- Page 37 NeXGen Gilbarco/Bennett - Installation and Start Up Guide Copyright 2018 by Allied Electronics, Inc. 3-13 October 18, 2018 Page...
- Page 38 NeXGen Gilbarco/Bennett - Installation and Start Up Guide Type 5 (Encore) Help Cancel Clear Enter Type 7 Pay Here Pay Inside Clear Enter Help Cancel Type 8 Cancel Clear Enter Copyright 2018 by Allied Electronics, Inc. 3-14 October 18, 2018...
- Page 39 NeXGen Gilbarco/Bennett - Installation and Start Up Guide Type 9 Pay Outside Credit Pay Outside Debit Pay Inside Cash Clear Enter Cancel Type A Outside Credit Inside Clear Enter Help Cancel Type B Outside Outside Debit Credit Inside Clear...
- Page 40 NeXGen Gilbarco/Bennett - Installation and Start Up Guide Copyright 2018 by Allied Electronics, Inc. 3-16 October 18, 2018 Page...
- Page 41 NeXGen Gilbarco/Bennett - Installation and Start Up Guide Type C Outside Credit Outside Inside Cash Clear Enter Help Cancel Type D Outside Outside Debit Credit Outside Inside Cash Clear Enter Help Cancel Type E Help Clear Enter Cancel Copyright 2018 by Allied Electronics, Inc.
- Page 42 NeXGen Gilbarco/Bennett - Installation and Start Up Guide Type F Outside Outside Debit Credit Inside Inside Credit Cash Cancel Help Clear Enter Type G Help Cancel Debit Clear Enter Copyright 2018 by Allied Electronics, Inc. 3-18 October 18, 2018...
- Page 43 NeXGen Gilbarco/Bennett - Installation and Start Up Guide Type H Soft Soft Left Right Soft Soft Left Right Customer Specific Prompts Soft Soft Left Right Soft Soft Left Right Cancel Re-print Receipt Clear Enter Copyright 2018 by Allied Electronics, Inc.
- Page 44 NeXGen Gilbarco/Bennett - Installation and Start Up Guide Type I Outside Credit Inside Inside Cash Credit Clear Enter Help Cancel Copyright 2018 by Allied Electronics, Inc. 3-20 October 18, 2018 Page...
- Page 45 NeXGen Gilbarco/Bennett - Installation and Start Up Guide Type J Soft Soft Left Right Soft Soft Left Right Customer Specific Prompts Soft Soft Left Right Soft Soft Left Right Cancel Re-print Receipt French English Clear Enter Copyright 2018 by Allied Electronics, Inc.
- Page 46 NeXGen Gilbarco/Bennett - Installation and Start Up Guide Type K (Soft keys Mirrored 1-4) Soft 1 (04) Soft 5 (08) Soft 2 (05) Soft 6 (09) Soft 3 (06) Soft 7 (0A) Soft 4 (07) Soft 8 (0B) Clear/No...
- Page 47 NeXGen Gilbarco/Bennett - Installation and Start Up Guide Type M Pay Outside Credit Pay Outside Debit Pay Inside Clear/ No Enter/ Yes HELP CANCEL Type N Outside Debit Outside Credit Inside Clear Enter Cancel Type O Pay Inside Clear...
- Page 48 NeXGen Gilbarco/Bennett - Installation and Start Up Guide Type P Inside Inside Cash Credit Outside Outside Credit Debit Clear Enter HELP CANCEL Copyright 2018 by Allied Electronics, Inc. 3-24 October 18, 2018 Page...
- Page 49 NeXGen Gilbarco/Bennett - Installation and Start Up Guide Type Q (EPP in T-DES - Graphics - Advantage and Encore 300 models) Notes: 1. Encrypting Pin Pads (EPP's) differ from other in the values that they return. 2. Column 4 does NOT exist on the physical keypad. It is included in this diagram only as a place holder.
- Page 50 NeXGen Gilbarco/Bennett - Installation and Start Up Guide Type S (EPP in S-DES – Graphics - Advantage and Encore 300 models) Notes: 1. Encrypting Pin Pads (EPP's) differ from other in the values that they return. 2. Column 4 does NOT exist on the physical keypad. It is included in this diagram only as a place holder.
- Page 51 NeXGen Gilbarco/Bennett - Installation and Start Up Guide Type U (EPP in T-DES – Graphics - Encore 500 models) Notes: 1. Encrypting Pin Pads (EPP's) differ from other in the values that they return. 2. Column 4 does NOT exist on the physical keypad. It is included in this diagram only as a place holder.
- Page 52 NeXGen Gilbarco/Bennett - Installation and Start Up Guide Type W (EPP in T-DES – Graphics - Encore 500 S ECIM models) Notes: 1. Encrypting Pin Pads (EPP's) differ from other in the values that they return. 2. Column 4 does NOT exist on the physical keypad. It is included in this diagram only as a place holder.
- Page 53 NeXGen Gilbarco/Bennett - Installation and Start Up Guide Type Y (EMV in S-DES – Compatible mode) Notes: 1. EMV returns different values for CANCEL and ENTER when in buffered mode. The keys in this table reflect the "normal" returns. CRIND code is responsible for handling the special case when in buffered...
- Page 54 NeXGen Gilbarco/Bennett - Installation and Start Up Guide Type a (EPP in S-DES – Graphics – Advantage and Encore 300 models w/o Auxiliary keys) Notes: 1. Encrypting Pin Pads (EPP's) differ from other in the values that they return.
- Page 55 NeXGen Gilbarco/Bennett - Installation and Start Up Guide Type c (CK Shell branded EPP with Auxiliary keys) Notes: 1. Encrypting Pin Pads (EPP's) differ from other in the values that they return. Debit Outside Clear Enter Help Cancel Type d...
- Page 56 NeXGen Gilbarco/Bennett - Installation and Start Up Guide Type e (S-DES UPT) Debit Credit Outside Outside Cash Credit Inside Inside Clear Enter Help Cancel Type f (T-DES UPT) Debit Credit Outside Outside Cash Credit Inside Inside Clear Enter Help Cancel Copyright ...
- Page 57 NeXGen Gilbarco/Bennett - Installation and Start Up Guide Type g Soft keys Reversed (5-8::1-4) Soft 1 (04) Soft 5 (08) Soft 2 (05) Soft 6 (09) Soft 3 (06) Soft 7 (0A) Soft 4 (07) Soft 8 (0B) Clear/No...
- Page 58 NeXGen Gilbarco/Bennett - Installation and Start Up Guide Type h (AN Support Req) Soft 1 (04) Soft 5 (08) Soft 2 (05) Soft 6 (09) Soft 3 (06) Soft 7 (0A) Soft 4 (07) Soft 8 (0B) Clear/No Enter/Yes...
- Page 59 NeXGen Gilbarco/Bennett - Installation and Start Up Guide Type j (T-DES UPT) Cancel Clear Enter Help Type k (T-DES UPT) Cancel Clear Enter Help Copyright 2018 by Allied Electronics, Inc. 3-35 October 18, 2018 Page...
-
Page 60: Bennett/Verifone Cat Keypads
NeXGen Gilbarco/Bennett - Installation and Start Up Guide 3.4 Bennett/Verifone CAT Keypads Type 1 Cancel Clear Help Clear Enter Enter Type 2 Copyright 2018 by Allied Electronics, Inc. 3-36 October 18, 2018 Page... -
Page 61: Peripheral Devices
3.5 Peripheral Devices 3.5.1 Tank Gauge Systems The NeXGen controller uses Channel 2 to interface to either the Veeder-Root tank gauge system or compatible system. The controller is connected to the serial board on a device and it may be connected to the DIM board on a TLS 350R. -
Page 62: Car Wash Controllers
9-pin DTE serial port, which is not the case for 6.1units. 3. The Ryko Code A Wash II will not work with the NeXGen system. It can be upgraded to a Code A Wash III. -
Page 63: Fuel Price Signs
NeXGen Gilbarco/Bennett - Installation and Start Up Guide 3.5.3 Fuel Price Signs The NeXGen controller supports the Future Media Display (FMD) protocol. The use of the FMD electronic price sign is configurable and can be mapped to an available serial RS232 port via the Allied Diagnostic (ANDI_DGS) utility.
Need help?
Do you have a question about the NeXGen and is the answer not in the manual?
Questions and answers