Table of Contents
Advertisement
Advertisement
Table of Contents

Related Manuals for MEDIZS Smart RK11


Summary of Contents for MEDIZS Smart RK11
- Page 2 MEDIZS reserves the right to make changes in its products or product specifications at any time and without prior notice, and is not required to update this documentation to reflect such changes.
-
Page 3: Table Of Contents
Contents Introduction and feature........................3 Safety information 2-1 Symbols marked on the Instrument ..................4 2-2 EU Countries ............................. 4 2-3 General Safety Information ......................5 Notes for using the instrument ......................7 Description 4-1 Front side of body ........................9 4-2 Back side of body........................ -
Page 4: Introduction And Feature
1. Introduction and feature RK 11 performs usual Refractometry and Keratometry. Also base curve of contact lens can be measured with this instrument. The main features of RK11 are as follows. 1. RK11 offers various measurement modes. 2. Because the RK11 covers a wide measurement range, from -30D to +22D, even an examinee with strong myopia can be measured. -
Page 5: Safety Information
2. Safety information 2-1 Symbols marked on the instrument Symbol Description TYPE B EQUIPMENT Protective earth (ground) Alternating current Attention, consult ACCOMPANYING DOCUMENTS Off (power: disconnect to the mains) On (power: connection to the mains) Do not throw away the waste to inappropriate place Manufacturer Authorized Representative in the European community Consult operating instructions... -
Page 6: General Safety Information
General safety information If you see any warnings or cautions printed on the warning labels, follow the safety instructions in this manual. Ignoring such cautions or warnings while handling the product may result in injury or accident. Be sure to read and fully understand the manual before using this product. - Page 7 In this case, just wait until condensation disappears before performing measurement. 3. This instrument is used with accessories from MEDIZS. If consumer would like to use the accessories from other manufactures, safety of accessories should be verified and identified by manufacturer or by MEDIZS.
-
Page 8: Notes For Using The Instrument
9. In case there is smoke, strange odor or noise on working, disconnect the power supply and consult the dealer. 10. Don’t use organic solution such as alcohol, thinner, benzene, etc. to clean the surface of this instrument. It may damage the instrument. 11. - Page 9 Printed data on thermal paper may be disappeared after a long time. After use 1. Cover up the instrument with dust cover and unplug if do not use long. 2. If the measurement window is not clean, wipe it with soft and dry cloth carefully to avoid any scratch.
-
Page 10: Description
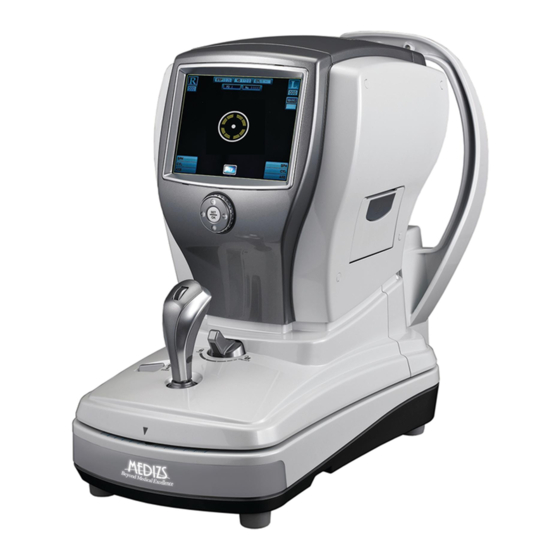
4. Description 4-1 Front side of body ① ② ③ ③ ④ ⑧ ④ ④ ⑤ ⑤ ⑤ ⑥ ⑤ ⑥ ⑦ ⑥ ⑦ ⑦ ⑦ ⑦ ⑥ ⑦ [Fig.1] Front side of body Name Description ① Monitor Monitor that displays Measurement ②... -
Page 11: Back Side Of Body
Wipe the forehead rest with ethanol or glutaraldehyde solution to disinfect it each time a different examinee uses it, in order to CAUTION prevent infection. Be sure to turn OFF the power switch before connecting or Disconnecting the cables. Also, do not handle them with wet hands. Otherwise, you may get an electric shock that may result in death or WARNING serious injury. -
Page 12: Bottom Side Of Body
4-3 Bottom side of body ① ⑥ ② ⑤ ③ ④ ⑥ [Fig.3] Bottom side of body Name Description ① Stage Clamping Bolt Makes the system stage fixed ②Power Switch Switch for turning power ON and OFF ③ Power IN LET Power IN LET ④RS-232 Connector Connect with external equipment... -
Page 13: Operation Buttons & Wheel
4-4 Operation Buttons & Wheel Function of each button could be changed in certain mode. Please refer to the each mode for details. WHEEL_LEFT WHEEL_RIGHT LEFT RIGHT DOWN [Fig.4] Operation Buttons & Wheel Main Function Description SET/OK Configure Operate Configure mode LEFT IOL mode ON/OFF RIGHT... - Page 14 Rotate the stage clamping bolt located in the bottom of body counterclock- wise and release. [Fig.5] [Fig.6] Rotate the stage holding lever to ‘UNFIXING’ direction. [Fig.6] [Fig. 7] push the stage to right side and then fasten the stage fixing knob by rotating it clockwise.
-
Page 15: Practicing By Model Eye
5-5 Check setting Please check the information such as VD, CYL format, SPH/CYL step, VD form KER unit, KER index, date, etc on the measure screen and setting mode. 5-6 To connect with other equipment This equipment is able to transfer test results other equipments. Consult with the dealer for details. - Page 16 6-5 Adjust the height and focus on the model eye 1. Adjust the height of the model eye. (Support the height auto tracking.) Adjust the height of the model eye to match with measurement window by using chinrest up/down button. ...
- Page 17 Move the Operation Lever to arrow direction (right side or left side) Move the Operation Lever backward and forward to find the focus of ring. Three colors of circles appear on the screen. When circle is yellow, it means focused, orange and white circles mean defocused.
- Page 18 6-7 Print Pressing the Print (DOWN) button, printing on the paper. After printing, former measurement results will be cleared automatically when staring next measurement. NOTE Record on thermal paper can be spoiled by heat. And Printed data on paper will be disappeared as time goes by. If the result should be kept in NOTE long period, please copy the result.
-
Page 19: Measurement
7. Measurement 7-1 REF mode Refractometry can be performed on REF mode. ▣ Operation Buttons & Wheel functions in REF mode Function Description SET/OK Configure Operate Configure mode LEFT IOL mode ON/OFF RIGHT Auto/Manual Select auto/manual measurement Result Display measurement result DOWN Print Print measurement result... - Page 20 lever, adjust the height until examinee’s eye is aligned with the mark on side of head rest. Keep hand or fingers out of under chin rest. Could damage and injured. CAUTION 4. Positioning and Focusing Move control lever (to left/right side) to make center of examinee’s pupil (bright dot) locate in the targeting mark ...
- Page 21 Repeated measurement ① Press the Measure Button. Please take care not to move focusing and measurement point. (In AUTO mode, automatically measured when focused well) ② Every time user performed the measurement, latest result is displayed on the screen. ③...
-
Page 22: Ker Mode (Keratometry Mode)
7-2 KER mode The radius of corneal curvature is measured on KER mode. ▣Operation Buttons & Wheel functions in KER mode Function Description SET/OK Configure Operate Configure mode LEFT RIGHT Auto/Manual Select auto/manual measurement Result Display measurement result DOWN Print Print measurement result WHEEL_LEFT Mode Select... -
Page 23: Rk Mode (Continuous Keratometry And Refractometry Mode)
Press Result(UP) button and then measurement result is displayed on the screen (maximum 10 results). 6. Printing Press the Print(DOWN)button and then measurement data will be printed. 7-3 RK mode RK mode performs Refractometry and Keratometry at the same time. ▣Operation Buttons &... -
Page 24: Pk Mode (Peripheral Keratometry Mode)
DOWN Print Print measurement result WHEEL_LEFT Mode Select Select measurement mode WHEEL_RIGHT Mode Select Select measurement mode 1. Rotate the Operation Buttons & Wheel until RK mode is displayed on the screen. 2. Check whether RK mode is displayed on the screen. 3. - Page 25 (SUP), bottom side from the center of cornea (INF), from the center of cornea to the temple of examinee, and from the center of cornea to the nose of examinee. Measurement sequence is ‘CENTER SUP INF TEM NAS’. ▣Operation Buttons &...
- Page 26 time, indicator lamp lights up to lead examinee’s eye. After finishing the measurement, value and direction of each periphery are displayed on the screen. Direction of periphery - Superior(SUP) : upside from the center of cornea - Inferior(INT) : bottom side from the center of cornea - Nasal(NAS) : From the center of cornea to the nose of examinee.
- Page 27 7. Re-measuring ① If the measurement was failed or re-measurement is needed, user can switch measurement location by pressing LEFT or RIGHT button. ② If the periphery mark was filled, it means that former measurement result exists. 8. Measuring another eye ...
-
Page 28: Clbc Mode (Contact Lens Base Curve Mode)
▣Operation Buttons & Wheel functions in CLBC mode Function Description SET/OK Configure Operate Configure mode LEFT RIGHT Result Display measurement result on the screen DOWN Print Print measurement result WHEEL_LEFT Mode Select Select measurement mode WHEEL_RIGHT Mode Select Select measurement mode 1. - Page 29 Contact Lens 3. Put model eye on the chinrest. Please take care not to drop the contact lens. 4. Adjust the height and focus of model eye. Refer to section 6 ‘Practicing by Model Eye’. 5. After focusing, press the Measure Button. 6.
-
Page 30: Iol Measuring Mode
7-6 IOL measuring mode Measure with IOL (LEFT) button when check IOL operated patient or crystalline are blurred like cataract patient. If such eye is measured with turning on IOL, it can make less errors. 1. Mode selection ① Rotate the Operation Buttons & Wheel until REF or RK mode is displayed. ②... -
Page 31: Size Mode (Cornea Size Measuring Mode)
7-7 SIZE mode Diameter of Iris or Pupil is measured in SIZE mode (Step: mm). ▣Operation Buttons & Wheel functions in SIZE mode Function Description SET/OK Configure Operate Configure mode LEFT RIGHT DOWN Print Print measurement result WHEEL_LEFT Mode Select Select measurement mode WHEEL_RIGHT Mode Select... - Page 32 ▣Operation Buttons & Wheel functions in SIZE measurement mode Function Description SET/OK Select ruler Select left or right ruler LEFT RIGHT DOWN WHEEL_LEFT Move ruler Move 1 step of selected ruler WHEEL_RIGHT Move ruler Move 1 step of selected ruler On SIZE measurement mode, 2 rulers (one on left side and another one on right side of screen) are displayed on the screen.
-
Page 33: Other Modes
Maximum 2 times measurement per each eye is available. If measurement was performed 2 times, average value will be displayed. Measure another eye with same method. Printing Press the Print(DOWN) button and then measurement data will be printed. 8. Other modes 8-1 Result mode (Seeing measurement result screen) Show saved measurement result on LCD screen. -
Page 34: Configure Mode
Set various options such as measuring, printing, system and etc. ▣Operation Buttons & Wheel functions in Configure mode Function Description SET/OK Exit Exit from Configure mode LEFT Page Select Select the page RIGHT Page Select Select the page Item select Select the item DOWN Item select... - Page 35 Choose the volume of sound. Cylinder Format Choose indication type of Cylinder value and form. Print Type STANDARD : Print all data. AVERAGE : Print average value only. OFF : Turn off printing function Eye Image Set print image option: print image of emmetropia/hyperopia/myopia ...
- Page 36 Auto Start MANUAL/ AUTO Repeat 1/3/5/7 Fogging 1 Time / Always Vertical Tracking VD Choose Vertex Distance. Cylinder Format Choose indication type of Cylinder value and form. Step Choose measurement data units. Kerato Unit Choose indication type of Keratometry. ...
- Page 37 3. System Configure Option Value Key Volume 0 ~ 10 Screen Saver 0/3/5/10(min) Date Format YMD/DMY/MDY Set Date 2011/06/23 Time Format 12H/ 24H Set Time AM 06 : 00 : 00 Brightness 0~10 Serial Baud Rate 9600 / 57600 / 115200 Factory Default Language English/Spanish/Korean...
- Page 38 Set current date. Time Format Choose indication type of time. SET TIME Set current time. Brightness Select the brightness of LCD screen. Serial Baud Rate Choose serial communication speed with other equipment. Factory Default Reload the factory data. (Initialize Configure data) ...
- Page 39 4. Printer Configure Option Value Print Number ON/OFF Print Type STANDARD/AVERAGE/OFF Eye Image ON/OFF Clear Data ON/OFF Message Print Number Choose the option concerning the number of printing. ON : Print the number of printing. OFF : Don’t print the number of printing. ...
- Page 40 Message If you set your message, it is printed bottom of paper. ♧How to set message♧ Select Message Option and press the SET/OK button. As below Set Message Box appears. You can set message with the Operation Buttons & wheel. To select a letter, use Wheel and set with SET/OK button.
-
Page 41: External Video Display
5. Information Option Value Model No. RK-11 Serial No. K1----- Version 1.00.-----r Model No.: Model number Serial No. : Show serial number of the instrument. Version : Show software version. 8-3 External Video Display RK11 supply RK image display function on external monitor. Connect RK11 and external monitor with external video connector, then user can check the image on external monitor. -
Page 42: Self Inspection And Maintenance
bigger than before. 9. Self Inspection and Maintenance 9-1 Before calling Service Person Warning message will be displayed on the monitor if some problems occur. It might be operation errors or problems of the instrument. In this case, refer the following instructions. -
Page 43: Cleaning
Examinee has strong irregular astigmatism Impossible to measure or corneal disease. The minimum pupil diameter that can be When the pupil is measured is 2.0mm. Although it is possible smaller than the to measure in the bright place, don’t outer alignment expose examinee’s eyes to the direct mark. -
Page 44: Replacement Of Paper
1. Replacement of printing paper Replace the roll of printing paper if the red line appears on the paper, or if ‘NO PAPER’ message is displayed on the screen. ① Open the printer cover by pushing cover open button on right side of body. ②... - Page 45 section , contact the distributor for repair. Please refer to the name plate and system information on Configure menu, and then let us have the following information: 1. Information Serial Number Name of the instrument : RK-11 Serial number : 7-digit characters indicated on the name plate ...
-
Page 46: Specifications
11. Specifications Refractometry SPH (Sphere power) -30.00 ~ +22.00D CYL (Cylinder power) 0.00 ~ +/-10.00D AXIS 1 ~ 180° VD (Vertex Distance) 0.0, 10.0, 12.0, 13.5, 15.0 PD (Pupil Distance) 10 ~ 85mm Minimum Pupil Diameter Ø2.0mm Keratometry Corneal Power 33.00 ~ 67.50D Corneal Astigmatism 0.00 ~ -15.00D... -
Page 47: Components
12. Components ① ② ③ ④ ⑤ ⑥ ⑦ Description Quantity 1. Power cable 2. Operation manual 3. Model eye 4. Printing paper 2 Rolls About 100 5. Chin rest paper sheets 6. Dust cover 7. Fuse...
Need help?
Do you have a question about the Smart RK11 and is the answer not in the manual?
Questions and answers