Table of Contents
Advertisement
Quick Links
Advertisement
Table of Contents
Troubleshooting

Related Manuals for J.A. Woollam alpha-SE

Summary of Contents for J.A. Woollam alpha-SE
- Page 1 ® Spectroscopic Ellipsometer Hardware Manual...
- Page 3 The contents of this manual are subject to change without notice and do not constitute a commitment on the part of J.A. Woollam Co. Every effort has been made to ensure the accuracy of this document. However, due to ongoing product improvements and revisions, J.A. Woollam Co.
-
Page 5: Table Of Contents
Operating Hardware ....................3-12 3.5. Activating the Software ..................3-13 3.6. Connecting the alpha-SE ..................3-13 Verifying the alpha-SE Driver Installation ............. 3-14 3.7. Running the CompleteEASE Software ..............3-15 3.8. Learning Data Analysis ..................3-16 Initial System Checks and Calibration 4.1. - Page 6 7.5. Manual Translation ....................7-7 7.6. QCM Adaptor ......................7-8 Service and Troubleshooting 8.1. Lamp Change Procedure ..................8-9 8.2. Upgrading CompleteEASE ..................8-10 8.3. Troubleshooting Guide ................... 8-10 Creating a Debug file....................8-12 iv Contents alpha-SE Hardware Manual...
- Page 7 Additional References ....................9-7 9.2. Conventions Used in this Manual ................9-7 Tabs .......................... 9-8 Screen Panels ......................9-8 Buttons ........................9-8 9.3. Short-cut Guide ......................9-9 9.4. Contacting J.A. Woollam Co.................. 9-11 Index Contents v alpha-SE Hardware Manual...
-
Page 9: Safety Instructions
Never look into a tip of an optical fiber. Never look directly at an operating lamp, severe eye injury may result. Wear UV protective lenses, such as a welder’s helmet, when working around operating lamps. Safety Instructions 1-1 alpha-SE Hardware Manual... -
Page 10: Environmental Operating Range
Wear face protection, such as a full-face shield, gloves and a long sleeve shirt whenever handling lamps. 1.3. Environmental Operating Range Temperature: 10°C to 35°C Humidity: 20% to 80% (non-condensing) 1-2 Safety Instructions alpha-SE Hardware Manual... -
Page 11: Quick Guide
Ellipsometer (SE) system. This manual will help with system installation, alignment, calibration, and basic data collection procedures. You should also receive the CompleteEASE Software Manual, which covers data analysis. Feel free to contact J.A. Woollam Co. or your local representative (see Section 9.4) with any questions. 2.1. - Page 12 Chapter 9: Appendices. The appendices include additional information for your reference, including short-cut guide, overview of spectroscopic ellipsometry, and contact details for J.A. Woollam Co. and our world-wide network of representatives. Chapter 10: Index. 2-2 Quick Guide alpha-SE Hardware Manual...
-
Page 13: Quick Setup
Connecting alpha-SE: Connect the vacuum, power, and USB cables and turn on the alpha-SE power. If this is a new computer, the alpha-SE USB drivers will be installed. It is now time to start the CompleteEASE software (Section 3.7) by double-clicking the icon on the Windows desktop. The software will initiate communication with the alpha-SE instrument and test motors. -
Page 14: Check The Beam And Calibrate The System
While at the Straight-Through position, check the signal intensity, per Section 4.3. The alpha-SE maintains its calibration through sensors on each of the optical elements. Thus, it should be able to collect data directly out-of- the-box. However, to improve accuracy, especially upon first installation, it is preferred to perform baseline measurements that correct for any subtle changes in the system. -
Page 15: Collect Data
The system is now ready for measurements. 4. Collect data The alpha-SE is easy to operate. From the Measurement Tab, you can set the measurement mode, sample alignment, angles of incidence, and model. For most measurements, choose Standard mode, Standard Sample Alignment, the Off-Sample angles, and “none”... -
Page 17: System Installation
Dispersion layers: Cauchy, General Oscillator, Effective Medium Approximation (EMA), and B-Spline. Layer “Parameterization” feature to convert dispersion layer types. Support for backside layers and depolarization modeling for films on glass. System Installation 3-1 alpha-SE Hardware Manual... -
Page 18: Facilities Requirements
3.2. Facilities Requirements Facilities requirements for the alpha-SE system are listed in Table 3-1 and the system dimensions are given in Figure 3-1. As shown in Figure 3-2, the preferred clear work area is 20 by 18 inches (500 by 460 mm), excluding the operator computer. -
Page 19: Unpacking The Hardware
Figure 3-3. Finally, remove the alpha-SE ellipsometer and position it on your clear 20” by 18” (510 by 460 mm) workspace. The alpha-SE should only be lifted by its handles as shown in Figure 3-3. -
Page 20: Attaching The Sample Chuck
You will need a #2 Phillips screwdriver for this step. Following the details shown in Figure 3-4, install the sample chuck: 1) Align the pins on the bottom of the sample chuck with the receptacles on the alpha-SE base. 2) Tighten the upper two captive thumb screws. 3) Use the Phillips screwdriver to tighten the lower two captive screws. -
Page 21: Releasing The Z-Stage Shipping Lock
The shipping lock will move about 1/3” [8mm] to the right. When finished, rotate the lamp/shipping lock access door to the closed position and hand-tighten the captive screw. System Installation 3-5 alpha-SE Hardware Manual... - Page 22 Figure 3-5. Open access door to lamp/shipping lock. Figure 3-6. Instructions for releasing the shipping lock. 3-6 System Installation alpha-SE Hardware Manual...
-
Page 23: Installing The Software
The software must be installed and activated on the computer before connecting the USB cable. If the computer was purchased from J.A. Woollam Co. at time of alpha-SE purchase, the software should already be installed and activated. Skip to Section 3.5. - Page 24 NOTE: For alpha-SE systems, the CD or USB provided with the tool will automatically install the calibration and configuration files for your specific instrument from the “CNF” directory. If your system was shipped with a computer, this was done at the factory. If your files...
- Page 25 Figure 3-7. License Agreement for CompleteEASE. Figure 3-8. Default (recommended) folder location for CompleteEASE installation. System Installation 3-9 alpha-SE Hardware Manual...
- Page 26 3-10. If you choose, a short-cut icon (Figure 3-12) will be placed on the Windows Desktop to start the CompleteEASE program. However, do NOT start CompleteEASE until following the system connection instructions. The software installation process should take less than two minutes on most computers. 3-10 System Installation alpha-SE Hardware Manual...
- Page 27 Repair File Permissions is only needed if recent computer activity (such as upgrading the operating system) has changed the CompleteEASE files to “read-only”. This setting will change all the files associated with CompleteEASE back to full-access. System Installation 3-11 alpha-SE Hardware Manual...
-
Page 28: Operating Hardware
If you will be operating hardware with CompleteEASE, it requires the configuration files for your instrument. These are provided with the installation CD that accompanies each instrument. Most alpha-SE installation CDs will automatically add these drivers and configuration files. If upgrading to a newer version of CompleteEASE, the configuration files should already be installed from the factory and do not require any additional efforts. -
Page 29: Activating The Software
The vacuum pump will need to be turned on before mounting samples. Turn on the power to the alpha-SE unit by pressing the green power switch. If the switch does not “light up”, check the power connections. -
Page 30: Verifying The Alpha-Se Driver Installation
Figure 3-14. Message displayed in Windows 7 when alpha-SE is initially connected to computer. Verifying the alpha-SE Driver Installation To verify the proper installation of the alpha-SE drivers, open the Windows “Device Manager”. For Windows 7, right-click on the “Computer” icon on the desktop or in the Start menu and choose “Properties”... -
Page 31: Running The Completeease Software
Figure 3-16. Verify listing shows “alpha-SE Ellipsometer”. 3.7. Running the CompleteEASE Software Turn the alpha-SE power switch on, and start the CompleteEASE program by double-clicking the “CompleteEASE” icon on the Windows Desktop. The software will automatically begin initializing the alpha-SE hardware and the status of initialization process will be displayed in the System Status section of the screen. -
Page 32: Learning Data Analysis
CompleteEASE program. You can also access this manual by pressing F1 key. For a hard-copy of the latest CompleteEASE manual (nearly 400 pages), as shown in Figure 3-18, please contact J.A. Woollam Co. Figure 3-18. Cover of CompleteEASE data analysis manual (for ver. 4.63) 3-16 ... -
Page 33: Initial System Checks And Calibration
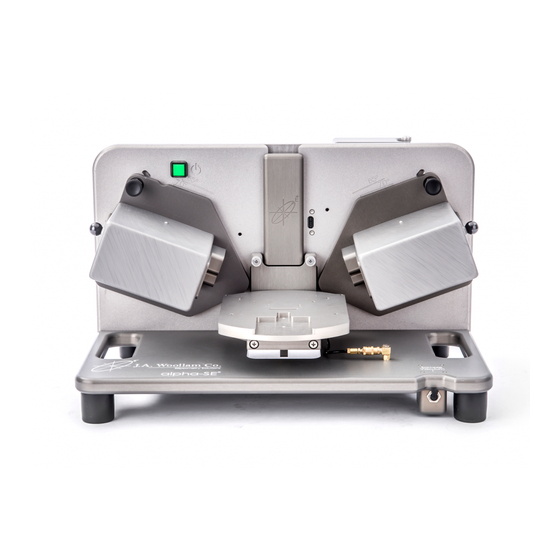
The chapter concludes with power-down procedures. 4.1. Initial System Operation alpha-SE System Components The various components of the alpha-SE system are named as shown in Figure 4-1. These names will be used throughout this chapter. Initial System Checks and Calibration 4-1 alpha-SE Hardware Manual... -
Page 34: Changing The Angle Of Incidence (Aoi)
Incidence. Changing the Angle of Incidence (AOI) The alpha-SE can perform measurements at 65°, 70°, and 75° (“Off-Sample” configuration), and at 90° (“Straight-Through” configuration). To change angle, pull out and hold Source side AOI Indexer (see Figure 4-3). Lift the Source side using the support knob (see Figure 4-2) until the top edge of the Source side is lined up with the engraved angle marker (see Figure 4-4). - Page 35 AOI slot. You should not be able to move the Source or Detector side up or down after the AOI Indexer is released. Figure 4-3. Changing the Angle of Incidence (AOI) of the alpha-SE system. Initial System Checks and Calibration 4-3 alpha-SE Hardware Manual...
-
Page 36: Checking Beam Alignment At 90
Verify that the beam is centered on the detector unit aperture when the alpha-SE system is in the “Straight-Through” or 90° configuration, as shown in Figure 4-5. If the system is not set to 90°, pull out the “AOI Indexer”... -
Page 37: Checking Signal Intensity
Figure 4-5. Verifying that the beam is centered on the detector aperture with the alpha-SE system in the “Straight-Through” configuration. 4.3. Checking Signal Intensity With the alpha-SE base in the Straight-Through (90°) position (as in Figure 4-5), click Hardware>‘Max. Sig. Display’. The CompleteEASE screen should appear similar to that shown in Figure 4-6. -
Page 38: Checking Straight-Through Se Data Accuracy
Ellipsometer accuracy is verified on a known sample. However, due to the high sensitivity of SE measurements to surface conditions and film changes, the most stable reference is air. For air measurement, the alpha-SE should achieve the following accuracy specifications over 95% of the measured spectral range: ... -
Page 39: Measuring The Reference Wafer
Mean Squared Error (MSE) as a test of whether the alpha-SE data is correct. We can also check the angle offset to make sure the angle of incidence is correctly calibrated. - Page 40 Figure 4-10, then click ‘Measure’ to begin the measurement. If the alpha-SE angle is not set to the correct angle of incidence (as determined by magnetic sensors), you will be prompted to move to the correct angle, as shown in Figure 4-11.
- Page 41 CompleteEASE screen, quantifies how well the model data “fits” or “matches” the experimental data. The lower the MSE value, the better the data fit. If the MSE for alpha-SE measurements of the 25nm calibration Initial System Checks and Calibration 4-9...
-
Page 42: S-T Baseline
3, then the alpha-SE system is acquiring accurate Off- Sample SE data. The Angle Offset is applied during the fit in case the actual angle does not precisely match the current nominal angle designation (see Angle Calibration for more details). - Page 43 ‘S-T Baseline’ button (Figure 4-13). Figure 4-13. S-T Baseline button. If the alpha-SE senses that the arms are not located in the correct position, you will see the message shown in Figure 4-14. Figure 4-14. Set the base to Straight-Through position before proceeding with S-T Baseline.
-
Page 44: Off-Sample Baseline
Mueller-matrix or Intensity measurements at this same angle, ii) if the angle of incidence has been moved and current angle is uncertain, or iii) after first setting up or moving the alpha-SE. The new baseline will store current Intensity data, which should be stable for up to an hour, depending on fluctuations or “warm-up”... - Page 45 Off-Sample intensity data. Note: When SE data are collected, Intensity data are also collected. They can be plotted in the graph, but are not Initial System Checks and Calibration 4-13 alpha-SE Hardware Manual...
-
Page 46: Calibrating The Angle Of Incidence
0.02° or better. Thus, the angle does not need to be recalibrated for standard ellipsometry measurements unless the alpha-SE has just been moved or installed, or after mounting the sample chuck. The following procedure is used to calibrate the angle of incidence for all three Off-Sample positions. - Page 47 After completing all three angles of incidence, the angle offsets should be correctly calibrated and saved for future measurements. Initial System Checks and Calibration 4-15 alpha-SE Hardware Manual...
- Page 48 4-25. The resulting angle offset is now in the low third decimal place. In practice, the “Angle Correction” can be considered successful if the angle offset for a follow-up measurement is within ± 0.02°. 4-16 Initial System Checks and Calibration alpha-SE Hardware Manual...
- Page 49 Figure 4-24. Measurements collected after Angle Offsets are calibrated will show the corrected angle of incidence. Note that all three angles shown for this measurement are over a tenth of a degree from their nominal positions. Initial System Checks and Calibration 4-17 alpha-SE Hardware Manual...
-
Page 50: Powering Down
Graph Legend. 4.9. Powering Down The alpha-SE system can be left on continuously if desired. However, the Quartz-Tungsten-Halogen (QTH) lamp has a rated lifetime of 1500 hours. To maximize lamp life, turn off the system when not in use for extended periods of time. -
Page 51: Data Collection
5.1. Measurement Tab Overview The Measurement tab for an alpha-SE will appear as in Figure 5-1. Figure 5-1. Measurement tab for alpha-SE systems. Camera panel only available if optional camera was purchased with the system. Data Collection 5-1 alpha-SE Hardware Manual... - Page 52 Three of these options provide a drop-down menu, as shown in Figure 5-2. Table 5-1 provides details for each of these choices. Figure 5-2. Options for measurement Mode, Sample Alignment, and Model. Table 5-1. Measurement Settings for an alpha-SE. Category Option...
-
Page 53: Off-Sample Measurements
The most common measurements with an alpha-SE involve collecting SE data from reflection Off-Sample. Measure one, two, or all three angles (65°, 70°, and 75°) within a single measurement procedure. The alpha-SE stores calibration information and does not need to be calibrated before typical operation. - Page 54 Figure 5-5. The model parameters will be reported in the Measurement>Fit Results: panel, while a graph of Psi and Delta versus wavelength are displayed at the bottom of CompleteEASE – along with corresponding Fit curves from the model. 5-4 Data Collection alpha-SE Hardware Manual...
-
Page 55: Straight-Through Measurements
Figure 5-5. Successful measurement of thin oxide film using an alpha-SE system. 5.3. Straight-Through Measurements Note: Straight-Through measurements are used for measuring i) transmission intensity data on samples with transparent substrates or ii) retardance of birefringent samples. Straight-Through measurements on the alpha-SE are performed by placing the Source and Receiver Units at 90°... - Page 56 Figure 5-6. Measurement settings for Transmission Intensity measurement. Note ‘Mode’ = Transmission. When finished, data will show in the graph panel. An example of transmitted Intensity through a Chromium coated glass substrate is shown in Figure 5-7. 5-6 Data Collection alpha-SE Hardware Manual...
-
Page 57: Mueller-Matrix Measurements
Mueller-matrix Measurements Mueller-matrix measurements can be acquired in reflection Off-Sample or in transmission via the Straight-Through configuration on an alpha-SE. Because Mueller-matrix measurements probe the anisotropic nature of a material, they can be useful when studying a variety of advanced thin films and substrates. - Page 58 12 measured Mueller-matrix elements can be graphed. An example of transmitted Mueller-matrix elements through an anisotropic plastic is shown in Figure 5-11. Figure 5-10. Menus for selecting Mueller-matrix Data Graphs. 5-8 Data Collection alpha-SE Hardware Manual...
- Page 59 Figure 5-11. Mueller-matrix elements measured through an anisotropic plastic sheet. Data Collection 5-9 alpha-SE Hardware Manual...
-
Page 61: Hardware Tab
6. Hardware Tab The Hardware tab for an alpha-SE is shown in Figure 6-1. This tab consists of multiple panels: Hardware, Signal, Calibration, Show Logs, Camera (optional), and Routine Test Measurement.. A brief description of all commands within this tab is provided. -
Page 62: Signal
The black dashed curve is a polynomial fit to the measured profile, and the reported “MSE=” value quantifies the symmetry of the profile. If the MSE value is greater than 0.02, contact your J.A. Woollam Co. representative. 6-2 Hardware Tab... -
Page 63: Calibration
This option also calibrates and stores the angle of incidence which is used for subsequent measurements. Because this baseline is angle dependent, the best Intensity and Mueller-matrix data follow an Off-Sample Baseline at the angle of incidence intended for measurement. Hardware Tab 6-3 alpha-SE Hardware Manual... -
Page 64: Angle Offsets
Angle Offsets Spectroscopic Ellipsometry is very sensitive to angle of incidence for a measurement. While the nominal angles for the alpha-SE are 65°, 70°, and 75°, the actual machined angles can vary from these values by tenths of a degree. Thus, it is very critical that the actual angles are calibrated to ensure accurate ellipsometry analysis. -
Page 65: Camera
6.5. Camera The camera is an optional accessory for the alpha-SE that may or may not have been purchased with your system. See Section 7.2 for more details. Show Image Dialog Click “Show Image Dialog” to open the camera image. -
Page 66: Mark Beam Position
This process can be repeated as many times as necessary. When finished, click ‘Close’, and the software will recall this marked location. 6-6 Hardware Tab alpha-SE Hardware Manual... -
Page 67: Illumination On
Routine test measurements can be used to monitor the stability of the tool using the 25nm calibration wafer. Note: For this feature to be useful, it is important to always use the same sample for the measurements. Hardware Tab 6-7 alpha-SE Hardware Manual... -
Page 68: Measure
The CompleteEASE software determines the hardware configuration based on the “cnf” files that are located in the C:\CompleteEASE\cnf folder. These files may include the following: hardware.cnf Describes the hardware configuration and options available with the current system. 6-8 Hardware Tab alpha-SE Hardware Manual... -
Page 69: Privileges.cnf
System Calibrations and Baseline measurements. Motorinfo.cnf Saves information regarding the calibrated angle of incidence for alpha-SE. CompleteEASE.cnf and CompleteEASEhard.cnf Configuration files for user settable software and hardware parameters. These parameters are accessed by choosing ‘Edit Configuration’ button from the Options tab (see Figure 6-11). -
Page 71: Accessories
The focus probes included with this system are designed to decrease the spot size of this alpha-SE from approximately 3 by 9 mm to 0.3 by 1 mm. They can be used to target a specific area of the sample or to reduce the effect of backside reflections. -
Page 72: How To Test Focus Probe Alignment
SE. There should be no gap between the probe and the system arm. Wipe off the mating surfaces of the probes and the alpha- SE. Dust or debris can become stuck under the probe, causing it to mount incorrectly. 7-2 Accessories alpha-SE Hardware Manual... -
Page 73: Aligning Focus Probes
If not, the lens of the focus probe may be adjusted. To adjust the focus, first loosen the set screw on the lens tube and slide it to minimize the spot size. Accessories 7-3 alpha-SE Hardware Manual... -
Page 74: Camera
7.2. Camera The camera is an optional accessory for the alpha-SE which can be used to view the light beam location or patterned features on samples. The actual light beam will not appear on smooth, specular surfaces, but the location 7-4 ... -
Page 75: Installation
The field of view is approximately 10 mm x7 mm and camera view is integrated within CompleteEASE. Figure 7-6. alpha-SE with optional camera accessory. Installation Installation of the camera is simple. Align the Camera Mounting Plate to the Z-Stage Post and slide down until fully seated. -
Page 76: Liquid Cell
Hardware tab, as described in Section 6.5. 7.3. Liquid Cell The alpha-SE liquid cell is used to measure samples under liquid ambient. It has 500 μL capacity and is designed for glass slides and 1” or 2” wafers 7-6 Accessories... -
Page 77: Transmission Mount
(other sample sizes may be accommodated, contact J.A. Woollam Co. for details). Instructions for the alpha-SE liquid cell are contained in a supplemental manual. Figure 7-10. alpha-SE with optional liquid cell accessory. 7.4. Transmission Mount The transmission mount is used to hold samples vertically for normal incidence transmission measurements. -
Page 78: Qcm Adaptor
D and Cell provided by Q-Sense. The QCM Adaptor should be installed similarly to the standard stage as described in Chapter 3, section “Attaching the Sample Chuck”. Figure 7-13. alpha-SE with optional QCM adaptor plate and QCM-D from Q-Sense. 7-8 Accessories alpha-SE Hardware Manual... -
Page 79: Service And Troubleshooting
Seat the lamp firmly into the holder. 5. Connect the white electrical connector. 6. Close the lamp access door. Turn on the alpha-SE power and start the CompleteEASE software. Allow lamp to warm up. 7. Check the Straight-Through beam alignment and intensity, as described in Sections 4.2 and 4.3. -
Page 80: Upgrading Completeease
Upgrading CompleteEASE If your software is newer than version 4.47, simply run the setup program and follow the on-screen prompts, as described in Section 2.4. If your software is older than version 4.47, contact J.A. Woollam Co. for instructions. Note:... - Page 81 Table 8-1. Potential alpha-SE problems and error messages. PROBLEM SOLUTION “Calibration data does Error: Copy the MOTORINFO.cnf, alpha-Cal.cnf, not match current and Hardware.cnf files from the cnf folder system" of the CompleteEASE directory on the original installation CD into the C:\CompleteEASE\cnf directory.
-
Page 82: Creating A Debug File
Woollam Co. representative to aid in debugging problems with your alpha- SE system. Note: The Debug File packages all hardware and software configuration files, along with the current Error Log into a single ZIP file. 8-12 Service and Troubleshooting alpha-SE Hardware Manual... -
Page 83: Appendices
This optical measurement technique, commonly used to determine thin film thickness and optical constants, is discussed briefly in this section. In addition, the alpha-SE can collect Intensity measurements and Mueller-matrix measurements, which are also discussed briefly. Ellipsometry is a non-destructive optical technique in which the sample to be characterized is illuminated with a beam of polarized light, as shown in Figure 9-1. -
Page 84: Ellipsometry Advantages
Intensity measurements relate the amount of light reflecting or transmitting from a surface to the incident light intensity. The alpha-SE software represents this as a ratio from 0 (no light) to 1 (all of the light). The Intensity... -
Page 85: Mueller-Matrix Measurements
Thus, SE measurements are the standard measurement used by alpha-SE. However, the alpha-SE is also able to collect the more general Mueller- matrix measurement when handling samples that may be anisotropic or depolarizing or both. -
Page 86: Determining Sample Properties (Data Analysis)
CompleteEASE or find the PDF from the C:\CompleteEASE folder after installation on your computer. Film Thickness Spectroscopic Ellipsometry is commonly used to measure both the film thickness and refractive index for transparent films. As the film thickness 9-4 Appendices alpha-SE Hardware Manual... - Page 87 As the thickness (T) increases, the interference oscillations shift toward longer wavelengths. In addition, the shape of the interference oscillations is dependent on the film index of refraction. Figure 9-4. Interference oscillations in SE data will shift as thickness increases. Appendices 9-5 alpha-SE Hardware Manual...
-
Page 88: Ultra-Thin Films (<10Nm)
A large index difference will reflect more light at the interface. Alternately, the optical constants can be described using the complex dielectric constant, given as: 9-6 Appendices alpha-SE Hardware Manual... -
Page 89: Additional References
H. Fujiwara, Spectroscopic Ellipsometry Principles and Applications John Wiley & Sons, West Sussex, England 2007. J.N. Hilfiker and J.A. Woollam, Ellipsometry, in Encyclopedia of Modern Optics, edited by Robert D. Guenther, Duncan G. Steel and Leopold Bayvel, Elsevier, Oxford, 2004. -
Page 90: Tabs
CompleteEASE software. Tabs When the software is used with an alpha-SE system, there are typically four Tabs, as shown across the top of the software screen: Measurement, Analysis, Hardware, and Options. Tabs will be written in bold and italics. -
Page 91: Short-Cut Guide
Graph the “N” data curves (N,C,S format) CTRL+C Graph the “C” data curves (N,C,S format) CTRL+S Graph the “S” data curves (N,C,S format) CTRL+1 Graph the <e1> data curves CTRL+2 Graph the <e2> data curves Appendices 9-9 alpha-SE Hardware Manual... - Page 92 Show graph statistics CTRL+ALT+SHIFT+I Add the In Situ Tab SHIFT+Mouse roller When positioned over model parameter, it will increase or decrease this parameter. CTRL+SHIFT+Mouse Same as SHIFT-Mouse roller, but with roller smaller parameter increments. 9-10 Appendices alpha-SE Hardware Manual...
-
Page 93: Contacting J.a. Woollam Co
9.4. Contacting J.A. Woollam Co. J.A. Woollam Co. 645 M Street, Suite 102 Lincoln, NE 68508 USA PH: 402-477-7501 FX: 402-477-8214 sales@jawoollam.com or support@jawoollam.com www.jawoollam.com Germany & Europe Japan China LOT-QuantumDesign GmbH J.A. Woollam Japan Genuine Optronics Ltd. Im Tiefen See 58... - Page 94 9-12 Appendices alpha-SE Hardware Manual...
-
Page 95: Index
Optical Constants · 9-6 Ellipsometry Advantages · 9-2 Error Log · 6-4 Park Z-Stage · 6-1 Powering Down · 4-18 Facilities Requirements · 3-2 Privileges.cnf · 6-9 Film Thickness · 9-4 Focusing · 7-1 Index 1 alpha-SE Hardware Manual... - Page 96 Unpacking · 3-3 Sample Chuck · 3-4 Screen Panels · 9-8 SETUP Program · 3-7 Shipping Lock · 3-5 Short-cuts · 9-9 Z-Stage Scan · 6-2 Show Image Dialog · 6-5 Signal · 6-2 2 Index alpha-SE Hardware Manual...
Need help?
Do you have a question about the alpha-SE and is the answer not in the manual?
Questions and answers