
Related Manuals for Thermics DURAN 2T Series


Summary of Contents for Thermics DURAN 2T Series
- Page 1 Use and maintenance manual DURAN 2T Reversible heat pump with inverter technology EN-GB Translation of the Original Instructions Rev. 0.0...
- Page 2 Dear Customer, Thank you for choosing a Thermics energie machine, an innovative, modern and quality product that will ensure your well-being, silence operation and safety for a long time. This instruction manual contains important indications and suggestions that must be observed in order to make the installation and use of the machine as easy as possible.
-
Page 3: Table Of Contents
CONTENTS Introduction 1.1 Purpose of the manual 1.2 Symbols 1.3 General warnings Safety regulations 2.1 General safety rules 2.2 Security pictograms Declaration of conformity 3.1 Standards 3.2 Declaration of conformity (facsimile) Machine features 4.1 Range 4.2 Machine identi cation 4.3 Machine description 4.4 Operating principle 4.5 Machine components 4.6 Overall dimensions... - Page 4 6.1 Recommended equipment 6.2 System inspection 6.3 Veri cation of functional spaces 6.4 Unit positioning 6.5 Noise control 6.6 Where not to install 6.7 Recommendations and suggestions 6.8 Access to internal parts 6.9 Hydraulic diagrams 6.10 Machine connections 6.11 Hydraulic connection 6.12 Connecting the condensate drain 6.13 Power supply connection 6.14 Duct characteristics...
- Page 5 Demolition and disposal Accessories Technical speci cations 12.1 Duran 8 2T - Duran 12 2T 12.2 Duran 15 2T- Duran 20 2T 12.3 Duran 25 2T - Duran 30 2T 12.4 Operating conditions 12.5 Consumptions Attachments...
-
Page 6: Introduction
Introduction Purpose of the manual The purpose of this manual is to provide the customer with all the information necessary to use and operate the machine correctly, independently and safely. The manual contains information on the safety, technical aspects, operation, maintenance and transport of the following machines: DURAN 2T - Reversible heat pump with inverter technology Correct use and maintenance contribute to good operation and a longer life cycle of the machine. - Page 7 Con dentiality The technical information (texts, drawings and illustrations) contained in this manual is the property of THERMICS and must be treated as con dential. It is strictly forbidden to disclose, reproduce or translate, even partially, this document without the written permission of THERMICS.
-
Page 8: Symbols
Symbols For the safety of persons and property, a special symbol has been used in this documentation to allow readers to focus on hazardous conditions, warnings or relevant information: DANGER! PAY UTMOST ATTENTION TO THE TEXT BLOCKS MARKED WITH THIS SYMBOL. Danger with risk of injury or death. -
Page 9: General Warnings
General warnings 1.3.1 Allowed use • Please read this booklet carefully. • The documentation supplied with the unit must be handed over to the owner who must keep it carefully for future maintenance or servicing. • The company shall not be liable for any damage to persons, animals or property arising from installation, adjustment and maintenance mistakes, improper use or a partial or super cial reading of the information provided herein;... - Page 10 1.3.3 User information • Keep this manual and the wiring diagram in a place accessible to the operator. • Note down the unit's identi cation data so as to provide it to the service centre in the event of a service request (see section "Machine identi cation"). •...
-
Page 11: Safety Regulations
Safety regulations DANGER! The machine has been designed and built according to appropriate safety standards. Before using the machine, carefully follow all the precautions and instructions provided in the manual to avoid accidents. General safety rules The use of products that use electricity and water involves compliance with certain basic safety rules such as the ones provided below: •... -
Page 12: Security Pictograms
Security pictograms 1 Electricity hazard 2 Sharp object hazard... -
Page 13: Declaration Of Conformity
Declaration of conformity Standards The machine complies with the following standards: • Low Voltage Directive: 2014/35/EU • Electromagnetic Compatibility Directive EMCD: 2014/30/EU • The Pressure Equipment Directive PED: 2014/68/EU (module A) • The RoHS directive on the restriction of the use of certain hazardous substances in EEE: 2011/65/EU •... -
Page 14: Declaration Of Conformity (Facsimile)
Declaration of conformity (facsimile) The EC declaration of conformity, supplied with the machine, is the document by which the Manufacturer certi es, under its own responsibility, to comply with the European Directives, standards and technical speci cations (indicated in the declaration itself) necessary for the machine to comply with the essential requirements for marketing and use in the European Union. - Page 15 The declaration regarding the amount and type of refrigerant in non-hermetically sealed equipment provides essential information on the type and amount of refrigerants contained in most of the non- hermetically sealed equipment listed in the THERMICS ENERGIE catalogue. This declaration provides all the information necessary for including the equipment in the uorinated gases database.
-
Page 16: Machine Features
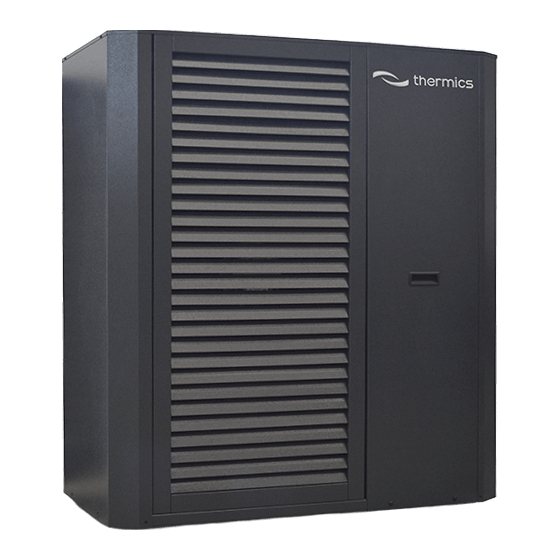
Machine features Range The DURAN 2T heat pump units are designed for applications using radiant panel heating systems or low temperature applications such as suitably dimensioned fan-coil, thermal ventilation and AHUs for delivery temperatures of 50°C. All versions are equipped with extremely silent EC axial fans and Twin Rotary inverter compressors that allow the complete power management of each single component. -
Page 17: Machine Identi Cation
Machine identi cation The equipment is identi ed by: • Packing plate (A). It provides the equipment identi cation data. • Nameplate (B). Applied to the machine, it shows the technical and performance data of the equipment. In case of loss or deterioration, request a duplicate to the Technical Customer Service. DANGER! The tampering with, removal and deterioration of the identi cation plates make it dif cult to install, maintain the system and request spare parts. -
Page 18: Machine Description
Machine description • The structure is made of thick galvanised sheet metal painted with epoxy powders. The panels of the compressor compartment are totally soundproofed by means of a sheet with high soundproo ng characteristics. The compressor compartment is accessible via removable front panels. -
Page 19: Machine Components
Machine components DURAN 8 KW 2T MB System heat exchanger System side circulator Safety valve Inverter board Air vent Liquid receiver Hot gas injection solenoid valve Bi ow lter External sensor Cycle reversing valve LP service outlet, HP transducer Electronic expansion valve HP transducer, HP service outlet, safety pressure switch Differential pressure switch... - Page 20 DURAN 12 kW 2T MB Safety valve System side circulator Air vent Inverter board Hot gas injection solenoid valve Liquid receiver External sensor Bi ow lter LP service outlet, HP transducer Cycle reversing valve HP transducer, HP service outlet, safety pressure switch Electronic expansion valve Compressor...
- Page 21 DURAN 15 kW 2T MB - DURAN 20 kW 2T MB Compressor Cycle reversing valve Outdoor air probe Electronic expansion valve Safety pressure switch Inverter HP transducer Bi ow lter HP service outlet System plate heat exchanger Reactor Air vent Liquid receiver Differential pressure switch LP service outlet...
- Page 22 DURAN 25 kW 2T MB - DURAN 30 kW 2T MB Fans Compressor Inverter Reactor Expansion valve Differential pressure switch Bi ow lter Hot gas injection solenoid valve Air vent LP service outlet Cycle reversing valve LP transducer System heat exchanger Outdoor air probe Liquid receiver Safety pressure switch...
-
Page 23: Overall Dimensions
Overall dimensions VERALL DIMENSIONS DURAN 12 kW 4T MB 1288 1135 DURAN 15 kW 4T MB 1290 1537 DURAN 20 kW 4T MB 1290 1537 DURAN 25 kW 4T MB 1690 1907 DURAN 30 kW 4T MB 1690 1907... -
Page 24: Reception And Handling
Reception and handling Handling with packaging The machine is supplied on wooden pallets protected by cardboard packaging. WARNING! Use spacers to avoid damage to the machine. WARNING! The machine is supplied with the vibration dampers already installed; handle the unit carefully to avoid damaging them. - Page 25 Lifting with forks • Insert the forks from the side so as not to damage the panels. Lifting with crane • Position the lifting belts as shown in the gure.
-
Page 26: Veri Cation Of Packaging
Veri cation of packaging Before accepting the received goods, please check that: • the machine has not been damaged during transportation; • the material delivered corresponds to that indicated on the transport document by comparing the data with the packing plate. In case of damage or faults: •... -
Page 27: Packaging Content
Packaging content HE STANDARD SUPPLY INCLUDES Heat pump Technical documentation WARNING! Keep the manual in a dry place, to avoid deterioration, for at least 10 years for future reference. -
Page 28: Removing The Packaging
Removing the packaging • Cut the xing straps. • Remove the top part by lifting it upwards. • Remove any protective inserts. • Remove the transparent lm that wraps the machine. -
Page 29: Handling Without Packaging
Handling without packaging Use handling equipment suitable for the machine weight. DANGER! The unit is supplied with the vibration dampers already installed; handle the unit carefully to avoid damaging them. DANGER! Use spacers to prevent damage to the unit. -
Page 30: Mounting
Mounting Recommended equipment To install the machine it is advisable to use the following equipment: • set of cross-head and slotted screwdrivers; • cutting nippers; • scissors; • set of open end wrenches and pipe wrenches; • ladder; • hydraulic material for sealing the threads; •... -
Page 31: System Inspection
System inspection DANGER! Current regulations require the heating system to be inspected before commissioning. The inspection must be carried out by a quali ed technician. Fill in the following check list on the installation data: YSTEM Description Notes Signature Date □... -
Page 32: Veri Cation Of Functional Spaces
Veri cation of functional spaces The installation of the machine must allow specialised and authorised personnel to easily perform maintenance activities while respecting both the safety distances between the units and the other equipment and the technical spaces indicated in the table. DURAN 8 kW 2T MB 2000 DURAN 12 kW 2T MB... -
Page 33: Unit Positioning
Unit positioning The vibration dampers (1) are supplied fully screwed in. • To adjust the height of the vibration dampers (1) turn counterclockwise (A) to raise the angle. DANGER! Check that the table supports the machine weight. -
Page 34: Noise Control
Noise control During installation, take into account the effect that the position of the machine will have on the noise emitted. Position the machine as far away from walls as possible. The noise level increases according to the place of installation as illustrated below: Module positioned against a wall: +3 dB(A) Module positioned in a corner: +6 dB(A) Module positioned in a con ned indoor space: +9 dB(A) -
Page 35: Recommendations And Suggestions
Recommendations and suggestions In order to limit acoustic disturbances and vibrations, we suggest that you do the following: • Install the module outdoors on a metal frame or on an inertia base. The weight of this base must be at least twice the weight of the module. •... -
Page 36: Access To Internal Parts
Access to internal parts DANGER! Before removing the side panels, make the hydraulic connections. DANGER! When removing the Control Panel dashboard, pay attention to the connection cable. To access the internal parts, remove the panel of the concerned area (A-B): •... - Page 37 • disengage the panel (2) by sliding it downwards (C); • if necessary, remove the upper panel (4) by loosening its retaining screws;...
- Page 38 • once panel (1) has been removed, it is possible to access the electrical panel (5); • remove the panel (6) of the electrical panel (5) by loosening the screws (7).
-
Page 39: Hydraulic Diagrams
Hydraulic diagrams System side hydraulic connections EY TO HYDRAULIC CONNECTIONS Connections by the manufacturer System ow Connections by the installer System return line EY TO HYDRAULIC CONNECTIONS Vent valve Safety valve Expansion vessel Temperature probe Shut-off cock 10 Discharge Mesh lter 11 Differential pressure switch Drain cock 12 Circulation pump... -
Page 40: Machine Connections
6.10 Machine connections System outlet System inlet Cable glands Condensate drain... - Page 41 6.10.1 Propylene glycol solution ROPYLENE GLYCOL SOLUTION Data ERCENTAGE OF PROPYLENE GLYCOL BY WEIGHT 0.99 0.985 0.98 0.97 0.965 1.02 1.04 1.075 1.11 1.14 1.07 1.11 1.18 1.22 1.24 • cPf: Cooling capacity correction factor • cQ: Flow rate correction factor •...
-
Page 42: Hydraulic Connection
6.11 Hydraulic connection DANGER! The pipes must be installed in accordance with the prevailing standards and directives. • The machine can operate at a maximum return temperature of 55°C and at a heat pump outlet temperature of 65°C on the system side. •... -
Page 43: Connecting The Condensate Drain
6.12 Connecting the condensate drain The condensate water tank (1) collects and eliminates most of the condensate water produced by the heat pump (2). WARNING! For the heat pump to function, the condensate water must be regularly removed and the condensate water drain must be correctly positioned so as not to damage the house. - Page 44 6.12.1 Condensation water diversion • If the house has a cellar, the stone box (3) must be positioned so that the condensate water does not affect the house. Alternatively, the stone box (3) can be placed directly under the heat pump (2). •...
- Page 45 6.12.3 Drain into the gutter pipe • The outlet of the condensate water pipe (4) must be located at a depth protected from frost. • Direct the tube downwards. • The condensate water pipe (4) must be equipped with a siphon (5) to prevent air circulation inside the pipe.
-
Page 46: Power Supply Connection
6.13 Power supply connection • Connect the cable to the terminals inside the electrical panel by passing it through the appropriate cable glands located on the lower part of the panel. • Refer to the attached wiring diagrams for connections. •... - Page 47 DANGER! After about 10 minutes of heat pump operation, make sure that the screws on the power supply terminal block are tightened. WARNING! Check the connections, the main voltage and the phase voltage before starting the machine to avoid damage to the electronics of the air/water heat pump. 6.13.1 Duran 8 2T connections ONNECTIONS...
- Page 48 USE PROTECTION TERMINAL BLOCK Fan protection fuse Protection fuse for system circuit circulator Auxiliary circuit protection fuse 230 V Auxiliary circuit protection fuse 230 V Auxiliary circuit protection fuse 230 V Auxiliary circuit protection fuse 24 V SER TERMINAL BLOCK Unit power connections NC: Normally closed contact for alarm signalling NO: Normally open contact for alarm signalling...
- Page 49 6.13.2 Duran 12 2T connections ONNECTIONS Connector B A2 - Compressor inverter Connector C QM1- Compressor thermal-magnetic Connector D circuit breaker Fuse terminal blocks (FU1...FU7) User terminal blocks Connector A...
- Page 50 USE PROTECTION TERMINAL BLOCK Fan protection fuse Protection fuse for system circuit circulator Protection fuse for High temperature/DHW circuit circulator Auxiliary circuit protection fuse 230 V Auxiliary circuit protection fuse 230 V Auxiliary circuit protection fuse 24 V Auxiliary circuit protection fuse 230 V SER TERMINAL BLOCK Unit power connections NC: Normally closed contact for alarm signalling...
- Page 51 6.13.3 Connections for Duran 15 2T - Duran 20 2T - Duran 25 2T - Duran 30 2T ONNECTIONS Connector B A2 - Compressor inverter Connector C QM1- Compressor thermal-magnetic Connector D circuit breaker Fuse terminal blocks (FU1...FU7) User terminal blocks Connector A USE PROTECTION TERMINAL BLOCK Fan protection fuse...
- Page 52 SER TERMINAL BLOCK Unit power connections NC: Normally closed contact for alarm signalling NO: Normally open contact for alarm signalling C: Contact power supply Settable multifunction input. Domestic hot water storage probe DHW heating element enable (230 V - 1 A max) 3-Way valve enable (230 V - 1 A max) Unit display connection (A4)
-
Page 53: Duct Characteristics
6.14 Duct characteristics Gas separator System circulator Compressor 4-way valve Temperature probe Liquid receiver Pressure transducer Hot gas injection valve Filling valve Dehydrator lter High pressure switch Electronic expansion valve System heat exchanger Finned heat exchanger... -
Page 54: Commissioning
Commissioning Preliminary checks • Check the availability of diagrams and manuals of the installed machine. • Check the availability of wiring and hydraulic diagrams of the system to which the machine is connected. • Make sure the machine is placed on a perfectly level surface. •... -
Page 55: Use
Control panel The control panel consists of a display and programming keys. It illuminates in the presence of alarm states. Alarms Press the button to display the type of alarm or to reset it. Allows you to access the programming pages or read the Programming parameters. -
Page 56: Display
Display ii / ii / ii ii : ii SET2 -28.9 °C OFFbyALRM ISPLAY DESCRIPTION Operating information Shortcut menu ON-OFF unit menu. Setpoint setting and setpoint 2 activation menu. Operating mode change menu: heating, cooling and domestic hot water only. Unit information display. - Page 57 ISPLAY DESCRIPTION Operating modes (heating, cooling and DHW). Operation in DHW production mode. Operation in system heating mode. Operation in system cooling mode. Operation in DHW priority in heating mode. Operation in DHW priority in cooling mode. Defrost function active. Drip function active.
-
Page 58: Access Levels
Access levels It has 3 consultation and programming levels: CCESS LEVELS To start/stop the unit, program the setpoints, activate/deactivate the most common functions, Without password change the season and refer to the active setpoints and the main temperatures detected. To check the unit's programming, change With User password (Default: “2345”) date and time, activate a time, daily, annual programming and make some simple settings. -
Page 59: Procedures
Procedures 8.4.1 Machine start-up The machine must be started up for the rst time by personnel authorised by the manufacturer. Set the QF main differential switch located outside the machine to the OFF position. Set any remote ON/OFF switch to OFF. Remove the front panel rst, then the electrical panel. - Page 60 8.4.4 Starting Press the keys to select the ON/OFF menu. Press the key to select ON (1). Press the key to return to the main page. Press the key to move to the "operating mode" menu. Use the keys to select the desired operating mode: summer, winter and DHW only.
- Page 61 8.4.6 Switching off Press the keys to select the ON/OFF menu. Press the key. Press the keys to move to OFF. Press to con rm. 8.4.7 Setting the setpoints Press the keys to select the "setpoint settings" menu. Press to con rm. The "Qb01"(3) screen displays the winter setpoints "Set"...
- Page 62 8.4.8 Boost coil activation (optional) Press the keys to select the "coil" menu (4). Press the key. Press the key to select ON. 21/08/19 10:28 28.9 °C OFFbyKEYB 8.4.9 Boost coil deactivation (optional) Press the keys to select the "coil" menu. Press the key.
- Page 63 Press the key to change the month and then the year. Move the cursor back to the "time" eld by pressing Press the keys to change the hour. Press the key to change the "minutes" eld. Press the key again to move the cursor to the screen header line where you can select other items from the "programming"...
- Page 64 8.4.14 Program activation System program: Press the key. Enter the user password (see paragraph “8.4.3 Entering the password”). Press the key to enter the "programming" menu. Press the keys to select "I. Time Program” Menu "Fc001": Press the key to enter the "Fc001" menu. Press the key again to move the cursor to the time program enable parameter for the "Heating/Cooling"...
- Page 65 IMPORTANT You can set the DHW program (from menu "Fc005" to menu "Fc008") by following the procedures of the system program (menu "Fc001" corresponds to menu "Fc005", "Fc002" to "Fc006", etc.). 8.4.15 Logout After entering a password (user password or maintainer password) you can exit the programming change status with the "logout"...
-
Page 66: Parameter List: User Menu
Parameter list: User menu U.M. ISPLAY DESCRIPTION EFAULT Qa001 Unit Power On/Off System heating setpoint System heating standard setpoint °C 30.0 10.0 50.0 Qb01 System heating setpoint 2 °C 35.5 10.0 50.0 DHW setpoint DHW standard setpoint °C 48.0 10.0 55.0 Qb02 DHW setpoint 2... -
Page 67: Parameter List: Programming Menu
Parameter list: programming menu 8.6.1 Adjustment U.M. ISPLAY DESCRIPTION EFAULT System System pump operating hours 999999 Maintenance hour threshold (in thousands) Aa001 Reset of system pump hour count System pump request -999.9 999.9 Inverter system pump manual mode Minimum setpoint temperature in cooling °C 10.0 -99.9... - Page 68 U.M. ISPLAY DESCRIPTION EFAULT Enabling start PID control Adjustment water temperature °C -999.9 999.9 System adjustment request -100.0 100.0 Aa009 Start PID proportional band °C 12.0 999.9 Start PID integral time Sec. 65535 Start PID derivative time Sec. Enabling operation PID control Adjustment water temperature °C -999.9...
- Page 69 U.M. ISPLAY DESCRIPTION EFAULT Enabling compressor start by FALSE advanced antifreeze request Advanced antifreeze setpoint (with °C -999.9 AFreezeSetP unit off) Advanced antifreeze differential (with °C 15.0 99.9 unit off) Aa022 Maximum duration of the AFreezeHeat_Adv condition (in Min. minutes) Time interval between two consecutive AFreezeHeat_Adv conditions (in Min.
- Page 70 U.M. ISPLAY DESCRIPTION EFAULT DHW start ow alarm delay Sec. Ab008 DHW operation ow alarm delay Sec. 0: ON REQUEST- 1:Unit On-2: Always Ab009 active Compressor start delay with DHW Sec. pump ON Ab010 DHW pump stop delay with Sec. compressor OFF DHW pump request in case of DHW_...
- Page 71 U.M. ISPLAY DESCRIPTION EFAULT Unit info Qc001 Requests Qc002 System circuit information Qc003 DHW circuit information Qc004 Cooling circuit information Qc005 Compressor status Qc006 Electronic expansion valve status Qc010 Source information Qc011 Defrosting information Qc019 SHW coil status Qc020 System program status Qc021 DHW programme status Other information after pressing...
- Page 72 8.6.4 Coil U.M. ISPLAY DESCRIPTION EFAULT Compressor coil Setpoint on: °C Off differential °C Accumulation coil D0001 Setpoint on: °C Off differential °C System coil Enabled FALSE Off differential °C D0007 Enabling DHW coil TRUE DHW coil Hours of activation 999999 Maintenance check threshold 999999...
- Page 73 U.M. ISPLAY DESCRIPTION EFAULT Source Fan management (0=Independent; TRUE 1=Common) Fan operating hours 999999 Fan maintenance threshold E0003 Fan inverter request Fan operating hour counter reset 100.0 Fan inverter manual mode Reference temperature threshold for -5.0 -999.9 999.9 cold climates Minimum fan speed in cooling mode 10.0 100.0...
- Page 74 U.M. ISPLAY DESCRIPTION EFAULT 0: None; 1: Temp. Evap.; 2: Outdoor temperature; 3: Evap. Temp. & Press. Defrost warning based on evaporation E0026 temperature Defrost warning based on outdoor temperature Hot gas defrosting Hot gas defrosting setpoint °C -999.9 999.9 Hot gas defrosting setpont hysteresis °C -999.9...
- Page 75 U.M. ISPLAY DESCRIPTION EFAULT Maximum compressor speed during E0035 80.0 999.9 defrosting Minimum compressor speed during E0036 40.0 999.9 defrosting Management of the compressor after E0037 the post-defrost phase (0: Compressor FALSE Off, 1: Compressor On) E0038 EEV valve force during defrosting FALSE E0039 Enable integration coil during defrosting...
- Page 76 8.6.7 Settings U.M. ISPLAY DESCRIPTION EFAULT Date and Time Date format (0: DDMMYY; 1: MMDDYY; 2: YYMMDDD) mont Month Year Ha001 Hour Minutes Min. Seconds 1 - Monday; 2 -Tuesday; 3 - Wednesday; 4 - Thursday; 5 - Friday; 6 - Saturday; 7 - Sunday Time zone Ha002 Update time zone...
-
Page 77: Alarms And Signals
Alarms and signals 8.7.1 Alarm indication LEDs The red LED under the button may be: • Off: no active alarm. • Flashing: at least one active alarm. • On: at least one active alarm and the display shows an alarm mask. 8.7.2 Alarm masks Pressing the... - Page 78 the mask shows the alarm code (3) in ascending order. Each alarm contains the information necessary to understand the possible causes of the problem: alarm number / total alarms (4); alarm code (3); date and time of alarm activation (5); alarm description (6);...
-
Page 79: Alarm Log
Alarm Log From the main menu, by entering the "Alarm history" menu you can access the following alarm log display mask: Data logger Record: 01 AL173 09:28 15/05/15 Circuit 1 HP alarm by pressure switch Start Event: 20.18 Condensing t. 26.04 Discharge t. -
Page 80: Alarm List
8.10 Alarm list ESCRIPTION FFECTS AL000 Unit - Prototype operation alarm Auto reset Unit switching off AL001 Unit - Remote conn. alarm User reset Unit switching off AL002 Unit - Permanent memory writing error User reset Information purpose only AL003 Unit - Memory writing error User reset Information purpose only... - Page 81 ESCRIPTION FFECTS Auto reset up to AL023 Unit - Source generic alarm 3 times in one Unit switching off hour AL024 Unit - DHW pump maintenance Auto reset Information purpose only AL025 Unit - DHW pump unit alarm User reset DHW circuit switching off Auto reset up to Unit - DHW circuit ow failure alarm...
- Page 82 ESCRIPTION FFECTS Cooling circuit 1 Compressor envelope - AL103 Auto reset Circuit 1 switching off Low pressure difference Cooling circuit 1 Compressor envelope - AL104 Auto reset Circuit 1 switching off Low discharge pressure Cooling circuit 1 Compressor envelope - AL105 Auto reset Circuit 1 switching off...
- Page 83 ESCRIPTION FFECTS Cooling circuit 1 Inverter - Motor PTC AL130 Auto reset Power+ switching off overtemperature Cooling circuit 1 Inverter - Module IGBT AL131 Auto reset Power+ switching off error AL132 Cooling circuit 1 Inverter - CPU error Auto reset Power+ switching off Cooling circuit 1 Inverter - Default AL133...
- Page 84 ESCRIPTION FFECTS Cooling circuit 1 BLDC - Pressure difference AL155 Auto reset Power+ switching off greater than the allowed value at the start Cooling circuit 1 - Evaporation Auto reset up to 3 AL159 Circuit 1 switching off temperature antifreeze alarm times in one hour Cooling circuit 1 - Compressor 1 AL160...
- Page 85 ESCRIPTION FFECTS Cooling circuit 2 Compressor envelope - AL199 Auto reset Circuit 2 switching off High suction pressure Cooling circuit 2 Compressor envelope - AL200 Auto reset Circuit 2 switching off Low compression ratio Cooling circuit 2 Compressor envelope - AL201 Auto reset Circuit 2 switching off...
- Page 86 ESCRIPTION FFECTS Cooling circuit 2 Inverter - Drive AL226 Auto reset Power+ switching off undertemperature Cooling circuit 2 Inverter - HW AL227 Auto reset Power+ switching off overcurrent Cooling circuit 2 Inverter - Motor PTC AL228 Auto reset Power+ switching off overtemperature Cooling circuit 2 Inverter - Module IGBT AL229...
- Page 87 ESCRIPTION FFECTS Cooling circuit 2 Inverter - Unexpected AL251 Auto reset Power+ switching off shutdown AL252 Cooling circuit 2 BLDC - Failed start User reset Power+ switching off Cooling circuit 2 BLDC - Pressure difference AL253 Auto reset Power+ switching off greater than the allowed value at the start Auto reset up to Cooling circuit 2 - Evaporation...
- Page 88 ESCRIPTION FFECTS Cooling circuit 1 Power+ AL315 Cooling circuit 1 - Safety alarm 108 Auto reset switching off Cooling circuit 1 Power+ AL316 Cooling circuit 1 - Safety alarm 109 Auto reset switching off Cooling circuit 1 Power+ AL317 Cooling circuit 1 - Safety alarm 110 Auto reset switching off Cooling circuit 1 Power+...
- Page 89 ESCRIPTION FFECTS Cooling circuit 1 Power+ AL338 Cooling circuit 1 - Safety alarm 215 Auto reset switching off Cooling circuit 1 Power+ AL339 Cooling circuit 1 - Safety alarm 216 Auto reset switching off Cooling circuit 2 Power+ AL340 Cooling circuit 2 - Safety alarm 101 Auto reset switching off Cooling circuit 2 Power+...
- Page 90 ESCRIPTION FFECTS Cooling circuit 2 Power+ AL361 Cooling circuit 2 - Safety alarm 206 Auto reset switching off Cooling circuit 2 Power+ AL362 Cooling circuit 2 - Safety alarm 207 Auto reset switching off Cooling circuit 2 Power+ AL363 Cooling circuit 2 - Safety alarm 208 Auto reset switching off Cooling circuit 2 Power+...
-
Page 91: Maintenance
Maintenance Preliminary warnings WARNING! All ordinary and extraordinary maintenance operations must be carried out by quali ed personnel. DANGER! It is recommended to disconnect the power supply before carrying out any work on the unit. WARNING! It is forbidden to ll the cooling circuits with a refrigerant other than that one speci ed on the identi cation plate. -
Page 92: Routine Maintenance
Routine maintenance • Maintenance is essential to keep the unit in perfect working order and ef cient in terms of energy saving. • A maintenance plan is recommended, with annual frequency, including the following operations and checks: • Water circuit lling. •... -
Page 93: Faults, Causes And Solutions
Faults, causes and solutions U/I/A AULT AUSE OLUTION Lack of voltage Check for voltage Check upstream safety systems Main switch in pos. OFF Set to ON Remote switch in OFF position Set to ON The heat pump Control panel in OFF position Set to ON does not start Main switch in OFF position... - Page 94 U/I/A AULT AUSE OLUTION Outside temperature below Check operating limits Low system inlet water temperature Check in summer mode Low suction pressure (less than Check and if necessary replace Abnormal fan operation 3.5 bar) the component Drain cooling circuit Check for leaks and re ll Finned heat exchanger clogged or Check frozen...
-
Page 95: Demolition And Disposal
Demolition and disposal This mark indicates that the product must not be disposed of with other household waste throughout the EU. To avoid any damage to the environment or human health caused by incorrect disposal of electrical and electronic waste (WEEE), please return the device using the appropriate collection systems or by contacting the dealer from whom the product was purchased. -
Page 96: Accessories
Accessories • Condensate tank coil. • Aesthetic grid. • Finned exchanger protection grid. • Soundproo ng kit. • External control expansion. • Puffer probe. • DHW coil. • Case coil kit. • Diverter valve kit (230 V). • Hot gas injection solenoid valve. •... -
Page 97: Technical Speci Cations
Technical speci cations 12.1 Duran 8 2T - Duran 12 2T Unit Duran 8 2T Duran 12 2T L x H x P 1135x688x545 1135x1288x545 Dimensions Refrigerant R410a Compressor type Twin Rotary Number of compressors Number of fans Electrical power supply V/Ph/Hz 230 - 1 - 50 Water connection diameter... - Page 98 A7/W45 UMMER OPERATION Sizes Unit Duran 8 2T Duran 12 2T 100% kW 8.19 11.91 Heat output 66% kW 5.07 7.42 33% kW 2.37 3.59 Compressor power input 100% kW 2.04 3.07 3.75 3.57 Water ow rate (system) 1.41 2.05 System side Useful head 5.50...
- Page 99 A35/W7 UMMER OPERATION Sizes Unit Duran 8 2T Duran 12 2T 100% kW 7.54 10.90 Cooling capacity 66% kW 4.75 6.85 33% kW 2.24 3.32 Compressor power input 100% kW 1.85 2.81 3.79 3.55 Water ow rate (system) 1.30 1.89 System side Useful head (system) Air ow rate...
-
Page 100: Duran 15 2T- Duran 20 2T
12.2 Duran 15 2T- Duran 20 2T Unit Duran 15 2T Duran 20 2T Dimensions L x H x P 1537x1290x546 Refrigerant R410a Twin Rotary Compressor type Number of compressors Number of fans Electrical power supply V/Ph/Hz 400-3-50 Water connection diameter 1”1/4 Sound power dB(A) - Page 101 A7/W45 UMMER OPERATION Sizes Unit Duran 15 2T Duran 20 2T 100% kW 14.27 18.39 Heat output 66% kW 9.41 11.52 33% kW 4.54 5.58 Compressor power input 100% kW 3.60 4.55 3.63 3.69 Water ow rate (system) 2.45 3.16 System side Useful head 5.60...
- Page 102 A35/W7 UMMER OPERATION Sizes Unit Duran 15 2T Duran 20 2T 100% kW 12.83 16.89 Cooling capacity 66% kW 8.45 10.65 33% kW 4.07 5.28 Compressor power input 100% kW 3.29 4.20 3.54 3.64 Water ow rate (system) 2.21 2.91 System side Useful head (system) Air ow rate...
-
Page 103: Duran 25 2T - Duran 30 2T
12.3 Duran 25 2T - Duran 30 2T Unit Duran 25 2T Duran 30 2T Dimensions L x H x P 1907x1690x646 Refrigerant R410a Compressor type Twin Rotary Number of compressors Number of fans Electrical power supply V/Ph/Hz 400-3-50 Water connection 1”1/2 diameter Sound power... - Page 104 A7/W45 UMMER OPERATION Sizes Unit Duran 25 2T Duran 30 2T 100% kW 23.89 30.92 Heat output 66% kW 15.57 20.16 33% kW 7.26 9.39 Compressor power input 100% kW 6.00 7.82 3.76 3.70 Water ow rate (system) 4.11 5.32 System side Useful head 4.50...
- Page 105 A35/W7 UMMER OPERATION Sizes Unit Duran 25 2T Duran 30 2T 100% kW 24.07 28.41 Cooling capacity 66% kW 16.15 18.82 33% kW 7.59 8.83 Compressor power input 100% kW 5.47 7.14 4.14 3.71 Water ow rate (system) 4.14 4.89 System side Useful head (system) Air ow rate...
-
Page 106: Operating Conditions
12.4 Operating conditions EN 14511 PERATING CONDITIONS ACCORDING TO A7/W35 User circuit: radiant system °C 30/35 In-Out Outdoor circuit: outside air 7°C with 85% R.H. °C 7°C 85% In-Out A7/W45 User circuit: radiant system °C 40/45 In-Out Outdoor circuit: outside air 7°C with 85% R.H. °C 7°C 85% In-Out... -
Page 107: Attachments
Attachments • Wiring diagram. • Start-up request form. • Declaration of conformity. • Technical documentation of components. - Page 108 Registered Office: Via dell’Olmo 37/2 - 33030 Varmo (UD) Operational Headquarters: Via C. Pascoletti 2 - 33040 Povoletto (UD) Italy Tel. (+39) 0432 823600 – Fax. (+39) 0432 825847 www.thermics-energie.it | info@thermics-energie.it All rights reserved. Thermics Energie reserves the right to modify and update this document...
Need help?
Do you have a question about the DURAN 2T Series and is the answer not in the manual?
Questions and answers