Table of Contents
Advertisement
Quick Links
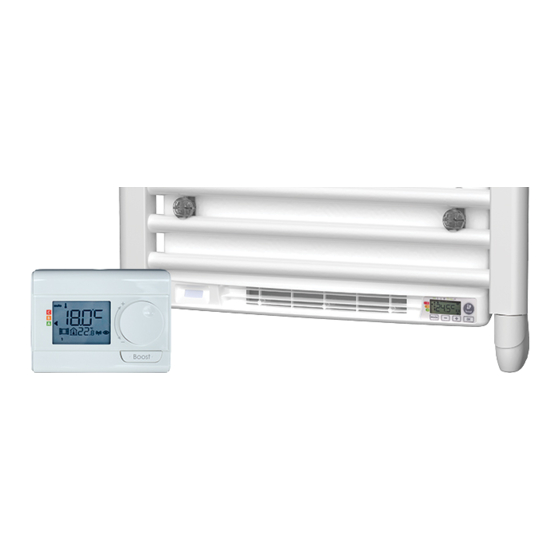
electric towel radiator
-
e
vento
EN
User-/installation manual
Safety instructions ................................2
Positioning of the device....................3
Installation of the device ...................3
Operation.............................................5
User settings .......................................14
Installler settings .................................17
Expert settings ....................................20
Maintenance tips ..............................24
Technical data ..................................25
OPTIONAL: RF REMOTE CONTROL
Advertisement
Table of Contents

Related Manuals for Stelrad E-VENTO 0184B0002


Summary of Contents for Stelrad E-VENTO 0184B0002
-
Page 1: Table Of Contents
electric towel radiator vento OPTIONAL: RF REMOTE CONTROL User-/installation manual Safety instructions ........2 Positioning of the device....3 Installation of the device ....3 Operation..........5 User settings ........14 Installler settings .........17 Expert settings ........20 Maintenance tips ......24 Technical data ........25... -
Page 2: Safety Instructions
SAFETY INSTRUCTIONS Please read these instructions carefully, in order to: ensure that your installation complies with applicable standards optimise your equipment’s • performance optimise your equipment’s performance • We cannot be held liable for any damage arising as a result of incorrect installation or non-compliance with our instructions. -
Page 3: Positioning Of The Device
POSITIONING OF THE DEVICE In the bathroom This is a class II heater with an IP24 protection rating and, as such, it can be installed in volume 2 of the bathroom (see figures 1a and 1b), provided that it is shielded from water splashes and that it is plugged in a wall socket placed outside volume 2. - Page 4 INSTALLATION OF THE DEVICE Installation The radiator must be installed with the heating element vertical and the blower in the lower section (figure 3a). It is prohibited to install the device with the blower in the upper section (figure 3b) or with the heating element horizontal (figure 3c).
-
Page 5: Operation
OPERATION POWER ON /STANDBY MODE DIAGRAM • Buttons overview Power on feature When this feature is first used, press the button (switch) so that it switches to the I located below the blower to put the device in operation. Selecting operating modes Plus and minus buttons, used to set temperatures, time, date and programmes The device is in Auto mode. - Page 6 SELECTING THE OPERATING MODE BOOST FEATURE Important: the Boost mode can be enabled at any time, button allows you to adapt the whatever the current operating mode (Auto, Comfort, Eco or operating schedule of your device to your Frost protection). needs, depending on the season, whether your home is occupied or not.
- Page 7 Comment: if the filter is obstructed or if the grid is covered involun- green. So, depending on the setting temperature, you can tary, a special sensor switches off the device. The normal Opera- choose your level of energy usage. As the temperature setting tion of the device will start again at the next start-up, if the filter or increases, the consumption will be higher.
- Page 8 by an external source, see important information concerning 2- Press simultaneously for more than 5 seconds. the presence detection system on page To exit resetting the energy meter, press , the de- Application of the intelligent program vice is automatically in the previous active mode. One week after switching on, the device will apply the new pro- CHILD ANTI-TAMPER, gram for the next 7 days.
- Page 9 3- The two minute figures will flash. 1- If you just set the time and day, go to step 2. Select using From Auto, Comfort, Eco or Frost protection mode, press for 5 seconds. Save by pressing When the cursor moves above the setting time symbol press shortly.
- Page 10 6- Press to exit the programming Mode and return to Auto Mode. Note: If you do not touch the keys, the device will automatically return to Auto mode after a few minutes. Choices and allocation programmes Prior information: Correspondence days / display area numbers Monday...
- Page 11 Viewing the programmes that you have selected - From Auto, Comfort, Eco or Frost protection mode, press for 5 seconds. Press twice, the programme for each day of the week (Comfort, Eco, P1, P2 or P3) will scroll on display in front of you.
- Page 12 OCCUPANCY DETECTION, ENERGY • Divisions of the detection zone SAVINGS Top view Detection zone, for a tem- perature of 19°C. Important information about the occupancy de- The detection zone is divi- tection ded into active and inactive areas. A person that crosses The occupancy detector is sensitive to temperature variations the area will be detected and light.
- Page 13 INFORMATION ABOUT PRIORITIES 3- When both blower and remote control are linked, the sym- bol appears and is constantly displayed. The blower returns BETWEEN THE DIFFERENT MODES automatically to the frost protection mode. Principe In Comfort, Eco and Frost protection modes, only orders of the occupancy sensor and those of the open window sensor will be considered.
-
Page 14: User Settings
USER SETTINGS ACCESS You access User settings in 3 steps: From Auto, Comfort, Eco or Frost protection mode : User Information display Information display = user settings Press for 5 Press briefly Press briefly seconds twice Setting sequence: Backlighting Eco mode temperature lowering-level Frost protection temperature Super comfort Comfort setting... - Page 15 SUPER COMFORT - ACTIVATION/ 10- To change the maximum temperature setting, press DEACTIVATION By default, the Super comfort is enabled. To save and move automatically to the next setting, press . To exit the user settings, press twice. SETTING OF THE MAXIMUM DURATION flashes, then appears on the display.
- Page 16 The Boost symbol and the heating indicator appear on the dis- The following factory values will be effective: play and the maximum temperature flashes. Parameters Factory settings 14- You can set the Boost maximum temperature by pressing from 25°C to 39°C by intervals of 1°C. Operation Comfort setting temperature 19°C...
-
Page 17: Installler Settings
INSTALLER SETTINGS ACCESS You access User settings in 4 steps: From Auto, Comfort, Eco or Frost protection mode : InSt Information display Information displays = Installer settings Press for 5 Press briefly Press for 10 Press briefly seconds twice seconds Setting sequence: Configuration of detection modes Dual optimization feature... - Page 18 Optimization choice PIN code initialisation By default, the PIN code is not enabled. The setting access is The OPTI COMFORT mode is activated by default. available in Standby mode only. OPTI 1- By default registered PIN code is 0000. The word will appear briefly on the display then it will al- CONF Press...
- Page 19 Customizing the PIN code appears. Press to select If you have just activated the PIN code, follow the stages des- cribed below. Alternatively, you must copy the steps 1 and 2 of the initialisation process as well as steps 1 and 2 of the activation process before personalising the PIN code.
-
Page 20: Expert Settings
EXPERT SETTINGS ACCESS You access expert settings in 5 steps. From Auto, Comfort, Eco or Frost protection mode : Information display Information displays Press for 5 Press briefly Press for 10 seconds twice seconds = Expert settings Information display Long and simultaneous Press briefly 10 seconds press Setting sequence:... - Page 21 Increase the temperature measured by the ambient tempera- ELEC = electric energy ture sensor by 2°C by pressing HYdr Not available in this version = hydraulic energy In our example the measured temperature by the sensor goes from 21°C to 23°C. 2- To save and move automatically to the next setting press To exit the Expert settings, press 3 times.
- Page 22 RESTORING FACTORY SETTINGS Settings Factory settings Maximum ambient temperature for the automatic 35°C If the PIN code protection is disabled, the user, installer and expert stop of the Boost settings are re-initialized: Temperature unit °C Installer settings 1- From the internal temperature monitoring setting, press Automatic open window rest Enabled...
- Page 23 2- Use a vacuum cleaner to eliminate the dust deposited on the IN CASE OF POWER CUT, BACKUP filter. If the filter is very dirty, wash it under the water tap with a damp sponge. After washing the filter, let it dry. Important : it is recommended to clean the filter at least once - After short power cuts (less than 16 hrs), the device will start FILT...
-
Page 24: Maintenance Tips
MAINTENANCE TIPS Maintenance operations must be done with the heater switched off. Therefore make sure that the appliance is off. In order to ensure your heater lasts, we recommend you use the following few tips: Use only mild cleaning agents when cleaning and wiping of the radiator (no abrasive or corrosive •... -
Page 25: Technical Data
Contact details: Stelrad Radiator Group, Welvaartstraat 14 bus 6, B-2200 Herentals Standards: Low voltage RoHS EN55014-1 EN60335-1...
Need help?
Do you have a question about the E-VENTO 0184B0002 and is the answer not in the manual?
Questions and answers