Subscribe to Our Youtube Channel
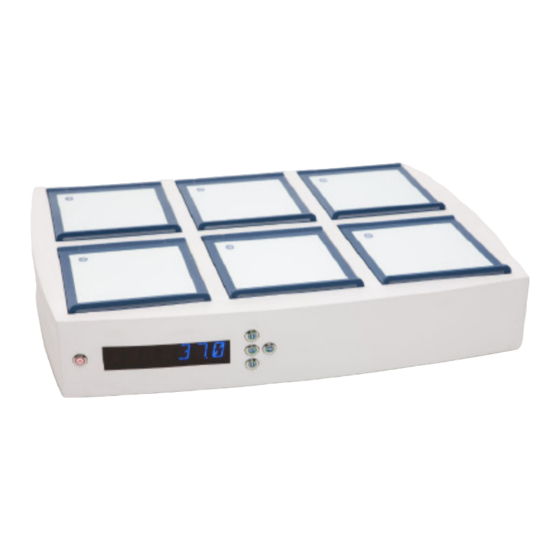
Summary of Contents for Esco Medical Miri MRI-6A10/XQ-1
- Page 1 Installation Procedure Esco Miri® Multi-Room Incubator ESCO MEDICAL MRI-6A10/XQ-1 Version 1.1...
- Page 2 Web : www.escoglobal.com : www.medical.escoglobal.com Service address: Please contact your local distributor for details. Users of ESCO MEDICAL products should not hesitate to contact us if there are any unclear points or ambiguities in this manual. CAUTION: If the equipment is used in a manner not specified in this manual, the safety of the user may be at risk and the equipment may be damaged.
-
Page 3: Table Of Contents
Installation Procedure ESCO MEDICAL MRI-6A10/XQ-1 Table of Contents 1 Welcome ........................4 2 Reading Instructions for the Text................. 5 3 Explanation of Symbols Used ................5 4 About the Product ....................6 5 Manuals Supplied ....................7 5.1 The User Manual ....................7 5.2 The Validation Manual .................. -
Page 4: Welcome
Congratulations with the acquisition of your MRI-6A10/XQ-1 incubator. We at ESCO MEDICAL are proud that you have chosen our product to serve your needs. We hope to hear from you with feedback on this product that can benefit future product developments. -
Page 5: Reading Instructions For The Text
Installation Procedure ESCO MEDICAL MRI-6A10/XQ-1 2 Reading Instructions for the Text The installation procedures is detailed in Chapter 5 and forwards. Chapters from 2 – 5 can be skipped if prior knowledge about the product exist. Chapters 5 and forward must be read chronologically. -
Page 6: About The Product
Open culture may lead to evaporation and a change in pH. If the correct conditions are not maintained. The incubator can be connected to a pc running the ESCO MEDICAL data logging software for long term data logging and data storage. -
Page 7: Manuals Supplied
Installation Procedure ESCO MEDICAL MRI-6A10/XQ-1 5 Manuals Supplied The MRI-6A10/XQ-1 incubator comes with 3 manuals as standard. • The User Manual • The Validation Manual • The Maintenance Manual Each manual has a specific purpose. 5.1 The User Manual Is intended to provide the user with the information that is necessary for using the device. -
Page 8: Installation
Installation Procedure ESCO MEDICAL MRI-6A10/XQ-1 6 Installation This document describes when and how to install an MRI-6A10/XQ-1 Incubator at an IVF clinic. 6.1 Responsibilities All technicians or embryologists installing the MRI-6A10/XQ-1 incubator must be able to identify problems, and perform any necessary calibrations, adjustments and maintenance. -
Page 9: Preparing Installation
Installation Procedure ESCO MEDICAL MRI-6A10/XQ-1 • Humidity control to avoid condensation • Uninterrupted power supply (UPS) with 115 or 230 V minimum 120 W • Proper grounding and HFI relay • CO gas outlet with 0.6-1.0 atm above ambient • N gas outlet with 0.6-1.0 atm above ambient if the clinic uses reduced oxygen... -
Page 10: Installation Procedure At The Site
Installation Procedure ESCO MEDICAL MRI-6A10/XQ-1 6.5 Installation Procedure at the Site 1. Follow the guidelines in the safety instructions and warnings section of the user manual. 2. Connect the mains cable to the UPS 3. Connect the mains cable to the MRI-6A10/XQ-1 Incubator 4. -
Page 11: After The Installation
Installation Procedure ESCO MEDICAL MRI-6A10/XQ-1 Use the user manual as much as possible to get the user well acquainted with it. The User/owner is informed that the first VOC filter change is 3 months after installation and then with 3 months intervals. First service check is under normal circumstances after 1 year. -
Page 12: Technical Assistance
ESCO MEDICAL MRI-6A10/XQ-1 7 Technical Assistance For more information, contact ESCO MEDICAL or the representative in your Country. All goods and services are sold subject to the terms and conditions of sale of the company within ESCO MEDICAL which supplies them.


Need help?
Do you have a question about the Miri MRI-6A10/XQ-1 and is the answer not in the manual?
Questions and answers