
Related Manuals for MYERSON HotShotElite

Summary of Contents for MYERSON HotShotElite
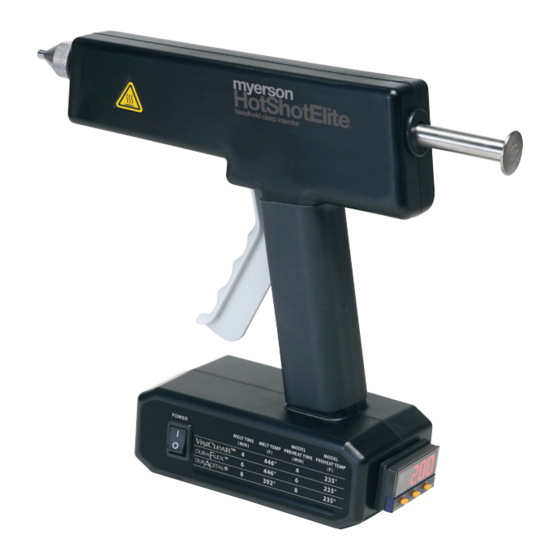
- Page 1 Instruction Manual more to myerson than teeth www.myersontooth.com myerson HOTSHOTELITE MANUAL ENGLISH.indd 1 3/23/10 9:54:23 AM...
-
Page 2: Table Of Contents
(30) minutes. Your myerson HotShotElite can also be used to make temporary crowns and bridges, as well as unilaterals. The melting temperature is easily programmable, so you can use the myerson HotShotElite with all three of myerson’s... -
Page 3: Components
2~components The components included with the myerson HotShotElite handheld clasp injector may vary, but what follows are three standard assort- ments offered by myerson. Description Professional Kit Advanced Kit Basic Kit 120v - EG-0102 120v - EG-0101 120v - EG-0100... -
Page 4: Storage And Handling
3 ~ storage & handling The myerson HotShotElite handheld clasp injector should be stored in a cool dry place. The device should not be used in an environment exceeding 40°C(104°F). Keep all combustibles away from device while in use. Standard forms of transport are acceptable for this device. If outer packaging appears damaged, please contact the manufacturer. -
Page 5: Preventative Maintenance And Cleaning
Use only approved materials in the myerson HotShotElite handheld clasp injector. The use of materials other than those recommended by myerson may cause the device to fail and will void the manufactures warranty. See Section 15 for warranty information. Keep melting chamber and sleeves free from dirt and other foreign debris to prolong the life of the device. -
Page 6: Duracetal Clasp To Metal Framework
The myerson HotShotElite handheld clasp injector is for indoor use Never immerse only. Do not use outdoors or in wet or damp locations. device in water or other liquids. Use only on a clean, dry work surface. Excessive dust and dirt will reduce the life of the device. - Page 7 Elite Putty Tool, indent down to the base of the tool. Repeat this step when creating two clasps making sure the first putty matrix is set as not to move or warp it. myerson HOTSHOTELITE MANUAL ENGLISH.indd 7 3/23/10 9:54:29 AM...
- Page 8 7. With the putty matrix removed, boil off the wax from the model and partial. 8. After all the wax has been removed, put the putty matrix and the model into a heating oven set at 235°F (113°C) for 8 minutes. myerson HOTSHOTELITE MANUAL ENGLISH.indd 8 3/23/10 9:54:33 AM...
- Page 9 235°F (113°C). 9. With the Injection Sleeve removed from the device, turn on the myerson HotShotElite. To set the Melt Temperature, press the Scroll Key once until “SP1” reads on the display. Use the up or down keys to adjust the Melt Temperature to 392°F (200°C).
- Page 10 This process is important to keep aerated material from becoming part of the final clasp or appliance. 14. After priming the myerson HotShotElite for injection, use the supplied gloves to clear off the tip of the injector with your finger.
- Page 11 17. Section the putty matrix using a thin bladed knife. Cut a section of the putty with the knife and using an instrument, pry off the pieces of the putty until all the putty is removed. myerson HOTSHOTELITE MANUAL ENGLISH.indd 11 3/23/10 9:54:39 AM...
- Page 12 19. See Section 14 for tips on finishing and polishing. 20. Notice the size, shape, and tapering of the finished clasp. To learn more about injecting DurAcetal ® , go to www.myersontooth.com. myerson HOTSHOTELITE MANUAL ENGLISH.indd 12 3/23/10 9:54:43 AM...
-
Page 13: Section 10 Duracetal Clasp To Existing Partial
10 ~ adding a myerson DurAcetal Clasp to an existing removable partial denture The following procedure outlines the steps necessary to create DurAcetal clasps onto an existing removable partial denture. Using CDM brand Thermoplastic Model Separator paint the area on the model where the clasp will touch. Be sure to wear eye protection and use proper air ventilation. -
Page 14: Section 11 Temporary Crowns And Bridges
Section 11 ~ creating provisional crowns & bridges with myerson DurAcetal For step-by-step instructions on fabricating on provisional crowns and bridges using your myerson HotShotElite, go to www.myersontooth.com. section 12 ~ unilaterals For step-by-step instructions on fabricating on unilaterals using your myerson HotShotElite, go to www.myersontooth.com. -
Page 15: Section 13 Visiclear Or Duraflex Clasps To Metal Framework
Myerson VisiClear and myerson DuraFlex have been specially designed for creating strong yet flexible clasps using the myerson HotShotElite handheld clasp injector. The following is the procedure for creating VisiClear clear clasps or DuraFlex tissue-coloured clasps onto a metal framework. - Page 16 Make sure the channel is 2mm by 2mm. Where the clasp joins the framework, drill a hole out through the putty coming out the lingual side. This is a vent hole and is very important to ensure a proper injection. myerson HOTSHOTELITE MANUAL ENGLISH.indd 16 3/23/10 9:54:52 AM...
- Page 17 Melt Temperature. 9. Allow the device to reach the set temperature before proceeding 10. Using the filler funnel, pour the entire Single Shot of myerson VisiClear or myerson DuraFlex into the Injection Sleeve (we recommend you use silver Injection Sleeve with VisiClear and the blue Injection Sleeve with DuraFlex).
- Page 18 Note: This process is important to keep aerated material from becoming part of the final clasp or appliance. 13. After priming the myerson HotShotElite for injection, use the supplied gloves to clear off the tip of the injector with your finger.
- Page 19 Notice the button of material on the lingual side. This if from the vent hole created in step 5 of this section. myerson HOTSHOTELITE MANUAL ENGLISH.indd 19 3/23/10 9:55:01 AM...
-
Page 20: Section 14 Finishing And Polishing
19. The finished appliance is now ready for try in. section 14 ~ finishing & polishing Myerson offers several products that make it quick and easy to finish and polish thermoplastic materials. The Finishing Bur Kit includes all the necessary burs to trim and con- tour a thermoplastic appliance. -
Page 21: Section 15 Warranty And Returns
15 ~ warranty & returns Myerson offers a one (1) year limited warranty against defects in material and workmanship. If you would like to submit a product for warranty return, please contact a myerson distributor or myerson. Include only the defective product submitted for warranty replacement;... -
Page 22: Section 18 Notes
18 ~ notes myerson HOTSHOTELITE MANUAL ENGLISH.indd 22 3/23/10 9:55:04 AM... - Page 23 EMA is available to medical and dental profession- Bite pads increase als through authorized dental vertical opening laboratories. Maximum room for tongue is a trademark of frantz design inc ® myerson HOTSHOTELITE MANUAL ENGLISH.indd 23 3/23/10 9:55:09 AM...
- Page 24 312 432 8200 facsimile 312 563 9535 EUROPEAN REPRESENTATIVE myerson limited 8 crystal way, harrow middx, HA1 2HP, united kingdom telephone +44 (0) 20 8863 9044 facsimile +44 (0) 20 8861 3091 3.2010 ENGLISH/50 myerson HOTSHOTELITE MANUAL ENGLISH.indd 24 3/23/10 9:55:09 AM...
Need help?
Do you have a question about the HotShotElite and is the answer not in the manual?
Questions and answers