Advertisement
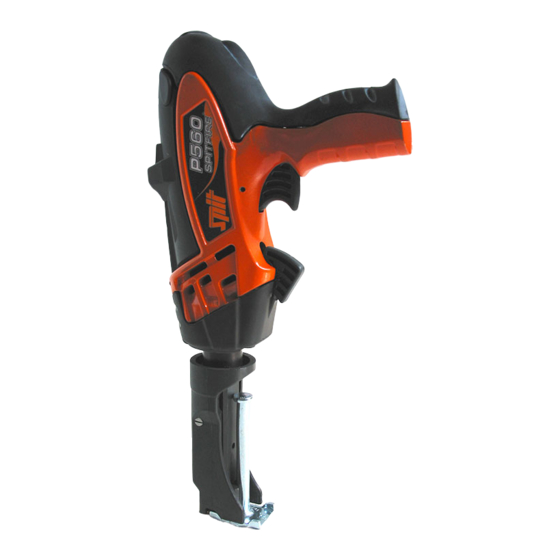
OPERATING INSTRUCTION FOR THE SPIT P560 TOOL
with special adaptor (Pin Guide) for CTFS shear connector
Cover n° 23
1
Pin guide n°1
2
3
LOADING THE CARTRIDGES
Fully open the pin guide (n°1).
Hold the tool with the pin guide pointing vertically
upwards. Insert the nail into the hole of the pin guide
(head first). A magnet will keep the nail in the correct
position.
Point the tool towards the ground. Now the tool is ready
for firing.
Hold the tool and the connector perpendicular to the
work surface, press firmly against the working surface
and pull the trigger.
LOADING THE PINS
In order to reload the tool fully extract the pin guide and
repeat the procedure. Each disc contains 10 cartridges
RELOADING
1) Press the button (n° 24) to open the cover (n° 23)
2) Fully open the pin guide (n°1)
3) Place the disc in the housing
4) Close the cover (n° 23)
Black cover button n° 24
Disk of cartridges
Viale Pecori Giraldi, 55
36061 Bassano del Grappa (VI) ITALY
www.tecnaria.com info@tecnaria.com
TEL: +39.0424.502029
FAX. +39.0424.502386
Pin
Advertisement
Table of Contents

Related Manuals for TECNARIA P560

Summary of Contents for TECNARIA P560
- Page 1 OPERATING INSTRUCTION FOR THE SPIT P560 TOOL with special adaptor (Pin Guide) for CTFS shear connector Black cover button n° 24 Cover n° 23 Disk of cartridges 1) Press the button (n° 24) to open the cover (n° 23) 2) Fully open the pin guide (n°1) 3) Place the disc in the housing 4) Close the cover (n°...
- Page 2 Maintenance of the tool During the maintenance operations the tool MUST be unloaded (and always unloaded when stored in the case). Make sure that no nails and loads are present into the tool The tool must be cleaned periodically (after approximately 1000 shots). Disassembling the front part of the tool for cleaning: Push the pin guide (1) back completely, lift the catch (38) and pull out the front part assembly [pin guide (1)
Need help?
Do you have a question about the P560 and is the answer not in the manual?
Questions and answers