Table of Contents

Related Manuals for KUPPET 1022101300


Summary of Contents for KUPPET 1022101300
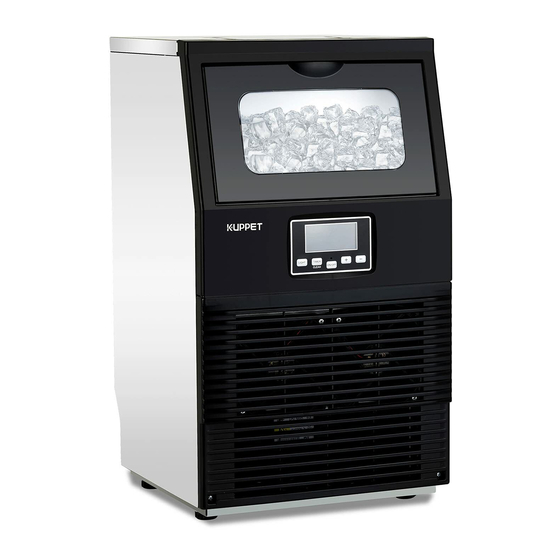
- Page 1 Automatic Ice Maker --Both Manual & Automatic water supplying Instruction Manual Model: 1022101300 To ensure proper use of this appliance and your safety, please read the following instructions carefully before operating this appliance.
-
Page 2: Table Of Contents
CONTENTS IMPORTANT INSTRUCTIO------------------------------------------------------------------------------2 IMPORTANT SAFTY TIPS------------------------------------------------------------------------3 SPECIFICATION--------------------------------------------------------------------------------------------5 DIMENSION/CONNECTION---------------------------------------------------------------------5 RATING------------------------------------------------------------------------------------------------5 GENERAL INFORMATION-------------------------------------------------------------------------------6 MAIN UNIT CONSTRUCTION-------------------------------------------------------------------6 ICE-MAKING AND ITS WATER TANK PARTS----------------------------------------------6 OPERATION PANEL-------------------------------------------------------------------------------7 EXPLOSIVE DRAWING---------------------------------------------------------------------------8 OPERATING PROCEDURE AND MAINTENANCE-----------------------------------------------11 UNPACKING YOUR ICE MAKER- ------------------------------------------------------------------------ INSTALLATION LOCATION REQUIREMENT------------------------------------------------11 ELECTRICAL REQUIREMENT & CONNECTIONS----------------------------------------12 CLEANING YOUR MAKER... -
Page 3: Important Instructio
IMPORTANT SAFETY INSTRUCTIONS Your safety and the safety of others are very important. We have provided many important safety messages manual and your appliance. Always read and obey all safety messages. This is the safety alert symbol: All safety messages will follow the safety alert symbol and the word “DANGER” or “WARNING”. DANGER WARNING These words mean:... -
Page 4: Important Safty Tips
IMPORTANT SAFETY TIPS When using electrical appliances, basic safety precautions should be followed to reduce the risk of fire, electric shock, and injury to persons or property. Read all instructions before using any appliance. Use this appliance only for its intended purpose as described in this owner’s manual. This ice-maker must be properly installed in accordance with the installation instructions before it is used. - Page 5 – WARNING: Do not damage the refrigerant circuit. – WARNING: Children should be supervised to ensure that they do not play with the appliance. – WARNING: This appliance must be earthed. And use the 110-120V/60Hz earthed power supply. DANGER – Risk Of Fire or Explosion. Flammable Refrigerant Used. Do Not Use Mechanical Devices To Defrost Ice Maker.
-
Page 6: Specification
SPECIFICATIONS 1) DIMENSIONS/CONNECTIONS 2) Rating MODEL 1022101300 POWER SUPPLY VOLTAGE 1Phase, 110-120/60Hz ELECTRICAL PROTECTION CLASS ICE MAKING RATING (Amps) 1.5 Amp ICE HARVEST RATING (Amps) 2.3 Amp ICE MAKING CAPACITY (lbs/24H) 66 lbs / 24Hour* REFRIGERANT CHARGE R600a, 1.8 Oz/51g... -
Page 7: General Information
GENERAL INFORMATION 1) Main Unit Construction 1.Water filler cap on top 2.Top cover 3. Ice-making & its water tank assembly: Including ice-making evaporator, water tank, water charging tank,water control valve, water pump and some detecting parts 4. Door for ice taking 5. -
Page 8: Operation Panel
A. Water level switch installing plate B. Water supplying pipe C. Water charging tank: Approximate 3.5 litters volume D. Water outlet control valve of water charging tank E. Water tank for water circulation: Approximate 0.9 litters volume F. Ice full detecting board: Use to detect the inner cabinet is full of ice or not, and to check the ice-harvest process is over or not. -
Page 9: Explosive Drawing
press this button for more than 5 seconds, to let the unit enter the Self-Cleaning program. D. “ON/OFF”button: When the unit is off, press this button to turn on the unit; And during the automatic-cleaning program, or normal ice-making state, press this button to turn off the unit at once; And also if the unit is set with the Timer, press this button to cancel the Timer setting. - Page 10 Part Name Material Qty. Note Top cover Steel plate With hole Top Water filler flame Top water filler cap Transparent ABS Insulation sponge for top cover 324*70 Cap of the water dividing pipe Silicone Water dividing pipe, eight holes Water Circulation pump Electrical parts Water charging tank Ice full detecting plate...
- Page 11 Dry filter Copper parts Support flame of DC fan Galvanized steel,0.6mm DC fan Electrical parts,DC12V Water drain pipe of water tank Silicone Bottom Foot ABS and bolts Air inlet front panel Water drainage cap Rubber Water drainage port Front door panel for ice taking Transparent window of front door panel for ice taking Door shaft...
-
Page 12: Operating Procedure And Maintenance
OPERATING PROCEDURES & MAINTENANCE UNPACKING YOUR ICE MAKER 1. Remove the exterior and interior packaging. Check if all the accessories, including instruction manual, ice scoop, white water supplying hose, 1/4 inches to 1/2 inches water quick connector and the water draining pipe, etc., are inside or not. If any parts are missing, please contact our customer service. -
Page 13: Electrical Requirement & Connections
To ensure proper ventilation for your ice maker, the front of the unit must be completely unobstructed (at least 8 inches free space). Allow at least 6 inches cm clearance at rear, and 2 inches of two sides for proper air circulation. And allow about 20 inches high space at top to fill water freely from unit top when using manual water supply way and for proper air circulation. -
Page 14: Cleaning Your Ice Maker Befroe First Using
CLEANING YOUR MAKER BEFROE FIRST USING CLEANING YOUR MAKER BEFROE FIRST USING Before using your ice maker, it is strongly recommended to clean it thoroughly. 1. Open the ice taking door. 2. Clean with diluted detergent, warm water and a soft cloth. 3. -
Page 15: How To Fill Water By Hand
2、Connecting the water drainage pipe ○ Pull out the water drainage cap with black color (indicated in above illustration), then connect the white drainage pipe included in accessory, again connect the other end of this drainage to the main water drainage pipeline. Make sure not to set the drainage pipe too high. 3. - Page 16 A、 If you select to use automatic water supplying mode,please complete the water connection according the above section “WATER CONNECTION FOR YOUR ICE-MAKER”. If you select to use manual water supplying mode open the transparent water filler cap on the top, fill the potable water by hand into the unit till the maximum water level.
- Page 17 I :Manual water supplying symbol; O: Automatic water supplying symbol; Arrow of this symbol flashes, means the water is flowing into the water tank. If this whole symbol keeps displaying, means no main water supplying at present. Ice-cube symbol, when it rotate, means unit is making the ice cube; and it flashes, means the unit is in ice harvest process.
-
Page 18: Automatic Self-Cleaning Program
Automatic self-cleaning program Start the self-cleaning program: After connecting all of the water pipe, plug on the main power supply plug, then press “TIMER /CLEAN” button on control panel for more than 5 seconds, to enter the Self-Cleaning program. And the “ ”... -
Page 19: Internal Led Light Operation
Internal LED light operation When the unit is plugged on, press the “LIGHT” button on the operation panel once to lighten the LED light inside the ice bin and the “ ” symbol on the LCD display window will also be on. Press this button once again, the LED light and the “... -
Page 20: Preparing Ice Maker For Long Storage
for each ice-making cycle. Rattling noises may come from the flow of the refrigerant or the water line. Items stored on top of the ice maker can also make noises. The high-efficiency compressor may make a pulsating or high-pitched sound. ... -
Page 21: Exterior Cleaning
Periodic cleaning and proper maintenance will ensure efficiency, top performance, hygienic, and long life. The maintenance intervals listed are based on normal conditions. You may want to shorten the intervals if you have pets, or the unit is used outdoors, or there are other special considerations. What shouldn't be done Never keep anything in the ice storage bin that is not ice: objects like wine and beer bottles are not only unsanitary, but also it’s labels may slip off and obstruct the drain pipe. - Page 22 The length of cleaning period is related to your water quality. And drain the water more frequently, the unit and its water pump can work much longer. When there are ice cubes on the surface of the evaporator, but can’t fall off easily, do not use the mechanical substance to remove it by force;...
-
Page 23: Ice Making Assembly System Cleaning By Using
Ice Making Assembly System Cleaning by Using Nu-Calgon Nickle Safe Ice-machine Cleaner (Better using automatic water supplying) Minerals that are removed from water during the freezing cycle will eventually form a hard scaly deposit in the water system. Cleaning the system regularly helps remove the mineral scale buildup. -
Page 24: Cleaning Suggestion
the unit slightly to drain out all of the cleaning solution completely. Then install back the drain pipe to the slot of the water tank. 7. Repeat steps 4--6 to clean the ice making assembly system again. The ice machine cleaner contains acids. DO NOT use or mix with any other solvent-based cleaner products. -
Page 25: Wiring Diagram
WIRING DIAGRAM Electrical Diagram Control panel PCB for Ice-maker Starting Relay COMPRSSOR Overload Protector POWER SUPPLY AC- L COM P AC- N AC Pump Main Water Supply Control Valve RELAY Water Charging Ice-harvest Tank Control Valve Solenoid Valve W ATER Water Level Switch Room Temp... -
Page 26: Normal Trouble Shooting
NORMAL TROUBLE SHOOTING Problem Possible Cause Solution When automatic water supplying way, maybe the main water pressure is too low or the water supplying hose is blocked. Check them and increasing the water No water in unit pressure and clean the supplying hose. When using manual water supplying way, maybe there is no water in water charging tank, fill the water into the water charging... - Page 27 Move the unit to low temperature space, or Ambient temperature is too lengthen the time of each ice making high cycle. Ice cube is very thin Make sure there is more than 20CM space Air circulation around the unit between the unit back & front and the is not goog obstacle Ice cube is too thick...
Need help?
Do you have a question about the 1022101300 and is the answer not in the manual?
Questions and answers