
Related Manuals for Costcare B120C

Summary of Contents for Costcare B120C
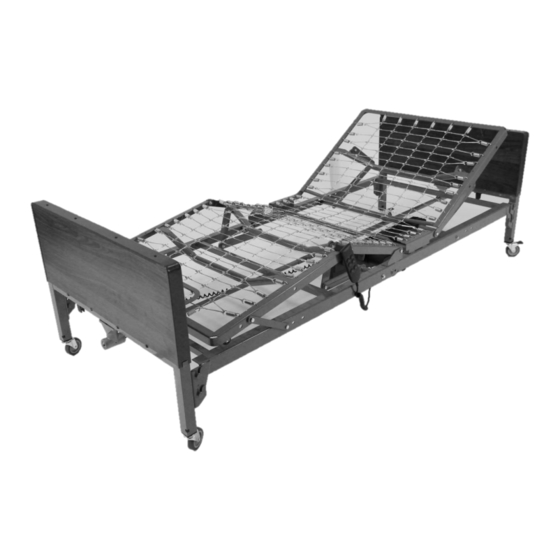
- Page 1 B120C & B130C (Semi-Electric) (Full-Electric) Home Care Bed User Manual DEALERS: This manual MUST be given to the user of the bed. USER: Before using this bed, read this manual and save for future reference.
-
Page 2: Table Of Contents
Table of Contents GENERAL WARNINGS .........................2 EQUIPMENT ASSEMBLY ........................4 EQUIPMENT OPERATION ......................... 11 PREVENTATIVE MAINTENANCE ......................12 TROUBLESHOOTING GUIDE ......................13 LIMITED WARRANTY ........................14 APPENDIX – SERVICE RECORD ........................15... -
Page 3: General Warnings
1.0 GENERAL WARNINGS Assembling the Bed DO NOT overtighten the mounting hardware as this will damage the mounting brackets. DO NOT modify this equipment without authorization of the manufacturer. Doing so will void the warranty. DO NOT use accessories that are not designed or approved for use with the bed. Operating the Bed DO NOT operate your bed until it is fully assembled and checked. - Page 4 Regular maintenance of bed and accessories is necessary to ensure proper operation. DO NOT overtighten mounting hardware. This will damage mounting brackets. Electrical and Earthing EARTHING DO NOT, under any circumstances, cut or remove the earthing prong from any plug. Some devices are equipped with three-prong (earthing) plugs for protection against possible shock hazards.
-
Page 5: Equipment Assembly
2.0 EQUIPMENT ASSEMBLY 2.1 Unpacking the Bed 1. Unpack the components from the shipping cartons. 2. Upon unpacking your bed, the package should contain all of the following components: 1 Instruction Manual 1 Foot board 1 Head board 1 Foot Spring Section 1 Head Spring Section 1 Dual motor 1 Length adjustable drive shaft... - Page 6 2.2 Assembling the Bed 2.2.1 Connecting the Lifting Plates on Each Frame 1. Remove the clevis and cotter pins from the U-shaped bracket on both sides of the drive shaft at foot section. 2. Align the U-shaped bracket with the holes on the lifting plate and insert the clevis pin through the mounting hole.
- Page 7 3. Hook the head frame mounting hooks to the foot frame mounting rivets. 4. After head and foot decks are connected, slowly flatten the frames and lay on the floor with spring facing up. Make sure the hooks remain engaged on the rivets at all times.
- Page 8 2.2.4 Installing the Head and Foot Boards 1. Stand the headboard section as close to the head frame as possible. Ensure the board and frame are paired correctly using the label on the boards. 2. Lift the head frame and hook the rivets onto the head board. Do not place your hand between the frame and the head board when joining the two pieces together.
- Page 9 2.2.5 Connecting the Mattress Platform Springs 1. With the bed flat and the springs facing up, lift the head spring section upward to give slack to the spring “fabric”. 2. Repeat the procedure until all six mattress retainers are installed. There should one retainer on either side of the bed and two on both ends of the bed.
- Page 10 4. Clip the motor on to the actuator bars. Once the motor is mounted, attach the slide caps on both ends. 5. A backup battery connection is provided on the motor next to the power cord. It is designed to raise and lower the bed for emergency use only. To engage the backup power, connect a 9V battery (not included) to the battery clip.
- Page 11 2.2.8 Installing the Center Drive Shaft 1. Extend the drive shaft so the lock pin locks on to the second hole on the outer tube. 2. Attach either side of the drive shaft to the heard board gearbox. 3. For Semi-Electric Bed: Attach the other end to the foot board gearbox. 4.
-
Page 12: Equipment Operation
) indicates raising the corresponding parts of the bed. The DOWN arrow ( ) indicates lowering the corresponding parts of the bed. Semi-Electric (B120C) Hand Pendant Full-Electric (B130C) Hand Pendant 3.2 Using the Manual Hand Crank To raise the bed: Turn the crank handle clockwise. -
Page 13: Preventative Maintenance
4.0 PREVENTATIVE MAINTENANCE A. Cleaning – It is recommended that the following cleaning procedures be conducted between uses and at least once a year. 1.1. Unplug the power code of electric beds before performing maintenance. 1.2. Wipe down with disinfectant. Allow to dry completely. CAUTION: Avoid spraying water directly into the electric components to avoid damage. -
Page 14: Troubleshooting Guide
5.0 TROUBLESHOOTING GUIDE SYMPTOMS POSSIBLE FAULTS POSSIBLE SOLUTIONS Bed idle when hand pendant Adjustment may be at the Check if other buttons are buttons are pressed. maximum or minimum working. position Power cord not connected or Ensure the power cord is damaged properly connected to the electrical socket and the bed. -
Page 15: Limited Warranty
In the event of a defect covered by this warranty, Costcare will, at Costcare's option, repair or replace the device. The warranty provides only for replacement of defective parts and does not cover shipping and labor charges. -
Page 16: Appendix - Service Record
APPENDIX – SERVICE RECORD DATE PERFORMED BY CONDITION REPORT...
Need help?
Do you have a question about the B120C and is the answer not in the manual?
Questions and answers