Table of Contents
Advertisement
Quick Links
Advertisement
Table of Contents

Related Manuals for Kangook AMARUK

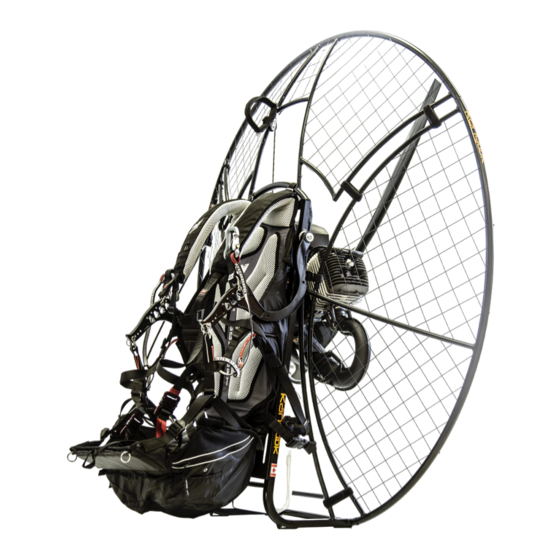
Summary of Contents for Kangook AMARUK
-
Page 2: Table Of Contents
Attaching the harness to the frame ..............36 Attaching the carabiners ..................37 Attaching the safety strap ..................39 V - Settings ........................ 40 V – Checklist ......................42 Contacts ........................45 Kangook User Manual 2021 Edition All rights reserved... - Page 3 Warning This manual should be read carefully before using your Kangook product. Flying any paramotor involves risk but this can be reduced if you respect the following instructions. The Kangook Paramotor’s 3 year manufacturing warranty does not cover damaged caused by wrecks and accidents. The pilot is solely responsible for assessing the condition of all flying equipment, the legality of the flight in accordance to local regulations, the weather conditions surrounding the flight, the pilot’s mental and...
-
Page 4: Preface
Please note that some details or images presented in this guide may be different from those corresponding to your equipment. Kangook User Manual 2021 Edition All rights reserved... -
Page 5: I - Motors
I - Motors 1)Technical Characteristics Kangook User Manual 2021 Edition All rights reserved... - Page 6 More information is available at: Vittorazi.com Polini.com corsairmotors.com Minari.com Kangook User Manual 2021 Edition All rights reserved...
-
Page 7: The Different Engine Mounts
2) The different engine mounts Moster 185 Plus Atom 80 Nitro 200 Black Devil M25Y Polini Kangook User Manual 2021 Edition All rights reserved... -
Page 8: Fixing The Motor On The Frame
3) Fixing the motor on the frame Amaruk frame and Moster 185 Required Items: - 4 M8 screws - Glue - 13 mm wrench - 6 mm Allen wrench Kangook User Manual 2021 Edition All rights reserved... - Page 9 Position the Amaruk frame so that the mounting holes shown in photo 2 are aligned with the motor vibration isolators (photo 1). Attach the motor to the frame by lightly tightening the 4 screws without thread locker. Kangook User Manual...
-
Page 10: Starter Installation
This operation must be repeated each of the 4 screws. 4) Starter installation Required Items: - 1 pulley - 1 starter handle - 1 cord - 1 small torch Kangook User Manual 2021 Edition All rights reserved... - Page 11 Burn the end of the cord remaining after the knot with a small torch. Camouflage the knot in the handle as shown in photo 6. Kangook User Manual 2021 Edition All rights reserved...
-
Page 12: Fitting The Throttle
(photo 4) Strip the wire of photo 5 - Thread the part shown on photo 6 through the wire and crush the highlighted part to secure it Kangook User Manual 2021 Edition All rights reserved... - Page 13 This is shown on photos 8 and 9. - Assemble the 2 parts as shown in photo 11. Secure the assembly by screwing in 2 bolts. -Add the part shown in photo 12 and the lock. Kangook User Manual 2021 Edition All rights reserved...
-
Page 14: The Cage
3 steps. Note: The cage sections come with the connectors and Velcro straps already in place. The Amaruk frame and its cage before fixing the Velcro straps. Kangook User Manual 2021 Edition All rights reserved... - Page 15 Required Items : - 1 Amaruk frame - 2 cage sections for each side (with connectors and Velcro straps) - 1 top cage section (with connectors and Velcro straps) Kangook User Manual 2021 Edition All rights reserved...
- Page 16 Keep your foot on the frame to stabilize it. Apply pressure cage with outstretched arm (as shown opposite) to engage the second attach point (photo a) in the Amaruk frame. Kangook User Manual 2021 Edition All rights reserved...
- Page 17 Step 2 : Connect the upper section of the cage Position the upper part of the Amaruk cage as illustrated opposite. the 4 connectors into the corresponding end caps. Step 3 : Fix the 3 parts together Grab the upper part of...
- Page 18 3. Final result Repeat the process, attaching the Velcro straps highlighted in orange in the opposite photo. Kangook User Manual 2021 Edition All rights reserved...
- Page 19 Attach the straps circled in white from the photo on the previous page: Hold the cage this way for better stability and better tightening. Kangook User Manual 2021 Edition All rights reserved...
- Page 20 Move the strap several times as shown in photos 5 and 6 to adjust the tightness. Final result Remark: To remove the cage more easily, apply pressure as shown on this photo: Kangook User Manual 2021 Edition All rights reserved...
- Page 21 Side cage High cage Cable length required Cable length required Step 1 Step 2 2.5 m Step 3 Step 4 4.5 m Step 5 4.5 m Step 6 Side cage Step 1 Kangook User Manual 2021 Edition All rights reserved...
- Page 22 Step 2 Step 3 Step 4 Kangook User Manual 2021 Edition All rights reserved...
- Page 23 Upper cage Step 1 Step 2 Step 3 Kangook User Manual 2021 Edition All rights reserved...
- Page 24 Step 4 Step 5 Step 6 Kangook User Manual 2021 Edition All rights reserved...
-
Page 25: Fixing The Goosenecks Arms
- 1 13 mm wrench - 1 6 mm Allen wrench Installation of goosenecks for belt reduction motors Gooseneck to the left of the pilot Gooseneck to the right of the pilot Kangook User Manual 2021 Edition All rights reserved... - Page 26 Assembly of goosenecks for motors with mechanical reduction (helical teeth) Gooseneck to the left of the pilot Gooseneck to the right of the pilot Example of mounting tubular swan necks for the model Moster 185 Kangook User Manual 2021 Edition All rights reserved...
-
Page 27: Cnc Gooseneck
Final result CNC gooseneck Required Item: - 2 CNC gooseneck swing arms - 13 mm wrench - 6 mm Allen wrench Remark : Composition identical to tubular necks Kangook User Manual 2021 Edition All rights reserved... - Page 28 Example of the assembly of the CNC goosenecks for the model Atom 80 Final result Kangook User Manual 2021 Edition All rights reserved...
-
Page 29: Harnesses: Fixing & Safety
IV – Harnesses: Fixing & safety Harness, APCO Attaching the harness to the frame Nomenclature : - A: Carrying strap - B: Holding strap Mounting the bindings: Kangook User Manual 2021 Edition All rights reserved... - Page 30 Binding Binding Kangook User Manual 2021 Edition All rights reserved...
- Page 31 Fixing the upper part of the harness (same process for DUDEK harness): Kangook User Manual 2021 Edition All rights reserved...
- Page 32 Explanatory video: Kangook Paramotors Link : https://youtu.be/eqgxqf1XE20 Kangook User Manual 2021 Edition All rights reserved...
- Page 33 Once the upper part of the harness is attached, clip the lower attachments to their mounting: Carrying strap attachment Clip the other fastener onto the corresponding fastener: Kangook User Manual 2021 Edition All rights reserved...
-
Page 34: Attaching The Carabiners
Attaching the carabiners Tubular Required Items : - 2 loops for carabiners - 2 safety straps - 2 swan necks - 2 carabiners Tubular Gooseneck Installation Kangook User Manual 2021 Edition All rights reserved... - Page 35 CNC Gooseneck Installation Kangook User Manual 2021 Edition All rights reserved...
-
Page 36: Attaching The Safety Strap
2. Pass the safety strap behind the harness strap. (See 2) 3. Pass the safety strap through the harness strap. (See 3) 4.Attach this harness attachment to the gooseneck via the shackle. (See 4) Final result Kangook User Manual 2021 Edition All rights reserved... -
Page 37: Harness, Dudek
Harness, DUDEK Attaching the harness to the frame Nomenclature : - A: Carrying strap - B: Holding strap Attachment to the frame of the strap Attachment to the strap frame Kangook User Manual 2021 Edition All rights reserved... -
Page 38: Attaching The Carabiners
Harness” → “Attaching the Harness to the Frame”. The process is the same for these 2 harnesses. Attaching the carabiners Necessary Elements: - 2 gooseneck swing arms Tubular Swan Neck - 2 safety straps - 2 carabiners straps - 2 carabiners CNC Swan Neck Tubular Gooseneck Installation Kangook User Manual 2021 Edition All rights reserved... - Page 39 CNC Gooseneck Installation - Carabiner - Carabiner fixing strap - Shackle Kangook User Manual 2021 Edition All rights reserved...
-
Page 40: Attaching The Safety Strap
Attaching the safety strap Attach the lower part of the safety strap to the gooseneck via the shackle. Kangook User Manual 2021 Edition All rights reserved... -
Page 41: Settings
V - Settings This step will allow you to adjust your position in the harness. You must ensure that you have a correct in-flight thrust angle (≈10-15 °) for your engine: Kangook User Manual 2021 Edition All rights reserved... - Page 42 It is also necessary to check that the thrust angle is not too low during landing: Kangook User Manual 2021 Edition All rights reserved...
-
Page 43: Checklist
V – Checklist 1) Pre-flight Checklist Harness - Closed pockets. - The frame straps and buckles are correctly attached. - The top and bottom of the harness are attached to the arms. Kangook User Manual 2021 Edition All rights reserved... - Page 44 - Verify the reserve parachute container is closed and the straps are correctly routed and attached to the frame. Make sure all accessories are properly connected to the harness (quick links). - If used, accelerator is attached to the harness. Kangook User Manual 2021 Edition All rights reserved...
- Page 45 - Avoid the engine exhaust blowing on the wing before take-off. Confirm the strength and direction of the wind using the windsock: - Make sure that the take-off area and the sky are clear of all traffic. Kangook User Manual 2021 Edition All rights reserved...
-
Page 46: Contacts
Contacts KANGOOK PARAMOTORS info@rsultra.com 2699 5e Avenue, Local 20 1-189-538-5000 Shawinigan, Québec G9T 2P7 418-289-3810 Canada Kangook User Manual 2021 Edition All rights reserved... - Page 47 Photo Credit : Pukana Adventure ² Bon vol ! Kangook User Manual 2021 Edition All rights reserved...
Need help?
Do you have a question about the AMARUK and is the answer not in the manual?
Questions and answers