Table of Contents
Advertisement
Quick Links
Advertisement
Table of Contents

Related Manuals for RSLAB RS 100 PRO

Summary of Contents for RSLAB RS 100 PRO
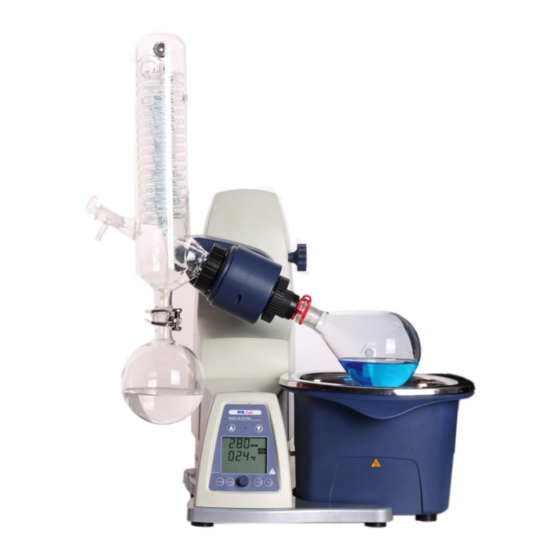
- Page 1 USER MANUAL EVAPORATOR RS 100 PRO...
-
Page 2: Table Of Contents
Contenu Préface Service Warranty 1. Safety Instructions 2. Proper Use 3. Inspection 3.1 Receiving Inspection 3.2 Listing of Items 4. Control and Display 4.1 Control elements 4.2 Display 5. Installation and Operation 5.1 Installation 5.2 Operation 6. Faults 7. Maintenance and Cleaning 8. - Page 3 - Splashing liquids, - Body parts, hair, clothing and jewellery getting caught, - Injury as a result of glass breakage. CAUTION! Inhalation of or contact with media such as poisonous liquids, gases, spray mist, vapours, dusts or biological and microbiological materials can be hazardous to user. •...
-
Page 4: Proper Use
tetrahydrofuran, as well as unsaturated hydrocarbons, such as tetralin, diene, cumene and aldehydes, ketones and solutions of these substances. DANGER OF BURNING! The heating bath, tempering medium, evaporator piston and glass assembly can become hot during operation and remain so for a long time afterwards! Let the components cool off before continuing work with the device. - Page 5 The package includes the following items: Items Main unit Heating bath Power cable Glassware vertical User Manual...
-
Page 6: Display
Items Descriptions Speed key Speed Push the key and then rotate control knob to set the rated speed in the range from 20 to 280. Temperature key Temp Push the key and then rotate control knob to set the rated temperature in the range from room temperature to 180°C. -
Page 7: Installation
5.1 Installation • Adjustable base (Figure 6). Figure 6 CAUTION ! Loosen transportation lock (Figure 7). • Hold the lift with your hand on the height position and remove the thumb screw on the back of the appliance (a). • Once the transportation lock has been removed, the lift moves slowly to its upper end position. The distance is 150mm. - Page 8 • Feed the steam pipe in until it stops. • Then lock the locking device by turning it clockwise by 60°. • The plastic screw nut (f) helps loosen tight-fitting piston ground-in connections (Figure 9). - Hold the tight-fitting evaporator piston and counter clockwise (e), and then turn the plastic screw nut (f) until the evaporator piston neck.
-
Page 9: Operation
- Load the cap nut (h) and locking spring (i) to condenser in turn. - Tighten the cap nut hand-screwed (h). Start the device at 200 rpm for 2 min. Then tighten the cap nut firmly. Figure 12 Figure 13 Installing the vertical glassware condenser locking device (Figure 14). -
Page 10: Faults
• Make sure the required operating voltage and power supply voltage match. • Ensure the socket must be properly grounded. • Plug in the power cable,ensure the power is on and begin initializing. • Press Lift-up/Lift-down key, the lift goes up/down. •... -
Page 11: Specifications
Construction in accordance with the following safety standards: EN 61010-1 UL 3101-1 CAN/CSA C22.2(1010-1) EN 61010-2-10 Construction in accordance with the following EMC standards: EN 61326-1 Associated EU guidelines: EMC-guidelines: 89/336/EWG Instrument guidelines: 73/023/EWG Changes or modifications not expressly approved by the party responsible for compliance could void the user's authority to operate the equipment.
Need help?
Do you have a question about the RS 100 PRO and is the answer not in the manual?
Questions and answers