Table of Contents
Advertisement
Quick Links
Advertisement
Table of Contents

Summary of Contents for Ayyeka WAVELET 4R
- Page 1 WAVELET 4R QUICK START GUIDE AYYEKA AYYEKA Jan 18, 2021 P/N 0100711 Rev 1...
- Page 2 It is important that you read the Quick Start Guide in a controlled environment prior to installation. Set up, activate, and successfully test the entire system (Wavelet 4R, sensors, and antenna connection) indoors, in a controlled environment, before going to the field for installation.
-
Page 3: Operating Temperature Range
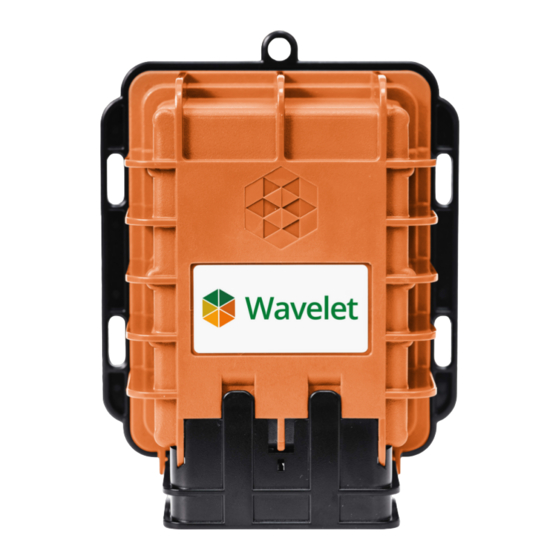
WARRANTY offered by Ayyeka covers only Ayyeka supplied hardware and software for the duration of the warranty period as per the warranty terms and conditions. - Page 4 SCHEMATC FRONT Magnetic Activator IP 68 / NEMA 6P Wavelet Mechanical Enclosure AYYEKA Slots for Zip Ties and/ or Bolts for Attachment 13.3 cm (5.2 in) BOTTOM Cellular Antenna Port Sensor Input Port External Power Port AYYEKA...
-
Page 5: Getting Started
GETTING STARTED WAVELET 4R KIT Wavelet Device & Wavelet Activator Protector M12 Field Attachable M8 Female Field Attachable Sensor Connector Power Connector (optional; ordered (optional; ordered separately) separately) AYYEKA... - Page 6 Zip Ties, Screws, and Cellular Antenna Anchors (REQUIRED; ordered separately) Other tools and/or materials may be required (not included): Rotary Hammer Electric Screw Driver with Phillips PH1 bit AYYEKA...
-
Page 7: Sensor Connection
Wavelet. CAUTION: Do not turn the black plastic hood of the connector. Turning the black hood may cause the wires to disconnect, break, and/or damage the connector pins. TURN HERE DO NOT TURN HERE AYYEKA... -
Page 8: External Antenna Connection
Place the magnetic Wavelet Activator on the embossed Ayyeka logo on the front of the Wavelet enclosure. Wavelet will initiate a 15 minute test mode of high frequency sampling and transmission. The device will then return to its default configuration. - Page 9 2. Select ”Enter Key Manually”. The Mobile Pair Key is found in the StreamView user interface in the Devices tab. Access the Ayyeka user interface at home.ayyeka.com using your log-in credentials. Expect data to appear between 5 – 10 minutes after the test mode is initiated.
- Page 10 Wavelet installation installation successfully and location and activate again. can begin collecting and If the problem persists, viewing your data! contact Ayyeka for assistance: support@ayyeka.com +1 (310) 876-8040 (US) +31 40 209-1001 (EMEA) AYYEKA...
- Page 11 Wait for at least 15 minutes, then log in to the user Log in to interface at home.ayyeka.com to home.ayyeka.com to make ensure that cellular signal sure stable communication has been recently updated is confirmed. in the last few minutes.
- Page 12 Insert the two lower clips into the two lower holes of the Wavelet enclosure. Snap the upper clips into place in the two grooves above the panel connector. CAUTION: The protector is provided to shield the connector from tampering or overexposure that could result in disconnected wiring. AYYEKA...
- Page 13 Secure the Wavelet on a wall, pipe, or other secure mounting location using zip ties or screws. Wall Mounted Pipe Mounted AYYEKA...
-
Page 14: Antenna Mounting
WARNING: If installing in a highly corrosive environment such as a sewer, apply technical grease to the antenna and sensor field attachable connectors after securing them to the panel connectors. Ayyeka recommends using Dow Corning Molykote 55 O-Ring Grease, although similar products can be effective. -
Page 15: Antenna Troubleshooting
If the device still does not transmit after multiple attempts at repositioning the antenna, consider using an alternative solution, such as an in-road or a high-gain antenna. Note: Ayyeka supplies antenna wall mounting hardware and various antennas, including in-road antennas — contact Support for details. USING YOUR OWN ANTENNA If you intend to use your own antenna, verify that the antenna uses an SMA male connector. - Page 16 YOUR WAVELET 4R IS NOW SUCCESSFULLY INSTALLED! AYYEKA...
- Page 17 4-20mA or 0-24V Input #1 Signal Pulse Counter/Digital Input #0 Signal RS485 A and RS232 RX Supply Wavelet 12V Power Supply #1 (+) Signal RS485 B and RS232 TX Back Signal Pulse Counter/Digital Input #1 Signal 4-20mA or 0-24V Input #2 Common AYYEKA...
-
Page 18: External Power
Section Surface Area Wire Gauge AWG 26-20 Cable Ø Diameter 4 – 5.5 mm EXTERNAL POWER PANEL CONNECTOR – M8 3-PIN MALE Power Pin Connector Function Description Assignment Pin # Font Supply+ 6-24VDC No Signal No Connection Common Negative (-) AYYEKA... - Page 19 WAVELET 4R DEVICE LOCATION Unlike some other models of the Wavelet, the Wavelet 4R device does not include an internal GPS. To take advantage of the map features within the StreamView, you can identify the GPS coordinates before field installation. Alternatively, during field installation, you can manually add the GPS coordinates for the device by using your smartphone, tablet, or laptop.
- Page 20 AYYEKA QUESTIONS? www.ayyeka.com support@ayyeka.com +1 (310) 876-8040 (US) +31 40 209-1001 (EMEA) AYYEKA...

Need help?
Do you have a question about the WAVELET 4R and is the answer not in the manual?
Questions and answers