Table of Contents
Advertisement
Quick Links
Advertisement
Table of Contents

Related Manuals for Garmin Alpha 200


Summary of Contents for Garmin Alpha 200
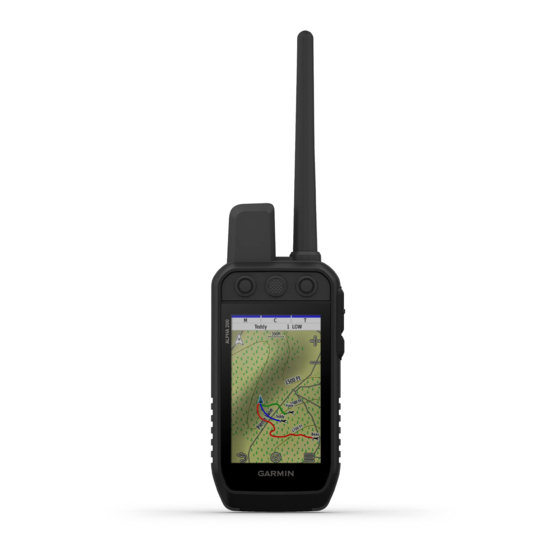
- Page 1 Alpha 200 with Training ® Owner’s Manual...
- Page 2 © 2020 Garmin Ltd. or its subsidiaries All rights reserved. Under the copyright laws, this manual may not be copied, in whole or in part, without the written consent of Garmin. Garmin reserves the right to change or improve its products and to make changes in the content of this manual without obligation to notify any person or organization of such changes or improvements. Go to www.garmin.com...
-
Page 3: Table Of Contents
Sharing a Dog Wirelessly....8 Device............ 17 Adding a Dog Using the Track and Connecting to a Wireless Network..17 Control Codes........8 Garmin Explore........18 VHF Radio Information....... 9 Managing a Group........9 Contact Tracking......18 Editing Dog Information......9 Turning On and Off the Transmitter.. - Page 4 Turning On Rescue Mode..... 21 Calibrating the Barometric Altimeter..........26 Pausing Dog Tracking......21 Navigating to a Point on the Plot..26 Waypoints, Routes, and Tracks..21 Changing the Plot Type....26 Resetting the Elevation Plot..... 26 Waypoints..........21 Trip Computer........26 Marking Your Current Location..
- Page 5 Appendix........38 Accessories and Replacement Parts.. 38 Purchasing Accessories....38 tempe..........38 Tips for Pairing ANT+ Accessories with Your Garmin Device....38 Dog Collar Device Battery Replacement Instructions....39 Replacing the Mini Dog Collar Device Battery..........41 Replacing the Collar Strap....41 Replacing the VHF Antenna in the Dog Collar Device........
-
Page 7: Getting Started
Getting Started WARNING See the Important Safety and Product Information guide in the product box for product warnings and other important information. Setting Up the Alpha System Before you can use the Alpha system, you must set up the devices. 1 Charge the handheld device (Charging the Handheld Device, page 2 Charge the dog collar device... -
Page 8: Device Overviews
Device Overviews Alpha Handheld Device NOTICE Avoid using a high-powered radio (greater than 5 W) in close proximity to the handheld device. It may cause irreversible damage to the handheld device. Satellite antenna VHF radio antenna Mounting spine microSD memory card slot (under battery) ®... - Page 9 Alpha Device Keys Power key Customizable training keys Training up Training down Training enter Getting Started...
-
Page 10: Dog Collar Device
Dog Collar Device NOTE: Your dog collar device may look different than the device pictured. VHF antenna GPS antenna Power key Contact points Status LED and flashing beacon LEDs Getting Started... -
Page 11: Installing The Battery Pack
Installing the Battery Pack 1 Turn the D-ring counter-clockwise, and pull up to remove the cover. 2 Locate the metal contacts on the end of the lithium-ion battery. 3 Insert the battery into the compartment, contacts first. 4 Press the battery into place. 5 Replace the battery cover, and turn the D-ring clockwise. -
Page 12: Charging The Dog Collar Device
Charging the Dog Collar Device NOTICE To prevent corrosion, thoroughly dry the contacts on the collar and the surrounding area before connecting the charging clip. NOTE: Your dog collar device may look different than the device pictured. You should fully charge the battery before you use the device for the first time. Charging a fully depleted battery takes about five hours. -
Page 13: Using The Status Page
Using the Status Page The status page displays the time, your GPS signal strength, and the device battery life. It also allows you to adjust settings and access shortcuts. You can open the status page from any other page by pressing the power key. -
Page 14: Adding A Dog To The Alpha Handheld Using Wireless Pairing
Adding a Dog to the Alpha Handheld Using Wireless Pairing 1 If the dog collar device is on, turn off the dog collar device (Turning Off the Device, page 2 Hold the power key on the dog collar device until the device emits two series of beeps (about 2 seconds), and then release the power button. -
Page 15: Vhf Radio Information
Changing the antenna can result in improved radio performance and higher radiated power. You must not use the device with a third party antenna or an antenna not approved by Garmin . Go to www.garmin.com/tracking-legal... -
Page 16: Changing The Dog Id
Changing the Dog ID Before you can change the dog ID, the collar must be turned on and within range of the handheld device. If you are experiencing interference from other collars or handheld devices in the area, you might need to change the ID for the dog. -
Page 17: Communication With The Collar
Communication with the Collar You should keep an unobstructed line of sight between your handheld device and the dog collar device to produce the best communication signal. To achieve the best line-of-sight conditions, you should move to the highest elevation point in your area (for example, on the top of a hill). Best Good Poor... -
Page 18: Tracking Your Dog On The Map
Tracking Your Dog on the Map Before you can track a dog on the map, you must add it to the handheld device (Adding a Dog to the Alpha Handheld Using Wireless Pairing, page You can view the dog's location on the map. 1 From the home screen, select 2 If necessary, select to zoom in and out of the map. -
Page 19: Dog Tracking Compass
Dog Tracking Compass To open the dog tracking compass, select You can use the dog tracking compass to view the direction and distance to your dog, your vehicle, and any paired devices. The dog tracking compass also shows the dog's status, such as running or on point (Dog Status Icons, page 12). -
Page 20: Setting Location Alerts
Setting Location Alerts 1 Select Location Alerts > Add Alert. 2 Select an option: • To create a geofence alert, select Geofence, select a point for the first corner of the geofence, select Use, and select additional points to define the geofence boundary. You must select at least 3 points to create a geofence alert. -
Page 21: Selecting And Installing The Contact Points
Selecting and Installing the Contact Points CAUTION To prevent irritation from the contact points, remove the collar for at least eight hours out of every 24-hour period. Do not spray the device or collar with harsh chemicals including but not limited to flea or tick spray. Always ensure that any flea or tick spray that is applied to the dog is completely dry before placing the collar on the dog. -
Page 22: Customizing The Training Keys
Customizing the Training Keys You can assign an application, device action, or utility to a training key. If a compatible dog collar is paired, you can also add a dog training command to a training key. You can add multiple pages of training key settings. For example, this is useful when training multiple dogs. -
Page 23: Collar Training
® network. Garmin Explore: The Garmin Explore app syncs and shares waypoints, tracks, and routes with your device. You can also download maps to your smartphone for offline access. Software Updates: Allows you to receive updates for your device software when connected to a Wi‑Fi network. -
Page 24: Garmin Explore
Garmin Explore The Garmin Explore website and mobile app allow you to plan trips and use cloud storage for your waypoints, routes, and tracks. They offer advanced planning both online and offline, allowing you to share and sync data with your compatible Garmin device. You can use the mobile app to download maps for offline access, and then navigate anywhere without using your cellular service. -
Page 25: Adding A Contact Using A Contact Id
Adding a Contact Using a Contact ID Before you can add a hunter using a contact ID, the hunter must find the contact ID (Finding Your Contact ID, page 19) and send it to you. If you are not near the hunter you want to add, you can add the hunter using a contact ID. 1 On your handheld device, select Dog List >... -
Page 26: Updating A Contact Id
Updating a Contact ID If a contact has changed their contact ID, you can quickly update the contact ID in your handheld device. 1 Select Dog List > 2 Select the contact. 3 Select > Update ID. 4 Select the contact ID that matches the contact's new contact ID. Hunting with the Alpha System You can perform various tasks that can be helpful when you are hunting with the Alpha system. -
Page 27: Turning On Rescue Mode
Turning On Rescue Mode You can turn on rescue mode to conserve battery power at the end of a long hunt or if your dog might get out of range. 1 Select Dog List. 2 Select a dog. 3 Select >... -
Page 28: Repositioning A Waypoint To Your Current Location
Repositioning a Waypoint to Your Current Location You can change the position of a waypoint. For example, if you move your vehicle, you can change the location to your current position. 1 Select Waypoint Manager. 2 Select a waypoint. 3 Select >... -
Page 29: Creating A Route
Creating a Route 1 Select Route Planner > Create Route > Select First Point. 2 Select a category. 3 Select the first point on the route. 4 Select Use > Select Next Point. 5 Select a point. 6 Repeat steps 3 through 5 to add all the points in the route. Editing the Name of a Route 1 Select Route Planner. -
Page 30: Recording Track Logs
Recording Track Logs By default, the device automatically starts recording your path as a track when it is turned on and has acquired satellite signals. You can pause and start recording manually. 1 Select Track Manager > My Track. 2 Select an option: •... -
Page 31: Navigation
Navigation You can navigate routes and tracks to a waypoint, geocache, or any saved location in the device. You can use the map or the compass to navigate to your destination. represents your location on the map. As you travel, the icon moves and leaves a track log. Waypoint names and symbols appear on the map. -
Page 32: Navigating With Sight 'N Go
Navigating with Sight 'N Go You can point the device at an object in the distance, lock in the direction, and navigate to the object. 1 Select Navigation > Compass > > Sight 'N Go. 2 Point the device at an object. 3 Select Lock Direction >... -
Page 33: Applications
Applications Additional device features can be found in the applications. You can customize the main menu to display additional applications (Customizing the Main Menu, page 28). Setting a Proximity Alarm Proximity alarms alert you when you or your dogs are within a specified range of a particular location. A tone sounds when you enter the designated radius. -
Page 34: Simulating A Location
Simulating a Location 1 Select Satellite > > Satellite Setup > Satellite System > Demo Mode. 2 Select > Set Location On Map. 3 Select a location. 4 Select Use. Downloading BirdsEye Imagery Before you can download BirdsEye imagery directly to your device, you must connect to a wireless network (Connecting to a Wireless Network, page 17). -
Page 35: System Settings
System Settings Select Setup > System. Satellite: Sets the satellite system options and enables or disables the use of Wide Area Augmentation System/European Geostationary Navigation Overlay Service (WAAS/EGNOS) data. Language: Sets the text language on the device. NOTE: Changing the text language does not change the language of user-entered data or map data, such as street names. -
Page 36: Tracked Devices Map Settings
Tracked Devices Map Settings Select Setup > Map > Tracked Devices. Auto Zoom: Allows the map to zoom out automatically, so the selected devices are always displayed on the map. Dog Tracks on Map: Determines how much of the track log for a tracked dog collar appears on the map. Handheld Tracks on Map: Determines how much of the track log for a tracked handheld device appears on the map. -
Page 37: Routing Settings
Routing Settings The available routing settings vary based on whether Direct Routing is enabled or disabled. Select Setup > Routing. Direct Routing: Enables or disables direct routing. Direct routing calculates the most direct route possible to the destination. Activity: Sets an activity while routing. The device calculates routes optimized for the type of activity you are doing. -
Page 38: Support And Updates
Support and Updates • You can update software and maps for your handheld device and compatible dog collar device using Garmin Express ™ • Go to support.garmin.com for FAQs, videos, and more information. Product Updates On your computer, install Garmin Express (www.garmin.com/express). -
Page 39: Specifications
Only for use with Garmin part number 361-00053-04. The device withstands incidental exposure to water of up to 1 m for up to 30 min. For more information, go to www.garmin.com/waterrating. The device withstands pressure equivalent to a depth of 10 m. For more information, go to www.garmin.com/waterrating. -
Page 40: Battery Information
Battery Information WARNING This product contains a lithium-ion battery. To prevent the possibility of personal injury or product damage caused by battery exposure to extreme heat, store the device out of direct sunlight. Do not use a sharp object to remove batteries. CAUTION Contact your local waste disposal department to properly recycle the batteries. -
Page 41: Saving Energy While Charging The Device
Changing the Dog Collar Device Update Rate Before you can change the collar update rate, the collar must be turned on and within range of the handheld device. You can select a longer duration for the update rate to conserve battery power. 1 Select Dog List. -
Page 42: Installing A Memory Card
Installing a Memory Card WARNING Do not use a sharp object to remove user-replaceable batteries. You can install a microSD memory card in the handheld device for additional storage or pre-loaded maps. 1 Turn the D-ring counter-clockwise, and pull up to remove the cover. 2 Remove the battery. -
Page 43: Connecting The Collar To A Computer
If you do not know the purpose of a file, do not delete it. Your device memory contains important system files that should not be deleted. 1 Open the Garmin drive or volume. 2 If necessary, open a folder or volume. -
Page 44: Appendix
Tips for Pairing ANT+ Accessories with Your Garmin Device • Verify that the ANT+ accessory is compatible with your Garmin device. • Before you pair the ANT+ accessory with your Garmin device, move 10 m (33 ft.) away from other ANT+ accessories. -
Page 45: Dog Collar Device Battery Replacement Instructions
Dog Collar Device Battery Replacement Instructions Dog Collar Device Components Back plate Power key Battery connector Battery cover Battery Power connector Removing the Old Battery Before you replace the battery, you must remove all dirt, water, and debris from the device. You must also have a small Phillips screwdriver. - Page 46 Installing the New Battery Before you replace the battery, you must remove the old battery (Removing the Old Battery, page 39). You also must have a small Phillips screwdriver. You may need a small flat screwdriver. 1 Install the new battery using the same orientation as the old battery. The connector should face the end nearest the power key, and the bump where the wires connect to...
-
Page 47: Replacing The Mini Dog Collar Device Battery
Replacing the Mini Dog Collar Device Battery Before you can replace the battery, you must remove all dirt, water, and debris from the device. You also need a small Phillips screwdriver and the security screwdriver included in the battery replacement kit. 1 Remove the screws from the L-shaped cover over the VHF antenna. -
Page 48: Replacing The Vhf Antenna In The Dog Collar Device
Replacing the VHF Antenna in the Dog Collar Device NOTICE Do not excessively bend the band that connects the main device case with the GPS antenna. When the L-shaped cover is removed, do not disturb the sealant opposite the VHF antenna, because this can damage the waterproof seal of the dog collar device. -
Page 49: Changing The Fuse In The Vehicle Power Cable
Changing the Fuse in the Vehicle Power Cable NOTICE When replacing the fuse, do not lose any of the small pieces and make sure they are put back in the proper position. The vehicle power cable does not work unless it is assembled correctly. If your device does not charge in your vehicle, you may need to replace the fuse located at the tip of the vehicle adapter. -
Page 50: Data Field Options
Data Field Options 24 hr. Max. Temperature: The maximum temperature recorded in the last 24 hours. 24 hr. Min. Temperature: The minimum temperature recorded in the last 24 hours. Accuracy of GPS: The margin of error for your exact location. For example, your GPS location is accurate to within +/- 12 ft. - Page 51 Grade: The calculation of rise (elevation) over run (distance). For example, if for every 10 ft. (3 m) you climb you travel 200 ft. (60 m), the grade is 5%. Heading: The direction you are moving. Lap Ascent: The vertical distance of ascent for the current lap. Lap Descent: The vertical distance of descent for the current lap.
- Page 52 Velocity Made Good: The speed at which you are closing on a destination along a route. You must be navigating for this data to appear. Vertical Dist. to Dest.: The elevation distance between your current position and the final destination. You must be navigating for this data to appear.
-
Page 53: Index
29–31 location 13, 14 device 30, 31 fuse, changing 43 altimeter, calibrating 26 recording 30 ANT+ sensors, pairing 38 Sight 'N Go 26 applications 17, 18 sleep mode 11 Garmin Express area calculation 27 smartphone 18 registering the device 32 applications 17 updating software 32 pairing 17 geofences 13, 14 backlight 34, 35 software GPS 27, 28 BaseCamp 37 updates 32... - Page 54 September 2021 GUID-7936C255-EDC9-4713-AA2B-26476A140DA6 v1...
- Page 55 IMPORTANT SAFETY AND PRODUCT INFORMATION July 2021 © 2014 Garmin Ltd. or its subsidiaries GUID-4448A574-ABF0-41E5-B9F2-67CCDB87475F v5...
- Page 56 Important Safety and Product Information Informations importantes sur le produit et la sécurité guida Informazioni importanti sulla sicurezza e sul prodotto Wichtige Sicherheits- und Produktinformationen Información importante sobre el producto y tu seguridad Informações importantes de segurança e do produto Belangrijke veiligheids- en productinformatie Vigtige produkt- og sikkerhedinformationer Tärkeitä...
- Page 57 Seek medical attention immediately. or interferes with vehicle operating controls, such as the • If using an external battery charger, only use the Garmin ® steering wheel, foot pedals, or transmission levers. Do accessory approved for your product.
- Page 58 Street Navigation Warnings Vehicles–RF signals may affect improperly installed or inadequately shielded electronic systems in motor If your Garmin device accepts street maps and suggests vehicles. Check with the manufacturer or its routes that follow roads, follow these guidelines to ensure representative regarding your vehicle.
- Page 59 Innovation, Science and power. You must not use the device with a third party Economic Development Canada's licence-exempt RSS(s). antenna or an antenna not approved by Garmin. Go to Operation is subject to the following two conditions: (1) www.garmin.com/tracking-legal...
- Page 60 COUNTRY TO COUNTRY. IF IMPLIED WARRANTIES the date of purchase. Within this period, Garmin will, at its CANNOT BE DISCLAIMED UNDER THE LAWS OF YOUR sole option, repair or replace any components that fail in STATE OR COUNTRY, THEN SUCH WARRANTIES ARE normal use.
- Page 61 Garmin Authorized service facility in the country of original purchase or to a Garmin Authorized service facility in another country that can service your product, in which case you will be responsible for complying with all applicable import and export laws and regulations and for paying all custom duties, V.A.T., shipping fees and other associated taxes...
Need help?
Do you have a question about the Alpha 200 and is the answer not in the manual?
Questions and answers