Advertisement
Quick Links
ASSEMBLY INSTRUCTIONS
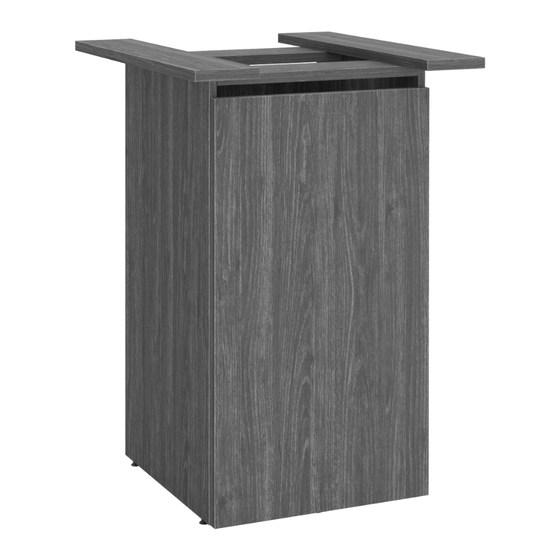
MODEL: PLCUBED2040
Before assembly, please remove all parts from the carton, verifying that you have the correct quantities, and read all the instructions.
IN THE CARTON:
Z:\Office Furniture\ECONOWISE\OLD\Performance_logo.jpg
1
2
Cam Lock
Klix Cam
20 Pcs
20 Pcs
A
Support Rail
Left & Right
2Pcs
1
Line up Cam Lock,
turn clockwise.
Z:\Office Furniture\ECONOWISE\OLD\Performance_logo.jpg
1
2
3
Housing
Cam Lock
Klix Cam
Cap (Short)
20 Pcs
20 Pcs
16 Pcs
A
B
Support Rail
Left & Right
Side Panel LEFT
2Pcs
IMPORTANT NOTE :
Place all wooden parts on a clean, smooth surface to prevent the parts from being scratched.
1
Check to be sure that you have all parts and hardware.
Remove all wrapping materials, including staples & packing straps before you start to assemble.
Do not tighten all screws/bolts until all completely assembled.
Keep all hardware parts out of reach of children.
REV. 1
Line up Cam Lock,
turn clockwise.
ASSEMBLY INSTRUCTION FOR CUBE PEDESTAL BASE
ACCESS DOOR
3
4
5
6
M4 x 65
Housing
Housing
Adjustable
Allen-Key
Cap (Short)
Cap (Long)
Glide
1 Pc
16 Pcs
16 Pcs
6 Pcs
B
C
Side Panel LEFT
Side Panel RIGHT
KLIX CAM INSTRUCTIONS
2
Insert the cam with the arrow
ASSEMBLY INSTRUCTION FOR CUBE PEDESTAL BASE
pointing towards the hole in the
edge.
ACCESS DOOR
A
E
4
5
6
M4 x 65
Housing
Adjustable
Allen-Key
Cap (Long)
Glide
1 Pc
16 Pcs
6 Pcs
G
C
Side Panel RIGHT
KLIX CAM INSTRUCTIONS
2
Insert the cam with the arrow
pointing towards the hole in the
edge.
A
HARDWARE
7
8
9
10
6 Hole
Screw
0' Compo
Magnet
L-Bracket
#6 x
5
"
8
Door Hingers
Catches
4 Pcs
24 Pcs
1 Pair
2 Set
COMPONENTS
D
E
Center /Top Rail
Back Panel
3PCS
3
Insert the Cam Lock into Klix
Cam. Turn Klix Cam to lock.
HARDWARE
B
D
A
7
8
9
6 Hole
Screw
0' Compo
L-Bracket
5
#6 x
"
8
Door Hingers
4 Pcs
24 Pcs
1 Pair
COMPONENTS
C
D
E
Center /Top Rail
Back Panel
3PCS
3
Insert the Cam Lock into Klix
Cam. Turn Klix Cam to lock.
B
D
11
12
13
JCBC Screw
Screw
Screw
M6 x 40mm = 8pcs
#3.5 x 16mm
#3.5 x 12mm
1
Washer = 8pcs
4 Pcs
4 Pcs
4
F
G
Bottom Rail
Door Panel
HINGES INSTRUCTIONS
DETAIL x-x
BACK VIEW
ADJUST THIS SCREW FOR DOOR ALIGNMENT
AFTER ASSEMBLY THE HINGES.
10
11
12
Screw
Screw
Magnet
#3.5 x 16mm
#3.5 x 12mm
Catches
4 Pcs
4 Pcs
2 Set
F
G
Bottom Rail
HINGES INSTRUCTIONS
DETAIL x-x
PAGE 1 OF 2
PL CUBED2040_AI
BACK VIEW
ADJUST THIS SCREW FOR DOOR ALIGNMENT
AFTER ASSEMBLY THE HINGES.
13
JCBC Screw
M6 x 40mm = 8pcs
1
Washer = 8pcs
4
Door Panel
1 of 2.
Advertisement

Summary of Contents for Performance Furnishings PLCUBED2040
- Page 1 ASSEMBLY INSTRUCTIONS MODEL: PLCUBED2040 Before assembly, please remove all parts from the carton, verifying that you have the correct quantities, and read all the instructions. ASSEMBLY INSTRUCTION FOR CUBE PEDESTAL BASE IN THE CARTON: ACCESS DOOR Z:\Office Furniture\ECONOWISE\OLD\Performance_logo.jpg HARDWARE 6 Hole...
- Page 2 ASSEMBLY INSTRUCTIONS MODEL: PLCUBED2040 ASSEMBLY INSTRUCTION FOR CUBE PEDESTAL BASE ACCESS DOOR Z:\Office Furniture\ECONOWISE\OLD\Performance_logo.jpg INSTRUCTIONS: Assemble Cube Base by attaching Side Panels(B)&(C) to Back Panels(D),Top/Center rail(E) & Bottom Rail(F) with Cam Lock (1) and Klix Cam (2). Screw Adjustable Glides (5) into bottom of Cube Base.


