
Related Manuals for Hoover F6212900


Summary of Contents for Hoover F6212900
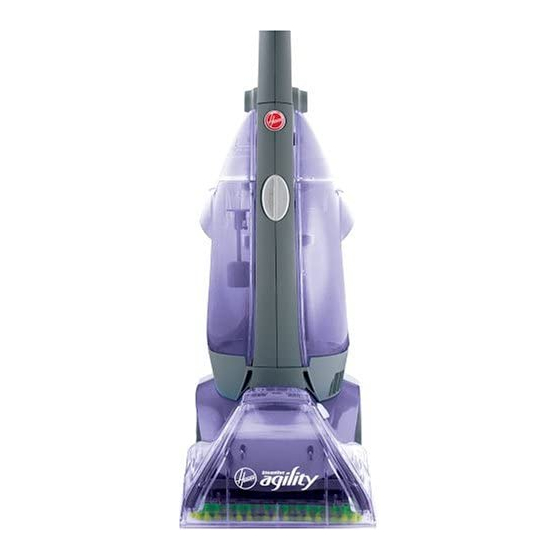
- Page 1 ENGLISH pp. 1-14 ESPAÑOL pág. 16-24 FRANÇAIS p. 25-33 ™ ™ Your HOOVER Deep Cleaner is fully assembled ready to begin cleaning! ® www.hoover.com...
-
Page 2: Grounding Instructions
If appliance is not working as Save these instructions! it should, has been dropped, dam- aged, left outdoors, or dropped into water, take it to a Hoover Factory Service Center or Authorized Hoover Warranty Service Dealer. • Close supervision is necessary when any appliance is used by or near children. -
Page 3: Table Of Contents
Serial No. _____________________________ Save your sales receipt and attach it to this manual. Proof of date of purchase may be required for warranty service of your cleaner. © 2004 The Hoover Company www.hoover.com Carton Contents A. Deep cleaner B. Hoover Detergent Contents Important safeguards . -
Page 4: Cleaner Description
Cleaner Description Your HOOVER Deep Cleaner is fully assembled and ready to begin cleaning! Unfold handle Raise upper handle (A) to upright position until it locks in place. Features Hand grip Solution trigger: press to release cleaning solution Clean Surge™ button... -
Page 5: Deep Cleaner Basics
Surface detergent Carpet caps Upholstery For heavy traffic areas: Pre-treat with HOOVER Spot and Stain Spray (available at additional cost if not included with your model) Use 4 caps of Carpet/Upholstery detergent. NOTE: For best results, use only Hoover detergents. -
Page 6: Emptying The Recovery Tank
Empty the recovery tank Unplug deep cleaner from electrical outlet. An automatic shut-off device prevents the cleaner from picking up more dirty water than it can hold in the recovery tank. You will know the tank needs to be emptied -- •... -
Page 7: Attaching The Hose
Attach the hose Unplug deep cleaner from electrical outlet. Place handle in upright position. The hose and tool caddy can be removed from the cleaner if you desire. Remove hose from tool caddy. Open hose door (A) on back of deep cleaner (Fig. 13). Align hose connector with hose and solution ports (C) (Fig. -
Page 8: Draining & Storing Hose
The handle must be in the upright position in order to get cleaning solution through the hose. Drain the hose When finished using the hose and tool, remove water from the hose. Turn deep cleaner on and hold end of hose up for several seconds (A). - Page 9 Hose caddy You can either store the hose caddy on the cleaner or remove it to store separately. To store caddy on the cleaner: Slide tabs (G) on caddy into slots on back of cleaner (Fig. 25). Hook top of caddy to cleaner (H). Wrap cord around cord hooks (I) on caddy (Fig.
-
Page 10: Cleaning Carpet
Wait ten minutes. Blot with white cloth or paper towel and check for color transfer. Pretreat spots, stains and high traffic areas with HOOVER Spot and Stain Spray (Fig. 32). Spray spot or area with Spot and Stain Spray. Then proceed with the next cleaning steps. -
Page 11: Cleaning Upholstery
For stubborn spots or stains, refer to the stain guide included with your cleaner. Fill solution tank with hot tap water and proper amount of HOOVER deter- gent (see page 5)(Fig. 38). Use only HOOVER brand detergents in your deep cleaner. Other brands may damage the deep cleaner. - Page 12 Routine care for your Deep Cleaner Clean the nozzle Unplug deep cleaner from electrical outlet. Remove solution and recovery tanks to prevent possible leaks. Lift up on top of nozzle (A) and slide off cleaner (Fig. 41). Wipe debris off nozzle and front of cleaner with a damp cloth. Tilt cleaner back, raising front of cleaner off floor.
-
Page 13: Basic Steps For Cleaning
Calling 1-800-944-9200 for an automated referral of authorized service outlet locations (U.S. only) Do not send your cleaner to The Hoover Company in North Canton for service; this will only result in delay. If further assistance is needed, contact The Hoover Company Consumer Response Center, North Canton, Ohio 44720, Phone: 330-499-9499. -
Page 14: Warranty
Full One Year Warranty (Domestic Use) Your HOOVER® appliance is war- ranted in normal household use, in accordance with the Owner’s Manual against original defects in material and workmanship for a period of one full year from date of purchase.