Table of Contents
Advertisement
Advertisement
Table of Contents

Related Manuals for Honeywell Friedland GlobalGuard


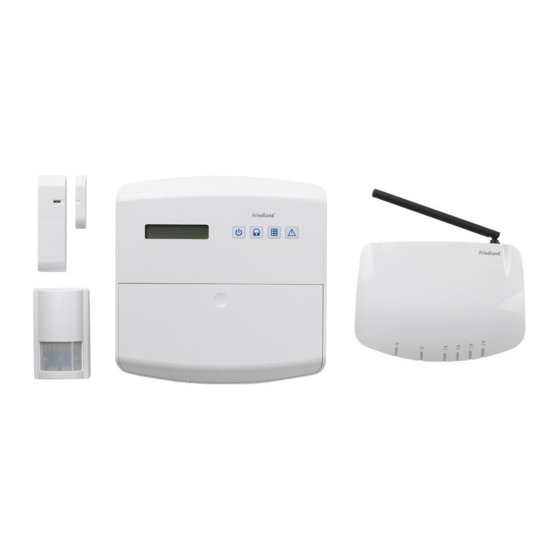
Summary of Contents for Honeywell Friedland GlobalGuard
- Page 1 GlobalGuard Alarm System Software Operating Manual...
-
Page 2: Table Of Contents
CONTENTS GlobalGuard Remote Access Web Software SYSTEM REQUIREMENTS AND FUNCTION OVERVIEW 1. Registration process IMPORTANT NOTE WHEN RUNNING SOFTWARE 2. Home page GlobalGuard PC Setup Software 3. Security page Operating Instructions 4. Home Automation page 1. Instructions for installation 5. Video Playback page 2. -
Page 3: System Requirements And Function Overview
SYSTEM REQUIREMENTS AND FUNCTION OVERVIEW 6. Mobile devices compatible with the GlobalGuard remote access App: - Apple IOS: iPhone1/2/3/4, iPad1/2, iPod 1. The HISK1 kit should be installed as a Touch 4 minimum to use any of the software - Android: Android phone V2.X, tablet PC up 2. -
Page 4: Important Note When Running Software
IMPORTANT NOTE WHEN RUNNING SOFTWARE Ensure the correct time/date has been set on the Control Panel to allow you to view the correct system date/time in different areas of the system such as the event log and live view CCTV. For setup please refer to pages 20-21. The PC setup software should not be operated in parallel with the online remote access web software or the mobile App. -
Page 5: Globalguard Pc Setup Software Operating Instructions
GlobalGuard PC Setup Software 2. GlobalGuard PC Setup Software Operating Instructions 1. Instructions for installation: When you attempt to configure the Control Panel via GlobalGuard PC setup software, please take note of In order to use the PC setup software, your PC must be the following during the process: connected to the internet to download the free software from: www.GlobalGuard.Friedland.co.uk:... -
Page 6: Home Page
2-2. Home Page system has validated the PIN code you have entered. The GlobalGuard system is made up of 5 primary Main functions you will find under “Home Page” functional modules, namely: include: 1-1 Show device information Home Page 1-2 Configure a Programme Key. Sync 1-3 Execute a Programme Key. -
Page 7: Configuring Programme Key
3. The system will display a small function menu above 2-2-2. Configuring the Programme Keys the icon and you can specify the location of the programme key. In this example, [I] has been chosen Please take note of the following when you configure and this means Programme Key [I] has been redefined Programme Keys: to [Living1]. -
Page 8: Sync
synchronizing. successful or not. i.e.: Programme executed successfully 2-3. Sync Important note during Syncing: The PC setup software is intended as an assistive When data is being synced to the Control Panel, program for the Control Panel setup. Setup is only complete after all the settings made on your PC have any security functions and home automation been applied to the Control Panel with the Sync... -
Page 9: Add Device
2-5. Add Device There are two ways to add new devices to the system; using the Control Panel (refer to Hardware manual) or using the GlobalGuard PC setup software. The PC software provides an intuitive interface so the user can add devices more easily. -
Page 10: Part-Arm I/Ii Setup Of Security Device
2. The software will issue a request to the Control is triggered, the camera assigned to the SAME Panel to go into code learning mode. location will start recording. Therefore you should plan beforehand and assign the location group carefully. 2) When the device is triggered, the Web software and the smartphone app will also inform the user of the location. -
Page 11: Replace Device
7. The system will promptly bring up the device setting window for you to configure the device’s properties. Select “Advance Setting” followed by any or both of the Part-arm-I or II selections Example 2: Adding a Home Automation device: 1. Click on the On/Off Plug icon. 2. -
Page 12: Settings
2-6. Settings 1. Click on the PIR movement detector icon. Concept of Programmes, Schedules and Event There are three ways to control home automation devices using the GlobalGuard system: Programmes : A Programme is a set of action(s) that are activated immediately when called upon by the user. -
Page 13: Adding A New Programme
The following section will cover relevant Programme 2-6-1-1. Adding a new Programme maintenance information: Click [Add New Programme] when you wish to add a Name: Programme Name; you may create a name for new Programme to the system. The system will bring the selected Programme for easy identification. -
Page 14: Event
reference. 2-6-2-1. Adding New Event Example: Click [Add New Event] when you wish to add a new Event to the system. The system will bring up the Setting – Event – New Event window for you to edit relevant details. For more information on Event maintenance, refer to section 2-6-2-2 on “Maintaining Events”... - Page 15 You can configure the system to take one of the following two actions: Example: Device Trigger 1. Control Device: the system will take whatever action(s) you have configured for Control Device, including Sound. You can configure up to 16 actions. 2.
- Page 16 the change of the Control Panel security modes. Example: Using System Trigger As you can see in this example, all Programmes have been disabled by the system. This means that all of the Programmes available involve the change of the Control Panel security modes.
-
Page 17: Schedule
Schedule to be triggered. 2-6-3. Schedule 1-2. Specify the security mode for the trigger to take effect. By default, the trigger will be To create or maintain a Schedule, select [Setting] in the applied to all security modes. top menu and click [Schedule] in the menu to the left. The system supports up to a maximum of 16 Schedules and once you have reached the maximum, the [Add New Schedule] button will turn grey. - Page 18 Example: Configuring the system to Control Device when the trigger has been set off. Step3: Specify the duration of delay time for Action 2 to be executed (Optional) Example: Configuring the system to execute a Example: Setting the delay time to 1 minute before preselected Programme.
-
Page 19: Device
2-6-4. Device : Different device types would have different advanced settings. To maintain the contents of device information, select [Setting] in the Top Menu and click [Device] on the Example: When you click , the following menu to the left. You will see the devices that have window will pop up. -
Page 20: System
2-6-5. System You can configure the following 5 system related settings here: User Siren Time Control Panel Spectra Lighting Controller Details on each setting will be covered in the following section. If a user is in possession of a remote, a remote control icon will appear next to the user in the edit window.
Need help?
Do you have a question about the Friedland GlobalGuard and is the answer not in the manual?
Questions and answers