Table of Contents
Advertisement
Quick Links
Advertisement
Table of Contents

Summary of Contents for Grundig MT 3910
- Page 1 NOSE AND EAR HAIR TRIMMER MT 3910 ENGLISH...
- Page 2 ------------------------------------------------------------------------------------------------------------------------------------------------------------------ 3...
- Page 3 SAFETY - - ------------------------------------------------------------------------------------------------------------------------- Please-observe-the-following-instructions-when-using-the- - d evice: - T his-device-is-intended-for-domestic-use-only. - D o-not-immerse-the-device-in-water.- - C lean-the-housing-with-a-damp-cloth.-Do-not-use- any-cleaning-agents. - S tore-the-device-in-a-cool-and-dry-place. If-you-do-not-wish-to-use-the-device-for-a-long-period- of-time,-remove-the-batteries. - D o-not-insert-the-device-too-far-into-the-nose-or-the- ears-during-use. - N ever-use-the-device-if-it-is-visibly-damaged. - K eep-the-device-out-of-the-reach-of-children. Do-not-open-the-device-under-any-circumstances.- No- warranty- claims- are- accepted- for- damage- caused-by-improper-handling.
-
Page 4: Special Features
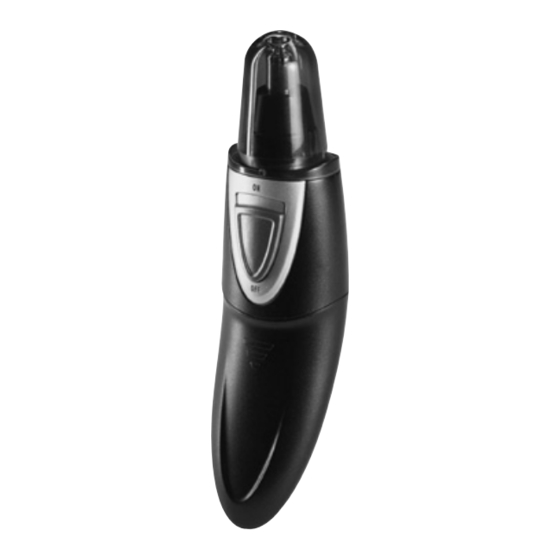
OVERVIEW - - ----------------------------------------------------------------------------------------------------- Dear-customer, congratulations-on-the-purchase-of-your-MT-3910-nose- and- ear- hair- trimmer.- Read- the- following- user- notes- carefully-to-ensure-you-can-enjoy-your-quality-product- from-Grundig-for-many-years-to-come. Specialfeatures –-- E asy-and-gentle-removal-of-all-nose-and-ear-hairs –-- W ashable- attachment- for- the- washable- trimmer- blades Controls See-the-illustration-on-page-3. - Detachable-protective-cap. Washable-attachment-for-the-trimmer-blades. Switch-for-turning-on-and-off. Detachable-housing-for-inserting-the-batteries-sup- plied-(2-x-1,5-V-AAA/LR-03). 13 ENGLISH... -
Page 5: Power Supply
POWERSUPPLY - - --------------------------------------------------------------------------- The-device-operates-with-the-enclosed-batteries-2-x-1,5- V-AAA/LR-03. Insertingthebatteries - Remove-the-battery-housing- - Insert-the-supplied-batteries-into-the-housing.-Ob- serve-the-polarity-indicated-in-the-housing. - Replace- the- housing- - and- press- it- down- until- it- catches. Notes: Do-not-expose-the-batteries-to-extreme-heat,-caused- for-example-by-direct-sunlight,-heaters-or-fire.- - R emove-the-batteries-if-it-is-flat-or-when-you-know- that-the-device-will-not-be-used-for-a-long-period-of- time.-The-manufacturer-accepts-no-liability-for-dam- age-caused-by-leaking-batteries. Environmentalnote: Batteries,- including- those- which- do- not- contain- heavy-metal,-should-not-be-disposed-of-with-house- hold-waste.-Always-dispose-of-used-batteries-in-ac- cordance-with-local-environmental-regulations.-... -
Page 6: Cleaning And Care
- - ------------------------------------------------------------------------------------------------------------------------------------------- Trimmingnoseorearhair - Remove-the-protective-cap- - Press-the-button- -to-switch-on-the-device. - Carefully-insert-the-device-with-the-trimmer-attach- ment-into-the-nose-or-ear. Note: Do-not-insert-the-device-too-far-into-the-nose-or-the- ears-during-use. - Press-the-button- -to-switch-off-the-device-after-use. Cleaningandcare - After-use,-remove-the-housing-for-the-trimmer-blades- -by-turning-the-housing-anti-clockwise-and-taking- it-off. Note: You-can-clean-the-housing-and-the-blades-under-run- ning-water.-Before-putting-the-parts-back-on,-make- sure-that-these-are-completely-dry. 15 ENGLISH... - Page 7 - - ------------------------------------------------------------------------------------------------------------------------------------------- - After-cleaning-and-drying,-replace-the-housing-for- the-trimmer-blades- -by-turning-the-housing-clock- wise-and-making-sure-that-it-firmly-engages-in-the- position-marked. - Replace-the-protective-cap- Notes: Only-clean-the-housing-of-the-device-with-a-damp- cloth.-Do-not-use-any-cleaning-agents-or-other-fluids. Remove-the-batteries-when-you-do-not-wish-to-use- the-device-for-a-long-period-of-time. Always-store-the-device-in-a-cool-and-dry-place. 16 ENGLISH...
-
Page 8: Environmental Note
INFORMATION --------------------------------------------------------------------------------- Environmentalnote This- product- has- been- made- from- high-quality- parts- and- materials-which-can-be-re-used-and-recycled. Therefore,-do-not-dispose-of-the-product-along-with- normal-household-waste-at-the-end-of-its-service- life.-Take-it-to-a-collection-point-for-the-recycling- of-electrical-and-electronic-equipment.-The-symbol- on-the-product,-in-the-operating-manual-or-on-the- packaging-indicates-that-recycling-is-possible. Please-find-out-about-collection-points-operated-by-your-local- authority. Help-protect-the-environment-by-recycling-used-products. Technicaldata This-product-fulfills-the-European-directives- 2004/108/EC-and-2006/95/EC Powersupply 2-x-1,5-V-AAA/LR-03 Battery:- Technical-and-design-modifications-reserved. 17 ENGLISH... - Page 9 Grundig Intermedia GmbH Beuthener Strasse 41 90471 Nürnberg AUS GUTEM GRUND www.grundig.com 72011 904 7500 12/46...


Need help?
Do you have a question about the MT 3910 and is the answer not in the manual?
Questions and answers