Table of Contents
Advertisement
Quick Links
Advertisement
Table of Contents

Related Manuals for Guangzhou Rigal Electronics RD-850-5896008

Summary of Contents for Guangzhou Rigal Electronics RD-850-5896008
- Page 1 INSTRUCTION MANUAL Note: As the product system is updated from time to time, the...
-
Page 2: Table Of Contents
Contents Important Safeguards........................1 Accessories List..........................1 Projector Overview........................2 Remote Control ..........................5 Switching Machine Operation ....................6 Focus / Keystone Correction .....................7 Standard Setting ...........................8 Use of the Projector ........................9 Multimedia..........................9 Source Settings........................10 Menu Settings........................11 Miracast ..........................12 iOS Cast..........................13 System Setting ........................15 Projector Setting .........................15... -
Page 3: Important Safeguards
Important Safeguards 1. Please read the manual carefully before operating projector. To ensure stable power supply, please use standard power cord. 2. Please use the power supply and cable indicated on the rating label. The projector should be kept away from cloths, sofas and anything that may block the ventilation scoop. -
Page 4: Projector Overview
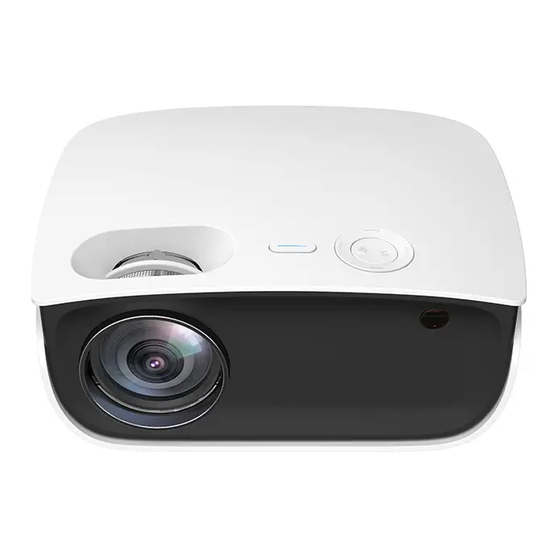
Projector Overview 1. Lens 7. Cooling Window 2. IR for Remote Control 8. Headphone Jack 3. Speaker 9. AV Port 4. IR for Remote Control 10. USB Port 5. Air Intake 11. USB Port / Wired SyncScreen Port 6. Power Input 12. - Page 5 Projector Overview 7. Keystone Correction 1. Arrow Keys 8.Bottom Label 2. Return (Tear off the bottom sticker, you can remove 3. Enter the bottom dust cover to clean up the dust) 4. Power Key 9.Machine Foot Pad 5. Power Indicator: 10.Hole for Stand(1/4 inch) Standby: red 11.Height Adjustment Machine Feet...
- Page 6 Specifications Model Mini projector Lamp Image System Language English, 23 languages Resolution 1280×720, support 1080P Input Voltage AC100V-240V Weight 1 KG Working Temp 0-35°C Input Port HDMI / USB / AV Output Port Headphone Aspect Ratio 16:9 / 4:3 Size 218×174×96mm Operation Mode Manual / Remote control...
-
Page 7: Remote Control
Remote Control 1. Power 2. Aspect Ratio 3. Arrow Keys 4. Home 5. Menu 6. Volume Down 7. Menu 8. Screen Flip 9. Source 10. Enter 11. Return 12. Volume Up 13. Mute - 5 -... -
Page 8: Switching Machine Operation
Switching Machine Operation Power On: Step 1: Press the power button on the body or the power button on the remote control, the indicator light will turn blue and steady. Step 2: After 2 seconds, the projector starts to start, the image appears on the screen, and the unit enters the normal working state. -
Page 9: Focus / Keystone Correction
Focus / Keystone Correction Focusing Keystone Correction Image Focusing Place the projector lens perpendicularly to the projection screen or curtain wall, and adjust the focus dial until the image is clear, that means the image focusing is finished. During the focusing process, you can play the programs or pick up the product menu images to match the focusing adjustment. -
Page 10: Standard Setting
Standard Setting Refer to the data in the table below to place the projector away from the projection screen according to the preset graphic size. When installing, place the projector on a solid, stable countertop . The airframe should be well ventilated. -
Page 11: Use Of The Projector
Use of the Projector Multimedia Step 1: Insert the U disk into the USB port of the projector. Step 2: Select Multimedia, and then press the OK key to enter. Step 3: Select the file to be played. Source Multimedia Setting Miracast iOS Cast... -
Page 12: Source Settings
Use of the Projector Source Settings Step 1: Select the signal source in the main interface (or press the remote control source key); Step 2: Press the OK key to enter the options. Signal Source: HDMI / AV. Source Multimedia Setting Miracast iOS Cast... -
Page 13: Menu Settings
Use of the Projector Menu Settings Step 1: In the Multimedia interface, press the menu key of the remote control to enter the menu setting options. Step 2: After entering the interface, adjust the parameters as needed, and then press the "OK" key to verify. MOVIE MUSIC PHOTO... -
Page 14: Miracast
Use of the Projector Miracast Step 1: Select Miracast on the main interface. Step 2: Turn on the Wireless Display function of the Android device. Note: Different Android devices have different names and opening methods for the Wireless Display function. For details, please refer to the manual of the Android device you are using. -
Page 15: Ios Cast
Use of the Projector iOS Cast Step 1: Select iOS Cast on the main interface. Step 2: The iOS device and the projector must be connected to the same network, or the iOS device must be connected to the wireless access point (AP) from the projector. - Page 16 Use of the Projector WiFi Setting Step 1: Select Setting in the main interface and press OK key to enter setting interface. Step 2: Select WiFi Setting. Step 3: Turn on the WiFi, find the WiFi you need to connect to, enter the password through the virtual keyboard, and confirm the connection.
-
Page 17: System Setting
Use of the Projector System Setting Select the system setting, you can check the language and software version; Version upgrade: local update and online update; Local update: Insert the U Disk and follow the prompts to find the file upgrade version. Online update: Connect to WiFi, upgrade the version according to the prompts (recommended to update from time to time) Restore factory default: Choose carefully. - Page 18 FCC Statement This equipment has been tested and found to comply with the limits for a Class B digital device, pursuant to part 15 of the FCC rules. These limits are designed to provide reasonable protection against harmful interference in a residential installation.
- Page 19 The terms HDMI and HDMI High-Definition Multimedia Interface, and the HDMI Logo are trademarks or registered trademarks of HDMI Licensing Administrator, Inc. in the United States and other countries.
Need help?
Do you have a question about the RD-850-5896008 and is the answer not in the manual?
Questions and answers