Table of Contents
Advertisement
Available languages
Available languages
Quick Links
Advertisement
Chapters
Table of Contents

Subscribe to Our Youtube Channel
Related Manuals for werma AndonWIRELESS


Summary of Contents for werma AndonWIRELESS
- Page 1 Handbuch Manual Manuel WERMA AndonWIRELESS Version: 1.1 - 09/2021...
- Page 3 Deutsch English Français...
- Page 5 Handbuch WERMA AndonWIRELESS Version: 1.1 - 09/2021...
- Page 6 Folgende Firmen und Marken werden in der Hilfe genannt: – Microsoft und Windows 10 sind Marken der Microsoft Corporation Irrtum, Druckfehler und technische Änderungen vorbehalten. © Copyright 2022, WERMA Signaltechnik GmbH + Co.KG. Alle Rechte vorbehalten. WERMA Signaltechnik GmbH + Co.KG...
-
Page 7: Table Of Contents
1.3 Systemanforderungen 1.4 Stromversorgung 1.4.1 Batteriebetrieb 1.4.2 Betrieb mit Netzteil 1.5 Verhalten beim Aus- und Wiedereintritt ins Netzwerk 1.5.1 Netzteilbetrieb 1.5.2 Batteriebetrieb 2 AndonWIRELESS Konfigurationssoftware installieren 3 AndonWIRELESS Konfigurationssoftware starten 3.1 Sprache einstellen 4 AndonWirelessBOX konfigurieren 4.1 Konfiguration importieren 4.2 Neue Konfiguration erstellen oder vorhandene Konfiguration anpassen 4.2.1 Funkkanal und Netzwerk-ID einstellen 4.2.2 Funktion der Tasten konfigurieren 4.2.3 Farbe der Tasten konfigurieren... - Page 8 6 Konfiguration exportieren und importieren 6.1 Konfiguration in Konfigurationsdatei exportieren 6.2 Konfiguration aus Konfigurationsdatei importieren 7 Auf Werkseinstellungen zurücksetzen 8 Software aktualisieren 9 Firmware aktualisieren 10 Manuelle Treiberinstallation 11 Konfigurationsbeispiele 11.1 Beispiel 1: Einfache Signalisierung 11.2 Beispiel 2: Problem an Schichtführer melden und Hilfe signalisieren 11.3 Beispiel 3: Mehrere Arbeitsplätze 11.4 Beispiel 4: Materialbedarf signalisieren...
-
Page 9: 1 Überblick
Transceiver individuell eingerichtet werden. Die Kombination einer Andon WirelessBOX mit 2 oder 5 Tasten und einem Transceiver ermöglicht es, die Stufen einer WERMA Signalleuchte über eine Funkverbindung zu steuern. Das System kann flexibel aufgebaut werden. So kann eine Andon WirelessBOX eine oder mehrere Signalleuchten steuern (Funknetz 1:1, Funknetz 1:n) oder mehrere Andon WirelessBOXen können... -
Page 10: Led-Anzeige
Frequenzbereich Europa 868,0 - 868,6MHz USA und Teile von Asien 921,0 - 922,0MHz 1.2 LED-Anzeige Mögliche Fehler und der aktuelle Zustand der WERMA AndonWIRELESS Geräte werden mit den jeweiligen LED angezeigt. 1.2.1 Andon WirelessBOX Bedeutung Statusanzeige bei Stromversorgung über USB-Anschluss LED leuchtet dau- Andon WirelessBOX ist mit Strom versorgt. -
Page 11: Transceiver
Mindestversion: 1607 Aktuelle Windows-Updates werden vorausgesetzt. Freier Festplattenspeicher 250 MB (empfohlen) USB-Anschluss Notwendig für die Hardware-Konfiguration. Internetverbindung Notwendig für Update der AndonWIRELESS Konfigurationssoftware. Unterstützte Betriebssysteme werden nur solange unterstützt, wie auch Microsoft diese über den Microsoft-Support Lifecycle unterstützt. Version: 1.1 - 09/2021... -
Page 12: Stromversorgung
1.4 Stromversorgung Die Stromversorgung der Andon WirelessBOX kann durch Batterien oder ein externes Netzteil erfol- gen. 1.4.1 Batteriebetrieb Einzusetzender Batterietyp: AAA LR03 Im Batteriebetrieb leuchten die Tasten der Andon WirelessBOX nicht dauerhaft. Eine Taste leuchtet kurz auf, sobald die Taste betätigt wird oder ein Zustandswechsel erfolgt. Alternativ kann eingestellt werden, dass eine Taste auch bei einem Tastendruck nicht leuchtet, siehe "Farbe der Tasten kon- figurieren", S. -
Page 13: Verhalten Beim Aus- Und Wiedereintritt Ins Netzwerk
1.5 Verhalten beim Aus- und Wiedereintritt ins Netzwerk 1.5.1 Netzteilbetrieb Sobald sich eine Andon WirelessBOX oder ein Transceiver außerhalb des Netzwerks befinden, erfolgt keine Synchronisierung des Status im Netzwerk. Wird das Netzwerk nicht erreicht, blinkt die Status-LED rot auf. Eine Synchronisierung erfolgt dann, wenn das Gerät wieder in das Netzwerk ein- tritt. -
Page 14: 2 Andonwireless Konfigurationssoftware Installieren
2 AndonWIRELESS Konfigurationssoftware installieren Die AndonWIRELESS Konfigurationssoftware muss nicht installiert werden und ist als Portable lauf- fähig. 1. Zip-Datei AndonWireless-x.x.x.xx.zip am gewünschten Speicherort entpacken. 3 AndonWIRELESS Konfigurationssoftware starten 1. Auf AndonWireless.exe doppelklicken. Die AndonWIRELESS Konfigurationssoftware startet. Die AndonWIRELESS Konfigurationssoftware wartet, bis eine Andon WirelessBOX oder ein Tran- sceiver angeschlossen werden. -
Page 15: 4 Andonwirelessbox Konfigurieren
Taste festgelegt werden und ob die Tasten nach einem Tastendruck weiter leuchten. Falls sowohl Andon WirelessBOXen mit 2 und 5 Tasten verwendet werden, empfiehlt WERMA zuerst die Andon WirelessBOX mit 5 Tasten zu konfigurieren und die Konfiguration zu exportieren, siehe "Konfiguration in Konfigurationsdatei exportieren", S. 29. Dadurch ist sichergestellt, dass die exportierte Konfigurationsdatei auch für die Stufen 3 bis 5 die... -
Page 16: Konfiguration Importieren
4.1 Konfiguration importieren 1. Im Fenster Neues Gerät erkannt auf Aus Datei importieren klicken. 2. Zur gespeicherten Konfigurationsdatei (*.json) navigieren und auf Öffnen klicken. Die Konfiguration wird geladen und angezeigt. 3. Auf Auf Gerät speichern klicken, um die Konfiguration auf die Andon WirelessBOX zu übertragen. Die Konfiguration wird auf die Andon WirelessBOX übertragen. -
Page 17: Neue Konfiguration Erstellen Oder Vorhandene Konfiguration Anpassen
5. Auf Nein klicken, um ein anderes AndonWIRELESS Gerät zu konfigurieren. 6. USB-Kabel von Andon WirelessBOX entfernen. 4.2 Neue Konfiguration erstellen oder vorhandene Kon- figuration anpassen Geänderte Einstellungen können jederzeit durch Klick auf Änderungen verwerfen auf die zuletzt auf der Andon WirelessBOX gespeicherte Konfiguration zurückgesetzt werden. -
Page 18: Funkkanal Und Netzwerk-Id Einstellen
4.2.1 Funkkanal und Netzwerk-ID einstellen Alle AndonWIRELESS Geräte, die miteinander kommunizieren sollen, müssen den gleichen Funkkanal und die gleiche Netzwerk-ID verwenden. 1. Im Auswahlmenü Funkkanal den gemeinsamen Funkkanal für die Andon WirelessBOX und den Transceiver wählen. 2. Im Feld Funk-Netzwerkadresse die gemeinsame Netzwerk-ID für die Andon WirelessBOX und den Transceiver eingeben. - Page 19 2. Für jede Stufe der Signalsäule den Status nach einem kurzen Tastendruck (Kurzes Drücken) und bei einem längeren Tastendruck (Langes Drücken) wählen. Status Beschreibung – Aktuellen Status der Stufe beibehalten. Zustand beibehalten – Stufe ausschalten. – Stufe einschalten. – Stufe blinken lassen. Blinken –...
-
Page 20: Farbe Der Tasten Konfigurieren
4.2.3 Farbe der Tasten konfigurieren Für jede Taste kann festgelegt werden, in welcher Farbe die Taste bei einem Tastendruck leuchtet. Zusätzlich kann festgelegt werden, ob die Taste nach einen Tastendruck weiter leuchtet und den Status der Stufe anzeigt, falls die Andon WirelessBOX über den USB-C-Anschluss mit Strom versorgt wird. - Page 21 3. Mit der Option Status der Taster-LED im Batteriebetrieb das Verhalten der Taste wählen, wenn die Andon WirelessBOX mit Batteriespannung betrieben wird. Option Beschreibung – Die Taste leuchtet während Tastendruck nicht. – Die Haltbarkeit der Batterie verlängert sich. – Die Taste leuchtet während Tastendruck. 'An' solange gedrückt –...
-
Page 22: Konfiguration Auf Andon Wirelessbox Übertragen
Konfiguration in eine Konfigurationsdatei exportiert werden, siehe "Konfiguration in Konfigurationsdatei exportieren", S. 29. WERMA empfiehlt die Konfiguration in eine Konfigurationsdatei zu exportieren, um die Ein- stellung des Funkkanals und der Netzwerk-ID für die Konfiguration des Transceiver impor- tieren zu können. -
Page 23: 5 Transceiver Konfigurieren
Falls bereits eine Konfiguration erstellt und gespeichert wurde, kann diese Konfiguration importiert werden oder es kann eine neue Konfiguration erstellt werden. Falls noch keine Konfiguration gespeichert wurde können die Einstellungen aus einem bereits konfigurierten AndonWIRELESS Gerät ausgelesen und exportiert werden. Version: 1.1 - 09/2021... -
Page 24: Konfiguration Importieren
5.1 Konfiguration importieren Beim Import der Konfigurationsdatei werden lediglich der Funkkanal und die Netzwerk-ID importiert. Die Stufenzuordnung wird nicht geladen. 1. Im Fenster Neues Gerät erkannt auf Aus Datei importieren klicken. 2. Zur gespeicherten Konfigurationsdatei (*.json) navigieren und auf Öffnen klicken. Die Konfiguration wird geladen und angezeigt. - Page 25 4. Auf Ja klicken, um die aktuelle Konfiguration auf weitere Transceiver zu übertragen, siehe "Kon- figuration auf weitere Transceiver übertragen", S. 28. 5. Auf Nein klicken, um ein anderes AndonWIRELESS Gerät zu konfigurieren. 6. USB-Kabel von Transceiver entfernen. Version: 1.1 - 09/2021...
-
Page 26: Neue Konfiguration Erstellen Oder Vorhandene Konfiguration Anpassen
5.2 Neue Konfiguration erstellen oder vorhandene Kon- figuration anpassen Geänderte Einstellungen können jederzeit durch Klick auf Änderungen verwerfen auf die zuletzt gespeicherte Konfiguration auf dem Transceiver zurückgesetzt werden. 1. Im Fenster Neues Gerät erkannt auf Neu erstellen klicken. Der Konfigurationsbildschirm erscheint. -
Page 27: Funkkanal Und Netzwerk-Id Einstellen
5.2.1 Funkkanal und Netzwerk-ID einstellen Alle AndonWIRELESS Geräte, die miteinander kommunizieren sollen, müssen den gleichen Funkkanal und die gleiche Netzwerk-ID verwenden. 1. Im Auswahlmenü Funkkanal den gemeinsamen Funkkanal für die Andon WirelessBOX und den Transceiver wählen. 2. Im Feld Funk-Netzwerkadresse die gemeinsame Netzwerk-ID für die Andon WirelessBOX und den Transceiver eingeben. -
Page 28: Konfiguration Auf Transceiver Übertragen
2. Auf Ja klicken, um die aktuelle Konfiguration auf weitere Transceiver zu übertragen, siehe "Kon- figuration auf weitere Transceiver übertragen", S. 28. 3. Auf Nein klicken, um ein anderes AndonWIRELESS Gerät zu konfigurieren. 4. USB-Kabel von Transceiver entfernen. Konfiguration auf weitere Transceiver übertragen 1. -
Page 29: 6 Konfiguration Exportieren Und Importieren
2. Zur gespeicherten Konfigurationsdatei (*.json) navigieren und auf Öffnen klicken. Die Konfiguration wird geladen und angezeigt. Die Konfiguration kann angepasst und auf das AndonWIRELESS Gerät übertragen werden, siehe "Neue Konfiguration erstellen oder vorhandene Konfiguration anpassen", S. 17 bzw. siehe "Neue Konfiguration erstellen oder vorhandene Konfiguration anpassen", S. 26. -
Page 30: 7 Auf Werkseinstellungen Zurücksetzen
Der Konfigurationsbildschirm erscheint. 2. Auf Werkseinstellungen wiederherstellen klicken. Eine Sicherheitsabfrage erscheint. 3. Auf Nein klicken, um das AndonWIRELESS Gerät nicht auf Werkseinstellungen zurückzusetzen. 4. Auf Ja klicken, um das AndonWIRELESS Gerät auf Werkseinstellungen zurückzusetzen. AndonWIRELESS Gerät wird auf Werkseinstellungen zurückgesetzt. -
Page 31: 8 Software Aktualisieren
1. Im Menü Info auf Nach Software-Update suchen (online) klicken. Die AndonWIRELESS Konfigurationssoftware sucht nach Software-Aktualisierungen. Falls eine Aktualisierung gefunden wurde, erscheint eine entsprechende Meldung. 2. Auf Ja klicken, um die neue Version der AndonWIRELESS Konfigurationssoftware von der Pro- duktwebseite herunterzuladen. Die Produktwebseite wird aufgerufen. -
Page 32: 9 Firmware Aktualisieren
9 Firmware aktualisieren Sobald ein AndonWIRELESS Gerät mit einer veralteten Firmware angeschlossen wird, erkennt die AndonWIRELESS Konfigurationssoftware die veraltete Firmware. Es erscheint eine entsprechende Meldung, das ein Firmware-Update durchgeführt werden kann. Beschädigung durch Unterbrechung des Firmware-Updates! Bei Unterbrechung des Firmwareupdates kann das AndonWIRELESS Gerät beschädigt wer- den oder es kann nicht mehr auf das AndonWIRELESS Gerät zugegriffen werden. - Page 33 2. Auf Update starten klicken, um das Firmware-Update durchzuführen. Das Firmware-Update wird heruntergeladen und auf das AndonWIRELESS Gerät übertragen. Falls beim Firmware-Update ein Fehler auftritt, leuchtet die Status-LED am AndonWIRELESS Gerät blau. 1. USB-Kabel vom AndonWIRELESS Gerät abziehen und erneut verbinden.
-
Page 34: 10 Manuelle Treiberinstallation
10 Manuelle Treiberinstallation Die manuelle Treiberinstallation ist nur notwendig, falls die Gerätetreibersoftware beim Anschluss eines AndonWIRELESS Geräts nicht automatisch installiert wurde. 1. Im Ordner driver doppelt auf CDM21228_Setup.exe klicken. Die Installation der FTDI CDM Treiber startet. 2. Auf Extract klicken. Der Gerätetreiberinstallations-Assistent startet. -
Page 35: 11 Konfigurationsbeispiele
11 Konfigurationsbeispiele Bei allen folgenden Konfigurationsbeispielen werden die Andon WirelessBOXen über den USB-Anschluss mit Strom versorgt, um den Status der Signalsäulen widerzuspiegeln. Version: 1.1 - 09/2021... -
Page 36: Beispiel 1: Einfache Signalisierung
11.1 Beispiel 1: Einfache Signalisierung Szenario – Der Werker hat eine Andon WirelessBOX mit 2 Tasten. Ablauf Der Werker hat ein Problem und drückt Taste 2 seiner Andon WirelessBOX. Taste 2 der Andon WirelessBOX des Werkers leuchtet rot. Die Signalsäule des Werkers leuchtet rot. Nachdem das Problem behoben ist, drückt der Werker Taste 1 seiner Andon WirelessBOX. -
Page 37: Beispiel 2: Problem An Schichtführer Melden Und Hilfe Signalisieren
11.2 Beispiel 2: Problem an Schichtführer melden und Hilfe signalisieren Szenario – Der Werker und Schichtführer haben eine Andon WirelessBOX mit 2 Tasten. Ablauf Der Werker benötigt Hilfe und drückt Taste 2 seiner Andon WirelessBOX. Taste 2 der Andon WirelessBOX des Werkers leuchtet rot. Die Signalsäule des Werkers leuchtet rot. - Page 38 Andon WirelessBOX des Schichtführers...
-
Page 39: Beispiel 3: Mehrere Arbeitsplätze
11.3 Beispiel 3: Mehrere Arbeitsplätze Szenario – Jeder Werker hat eine Andon WirelessBOXmit 2 Tasten. – Der Schichtführer hat eine Andon WirelessBOX mit 5 Tasten. – Die Signalsäulen spiegeln den Bedarf. – Stufe 1 der Signalsäulen: Werker 1; Farbe weiß – Stufe 2 der Signalsäulen: Werker 2; Farbe rot –... - Page 40 Konfiguration der Andon WirelessBOXen Andon WirelessBOX von Werker 2 Andon WirelessBOX des Schichtführers, beispielhaft für Taste 2 für Werker 2 Die Konfiguration der Andon WirelessBOXen der weiteren Werker unterscheiden sich ledig- lich in der Einstellung der Stufe für den jeweiligen Werker und der Farbe der Taste 1.
-
Page 41: Beispiel 4: Materialbedarf Signalisieren
11.4 Beispiel 4: Materialbedarf signalisieren Szenario – Jeder Werker hat eine Andon WirelessBOXmit 5 Tasten. – Das Lager hat eine Andon WirelessBOX mit 5 Tasten. – Die Signalsäulen spiegeln den Bedarf. – Stufe 1 der Signalsäulen: Bedarf für Material 1; Farbe weiß –... - Page 42 Konfiguration der Andon WirelessBOXen Andon WirelessBOXen der Werker, beispielhaft für Material 3 Andon WirelessBOX des Lagers, beispielhaft für Material 3 Die Konfiguration der weiteren Tasten unterscheidet sich lediglich in der Einstellung der Stufe für das jeweiligen Material und der Farbe der Taste.
- Page 43 Manual WERMA AndonWIRELESS Version: 1.1 - 09/2021...
- Page 44 Help Manual: – Microsoft and Windows 10 are trademarks of the Microsoft Corporation WERMA reserves the right to make technical changes to the product and accepts no responsibility for mistakes or printing errors which may be contained in this documentation.
- Page 45 1.4.2 Operation with a power supply unit 1.5 Behaviour when entering and leaving the network 1.5.1 Operation with a power supply unit 1.5.2 Battery operation 2 Installing the AndonWIRELESS configuration software 3 Starting the AndonWIRELESS configuration software 3.1 Setting the language 4 Configuring the Andon WirelessBOX 4.1 Importing the configuration 4.2 Creating a new configuration or modifying an existing configuration...
- Page 46 6 Exporting and importing the configuration 6.1 Exporting the configuration to a configuration file 6.2 Importing the configuration from the configuration file 7 Resetting to the factory settings 8 Updating the software 9 Updating the firmware 10 Manual driver installation 11 Configuration examples 11.1 Example 1: Simple signalling 11.2 Example 2: Reporting a problem to the shift manager and signalling help 11.3 Example 3: Multiple workstations 11.4 Example 4: Signalling material requirements...
-
Page 47: 1 Overview
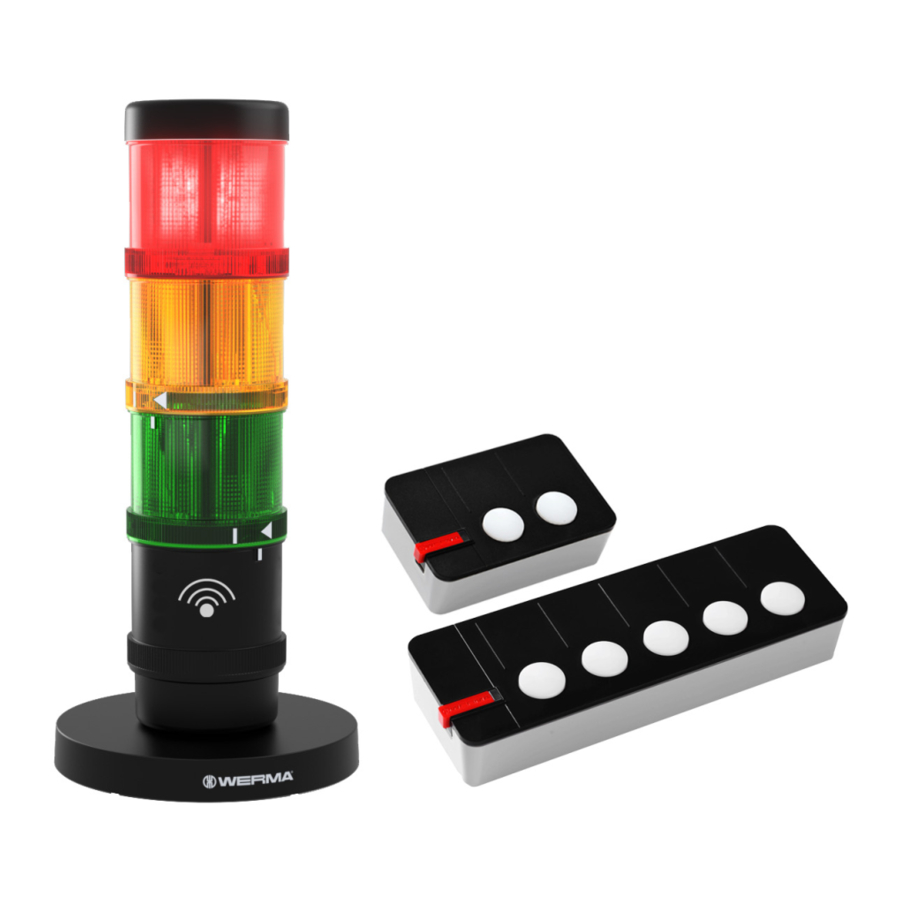
1 Overview 1.1 Function The WERMA AndonWIRELESS configuration software can be used to set up the Andon WirelessBOXes and Transceivers individually. The combination of an Andon WirelessBOX with 2 or 5 buttons and a Transceiver allows for the tiers of a WERMA signal light to be controlled via a wireless connection. -
Page 48: Led Display
868.0 - 868.6 MHz USA and parts of Asia 921.0 - 922.0 MHz 1.2 LED display Possible errors and the current status of the WERMA AndonWIRELESS devices are displayed by the respective LEDs. 1.2.1 Andon WirelessBOX Meaning Status display for the supply of power via the USB port LED lights up green continuously... -
Page 49: Transceiver
250 MB (recommended) USB port Required for the hardware configuration. Internet connection Necessary for updating the AndonWIRELESS configuration soft- ware. Supported operating systems are only supported for as long as Microsoft also supports them through the Microsoft Support Lifecycle. Version: 1.1 - 09/2021... -
Page 50: Power Supply
1.4 Power supply The Andon WirelessBOX can be powered by batteries or an external power supply. 1.4.1 Battery operation Battery type to be used: AAA LR03 When the battery is in use, the buttons on the Andon WirelessBOX are not lit continuously. A button lights up briefly as soon as the button is pressed or a status change occurs. -
Page 51: Behaviour When Entering And Leaving The Network
1.5 Behaviour when entering and leaving the network 1.5.1 Operation with a power supply unit Once an Andon WirelessBOX or Transceiver is outside the network, the status is not synchronised on the network. If the network is not reached, the status LED blinks red. Synchronisation occurs when the device re-enters the network. -
Page 52: 2 Installing The Andonwireless Configuration Software
2 Installing the AndonWIRELESS con- figuration software The AndonWIRELESS configuration software does not need to be installed and runs as a portable version. 1. Unzip the AndonWireless-x.x.x.xx.zip file at the desired location. 3 Starting the AndonWIRELESS con- figuration software 1. Double-click on AndonWireless.exe. -
Page 53: 4 Configuring The Andon Wirelessbox
If both Andon WirelessBOXes are used with 2 and 5 buttons, WERMA recommends con- figuring the Andon WirelessBOX with 5 buttons and exporting the configuration first, see "Exporting the configuration to a configuration file", S. -
Page 54: Importing The Configuration
4.1 Importing the configuration 1. Click on Import from file in the New Device Setup window. 2. Navigate to the saved configuration file (*.json) and click on Open. The configuration is loaded and displayed. 3. Click on Save to device to transfer the configuration to the Andon WirelessBOX. The configuration is transferred to the Andon WirelessBOX. -
Page 55: Creating A New Configuration Or Modifying An Existing Configuration
4. Click on Yes to transfer the current configuration to other Andon WirelessBOXes, see "Transferring the configuration to other Andon WirelessBOXes", S. 60. 5. Click on No to configure another AndonWIRELESS device. 6. Remove the USB cable from the Andon WirelessBOX. 4.2 Creating a new configuration or modifying an existing... -
Page 56: Setting The Radio Channel And Network Id
4.2.1 Setting the radio channel and network ID All AndonWIRELESS devices that are to communicate with each other must use the same radio channel and the same network ID. 1. Select the common radio channel for the Andon WirelessBOX and Transceiver in the Radio chan- nel selection field. - Page 57 2. For each tier of the signal tower, select the status after pressing the button briefly (short press) and after pressing the button for longer (long press). Status Description – Retain the current status of the tier. Keep current state –...
-
Page 58: Configuring Button Colours
4.2.3 Configuring button colours It is possible to define the colour in which the button lights up when it is pressed for each button. In addition, it is possible to specify whether the button remains lit after it has been pressed and displays the status of the tier if the Andon WirelessBOX is powered via the USB-C port. - Page 59 3. Select the behaviour of the button with the Button LED status with battery power option if the Andon WirelessBOX is operated with battery voltage. Option Description – The button does not light up while the button is pressed. – The battery life is extended. –...
-
Page 60: Transferring The Configuration To The Andon Wirelessbox
"Exporting the configuration to a configuration file", S. 67. WERMA recommends that you export the configuration to a configuration file to be able to import the setting of the radio channel and network ID for the configuration of the Trans- ceiver. -
Page 61: 5 Configuring The Transceiver
1. Use the USB cable to connect the Transceiver to the computer. The AndonWIRELESS configuration software detects the Transceiver. If necessary, the required drivers are installed by the Windows update. If the driver installation fails, the drivers can be installed manually, see "Manual driver installation", S. -
Page 62: Importing The Configuration
5.1 Importing the configuration When importing the configuration file, only the radio channel and network ID are imported. The tier assignment is not loaded. 1. Click on Import from file in the New Device Setup window. 2. Navigate to the saved configuration file (*.json) and click on Open. The configuration is loaded and displayed. - Page 63 4. Click on Yes to transfer the current configuration to other Transceivers, see "Transferring the con- figuration to other Transceivers", S. 66. 5. Click on No to configure another AndonWIRELESS device. 6. Remove the USB cable from the Transceiver. Version: 1.1 - 09/2021...
-
Page 64: Creating A New Configuration Or Modifying An Existing Configuration
5.2 Creating a new configuration or modifying an existing configuration Modified settings can be changed at any time by clicking on Discard changes in the last configuration saved on the Transceiver. 1. Click on Create New in the New Device Setup window. The configuration screen appears. -
Page 65: Setting The Radio Channel And Network Id
5.2.1 Setting the radio channel and network ID All AndonWIRELESS devices that are to communicate with each other must use the same radio channel and the same network ID. 1. Select the common radio channel for the Andon WirelessBOX and Transceiver in the Radio chan- nel selection field. -
Page 66: Transferring The Configuration To The Transceiver
2. Click on Yes to transfer the current configuration to other Transceivers, see "Transferring the con- figuration to other Transceivers", S. 66. 3. Click on No to configure another AndonWIRELESS device. 4. Remove the USB cable from the Transceiver. Transferring the configuration to other Transceivers 1. -
Page 67: 6 Exporting And Importing The Configuration
2. Navigate to the saved configuration file (*.json) and click on Open. The configuration is loaded and displayed. The configuration can be modified and transferred to the AndonWIRELESS device, see "Creating a new configuration or modifying an existing configuration", S. 55 or see "Creating a new configuration or modifying an existing configuration", S. -
Page 68: 7 Resetting To The Factory Settings
2. Click on Factory reset. A security prompt appears. 3. Click on No if you don't want to reset the AndonWIRELESS device to the factory settings. 4. Click on Yes to reset the AndonWIRELESS device to the factory settings. AndonWIRELESS device is reset to the factory settings. -
Page 69: 8 Updating The Software
The AndonWIRELESS configuration software checks for software updates. A corresponding message appears if an update is found. 2. Click on Yes to download the new version of the AndonWIRELESS configuration software from the product website. The product website is loaded. -
Page 70: 9 Updating The Firmware
Damage caused by an interruption to the firmware update! If the firmware update is interrupted, the AndonWIRELESS device may be damaged or the AndonWIRELESS device may no longer be accessible. 1. Never interrupt the firmware update. - Page 71 2. Click on Start update to perform the firmware update. The firmware update is downloaded and transferred to the AndonWIRELESS device. If an error occurs during the firmware update, the status LED on the AndonWIRELESS device lights up blue. 1. Disconnect the USB cable from the AndonWIRELESS device and reconnect it.
-
Page 72: 10 Manual Driver Installation
10 Manual driver installation A manual driver installation is only required if the device driver software has not been auto- matically installed during the connection of an AndonWIRELESS device. 1. Double-click on the CDM21228_Setup.exe in the driver folder. The installation of the FTDI CDM driver starts. -
Page 73: 11 Configuration Examples
11 Configuration examples In all of the following configuration examples, the Andon WirelessBOXes are powered via the USB port to reflect the status of the signal towers. Version: 1.1 - 09/2021... -
Page 74: Example 1: Simple Signalling
11.1 Example 1: Simple signalling Scenario – The operator has an Andon WirelessBOX with 2 buttons. Process The operator has a problem and presses button 2 of their Andon WirelessBOX. Button 2 of the operator's Andon WirelessBOX lights up red. The operator's signal tower lights up red. After the problem has been resolved, the operator presses button 1 of their Andon WirelessBOX. -
Page 75: Example 2: Reporting A Problem To The Shift Manager And Signalling Help
11.2 Example 2: Reporting a problem to the shift manager and signalling help Scenario – The operator and shift manager have an Andon WirelessBOX with 2 buttons. Process The operator needs help and presses button 2 of their Andon WirelessBOX. Button 2 of the operator's Andon WirelessBOX lights up red. The operator's signal tower lights up red. - Page 76 Shift manager's Andon WirelessBOX...
-
Page 77: Example 3: Multiple Workstations
11.3 Example 3: Multiple workstations Scenario – Every operator has an Andon WirelessBOX with 2 buttons. – The shift manager has an Andon WirelessBOX with 5 buttons. – The signal towers reflect the requirement. – Tier 1 of the signal towers: Operator 1; colour white –... - Page 78 Configuration of the Andon WirelessBOXes Operator 2's Andon WirelessBOX Shift manager's Andon WirelessBOX, with the example of button 2 for operator 2 The configuration of the Andon WirelessBOXes of the other operators differs only in the set- ting of the tier for the respective operator and the colour of button 1.
-
Page 79: Example 4: Signalling Material Requirements
11.4 Example 4: Signalling material requirements Scenario – Every operator has an Andon WirelessBOX with 5 buttons. – The warehouse has an Andon WirelessBOX with 5 buttons. – The signal towers reflect the requirement. – Tier 1 of the signal towers: Requirement for material 1; colour white –... - Page 80 Configuration of the Andon WirelessBOXes Operator's Andon WirelessBOXes, with the example of material 3 Warehouse's Andon WirelessBOX, with the example of material 3 The configuration of the other buttons differs only in the setting of the tier for the respective material and the colour of the button.
- Page 81 Manuel WERMA AndonWIRELESS Version : 1.1 - 09/2021...
- Page 82 – Microsoft et Windows 10 sont des marques déposées de la société Microsoft Corporation. WERMA se réserve le droit d’apporter des modifications techniques au produit et décline toute res- ponsabilité pour les erreurs ou les fautes d’impression contenues dans ce manuel.
- Page 83 1.4.2 Fonctionnement avec bloc d’alimentation 1.5 Comportement à l’entrée et à la sortie dans le réseau 1.5.1 Fonctionnement avec bloc d’alimentation 1.5.2 Fonctionnement avec pile 2 Installation du logiciel de configuration AndonWIRELESS 3 Démarrage du logiciel de configuration AndonWIRELESS 3.1 Définir la langue 4 Configuration du boîtier WirelessBOX 4.1 Importer une configuration...
- Page 84 6 Exportation et importation de la configuration 6.1 Exportation de la configuration vers un fichier de configuration 6.2 Importation de la configuration à partir du fichier de configuration 7 Restauration des paramètres d’usine 8 Mettre à jour le logiciel 9 Mise à jour du firmware 10 Manuel d’installation du pilote 11 Exemples de configuration 11.1 Exemple 1: Signalisation simple 11.2 Exemple 2 : Signaler un problème au chef d’équipe et demander de l’aide...
-
Page 85: 1 Aperçu Général
La combinaison d’un Andon WirelessBOX avec 2 ou 5 boutons et d’un émetteur-récepteur permet de contrôler les niveaux d’une colonne de signalisation WERMA via une connexion sans fil. Le système peut être conçu de manière flexible. Par exemple, un boîtier Andon WirelessBOX peut commander un ou plusieurs feux de signalisation (réseau sans fil 1:1, réseau sans fil 1:n) ou plusieurs... -
Page 86: Affichage Led
868.0 - 868.6 MHz USA ou parties de ASIE 921.0 - 922.0 MHz 1.2 Affichage LED Les erreurs éventuelles et l’état actuel des appareils WERMA AndonWIRELESS sont affichés par les LED respectives. 1.2.1 Andon WirelessBOX Signification Affichage de l’état de l’alimentation électrique via le port USB La LED s’allume en vert en permanence Andon WirelessBOX est alimenté... -
Page 87: Émetteurs-Récepteurs
Nécessaire pour la configuration du matériel Connexion Internet Nécessaire pour la mise à jour du logiciel de configuration AndonWIRELESS Les systèmes d’exploitation sont pris en charge tant que Microsoft les prend en charge dans le cadre du cycle de vie du support Microsoft. -
Page 88: Alimentation Électrique
1.4 Alimentation électrique L’alimentation électrique de l’Andon WirelessBOX peut être assurée par des piles ou un bloc d’alimentation externe. 1.4.1 Fonctionnement avec pile Type de batterie compatible : AAA LR03 En mode de fonctionnement avec pile, les touches de l’Andon WirelessBOX ne sont pas allumées de manière permanente. -
Page 89: Comportement À L'entrée Et À La Sortie Dans Le Réseau
1.5 Comportement à l’entrée et à la sortie dans le réseau 1.5.1 Fonctionnement avec bloc d’alimentation Dès qu’un Andon WirelessBOX ou un émetteur-récepteur se situe hors du réseau, aucune syn- chronisation de l’état n’a lieu dans le réseau. Si le réseau n’est pas atteint, la LED d’état clignote en rouge. -
Page 90: 2 Installation Du Logiciel De Configuration Andonwireless
2 Installation du logiciel de configuration AndonWIRELESS Le logiciel de configuration AndonWIRELESS n’a pas besoin d’être installé et fonctionne comme une version portable. 1. Décompressez le fichier AndonWireless-x.x.x.xx.zip à l’emplacement souhaité. 3 Démarrage du logiciel de configuration AndonWIRELESS 1. Double-cliquez sur AndonWireless.exe. -
Page 91: 4 Configuration Du Boîtier Wirelessbox
Si les Andon WirelessBOXes sont utilisés avec 2 et 5 boutons, WERMA recommande de confi- gurer l’Andon WirelessBOX avec 5 boutons et d’exporter d’abord la configuration, voir « Exportation de la configuration vers un fichier de configuration », p. -
Page 92: Importer Une Configuration
4.1 Importer une configuration 1. Cliquez sur Import from file dans la fenêtre New Device Setup. 2. Naviguer jusqu’au fichier de configuration enregistré (*.json) et cliquer sur Open. La configuration est chargée et affichée. 3. Cliquez sur Save to device pour transférer la configuration vers l’Andon WirelessBOX. La configuration est transférée sur l’Andon WirelessBOX. -
Page 93: Création D'une Nouvelle Configuration Ou Modification D'une Configuration Exis
4. Cliquez sur Yes pour transférer la configuration actuelle vers d’autres Andon WirelessBOXes, voir « Transfert de la configuration vers d’autres Andon WirelessBOXes », p. 98. 5. Cliquez sur No pour configurer un autre périphérique AndonWIRELESS. 6. Retirez le câble USB de l’Andon WirelessBOX. 4.2 Création d’une nouvelle configuration ou modification d’une configuration existante... -
Page 94: Réglage Du Canal Radio Et De L'id Du Réseau Radio
4.2.1 Réglage du canal radio et de l’ID du réseau radio Tous les AndonWIRELESS qui doivent communiquer entre eux doivent utiliser le même canal radio et le même ID de réseau radio. 1. Sélectionnez le canal radio commun à l’Andon WirelessBOX et à l’émetteur-récepteur dans le menu de sélection du Radio channel. - Page 95 2. Pour chaque étage de la colonne lumineuse, sélectionnez l’état après une brève pression sur le bouton (pression courte) et après une pression plus longue (pression longue). Etat Etat Description Garder l’état actuel – Conserve l’état actuel du niveau Keep current state –...
-
Page 96: Configuration Des Couleurs Des Boutons
4.2.3 Configuration des couleurs des boutons Il est possible de définir pour chaque bouton la couleur dans laquelle il s’allume lorsqu’on appuie dessus. En outre, il est possible de préciser si le bouton reste allumé après avoir été enfoncé si l’Andon WirelessBOX est alimenté par le port USB-C. Cela permet de connaître l’état actuel de la colonne lumineuse sur l’Andon WirelessBOX. - Page 97 3. Sélectionnez le comportement du bouton à l’aide de l’option Button LED status with battery power si l’Andon WirelessBOX fonctionne sur batterie. Option Description – Le bouton ne s’allume pas lorsque l’on appuie dessus. – La durée de vie de la batterie est prolongée. –...
-
Page 98: Transfert De La Configuration Vers L'andon Wirelessbox
Si la configuration doit être transférée ultérieurement vers d’autres Andon WirelessBOXes, la configuration actuelle peut être exportée vers un fichier de configuration, voir « Expor- tation de la configuration vers un fichier de configuration », p. 105. WERMA vous recom- mande d’exporter la configuration vers un fichier de configuration pour pouvoir importer le réglage du canal radio et l’ID du réseau radio pour la configuration de l’émetteur-récep-... -
Page 99: 5 Configuration De L'émetteur-Récepteur
Si une configuration a déjà été créée et sauvegardée, cette configuration peut être impor- tée ou une nouvelle configuration peut être créée. Si aucune configuration n’a encore été enregistrée, les paramètres peuvent être lus et exportés à partir d’un appareil AndonWIRELESS déjà configuré. Version: 1.1 - 09/2021... -
Page 100: Importer La Configuration
5.1 Importer la configuration Lors de l’importation du fichier de configuration, seuls le canal radio et l’ID du réseau radio sont importés. L’affectation des niveaux n’est pas chargée. 1. Cliquez sur Import from file. 2. Naviguez jusqu’au fichier de configuration enregistré (*.json) et cliquez sur Open. La configuration est chargée et affichée. - Page 101 4. Cliquez sur Yes pour transférer la configuration actuelle vers d’autres émetteurs-récepteurs, voir « Transfert de la configuration à d’autres émetteurs-récepteurs », p. 104. 5. Cliquez sur No pour configurer un autre dispositif AndonWIRELESS. 6. Retirez le câble USB de l’émetteur-récepteur. Version: 1.1 - 09/2021...
-
Page 102: Création D'une Nouvelle Configuration Ou Modification D'une Configuration Existante
5.2 Création d’une nouvelle configuration ou modification d’une configuration existante Les paramètres modifiés peuvent être changés à tout moment en cliquant sur Discard changes dans la dernière configuration enregistré sur l’émetteur-récepteur. 1. Cliquez sur Create New . L’écran de configuration apparaît. -
Page 103: Réglage Du Canal Radio Et De L'id Du Réseau Radio
5.2.1 Réglage du canal radio et de l’ID du réseau radio Tous les AndonWIRELESS qui doivent communiquer entre eux doivent utiliser le même canal radio et le même ID de réseau radio. 1. Sélectionnez le canal radio commun à l’Andon WirelessBOX et à l’émetteur-récepteur dans le menu de sélection du Radio channel. -
Page 104: Transfert De La Configuration À L'émetteur-Récepteur
2. Cliquez sur Yes pour transférer la configuration actuelle vers d’autres émetteurs-récepteurs, voir « Transfert de la configuration à d’autres émetteurs-récepteurs », p. 104. 3. Cliquez sur No pour configurer un autre dispositif AndonWIRELESS. 4. Retirez le câble USB de l’émetteur-récepteur. Transfert de la configuration à d’autres émetteurs-récepteurs 1. -
Page 105: 6 Exportation Et Importation De La Configuration
2. Naviguez jusqu’au fichier de configuration enregistré (*.json) et cliquez sur Open. La configuration est chargée et affichée. La configuration peut être modifiée et transférée à l’AndonWIRELESS, voir « Créer une nou- velle configuration ou modifier une configuration existante », voir « Création d’une nouvelle configuration ou modification d’une configuration existante », p. -
Page 106: 7 Restauration Des Paramètres D'usine
2. Cliquez sur Factory reset. Une fenêtre de confirmation apparaît. 3. Cliquez sur No si vous ne souhaitez pas réinitialiser l’AndonWIRELESS aux paramètres d’usine. 4. Cliquez sur Yes pour réinitialiser l’AndonWIRELESS aux paramètres d’usine. Le périphérique AndonWIRELESS est réinitialisé aux paramètres d’usine. -
Page 107: 8 Mettre À Jour Le Logiciel
2. Cliquez sur Yes pour télécharger la nouvelle version du logiciel de configuration d’AndonWIRELESS à partir du site Web du produit. Le site Web du produit est chargé. 3. Téléchargez la dernière version du logiciel de configuration d’AndonWIRELESS à partir du site Web du produit. 4. Arrêtez le logiciel de configuration AndonWIRELESS. -
Page 108: 9 Mise À Jour Du Firmware
AndonWIRELESS peut ne plus être accessible. 1. N’interrompez jamais la mise à jour du firmware. 2. Ne débranchez pas le câble USB du dispositif AndonWIRELESS avant la fin de la mise à jour du firmware. Le firmware est stocké dans le logiciel de configuration d’AndonWIRELESS. Pour obtenir le dernier firmware disponible, WERMA recommande de mettre à... - Page 109 2. Cliquez sur Start update pour effectuer la mise à jour du firmware. La mise à jour du firmware est téléchargée et transférée vers le dispositif AndonWIRELESS. Si une erreur se produit pendant la mise à jour du firmware, le voyant d’état du dispositif AndonWIRELESS s’allume en bleu.
-
Page 110: 10 Manuel D'installation Du Pilote
L’installation manuelle du pilote n’est nécessaire que si le logiciel du pilote du périphérique n’a pas été automatiquement installé lors de la connexion d’un périphérique AndonWIRELESS. 1. Double-cliquez sur le fichier CDM21228_Setup.exe dans le dossier du pilote. L’installation du pilote FTDI CDM démarre. -
Page 111: 11 Exemples De Configuration
11 Exemples de configuration Dans tous les exemples de configuration suivants, les Andon WirelessBOXes sont alimentés par le port USB afin de refléter l’état des colonnes de signalisation. Version: 1.1 - 09/2021... -
Page 112: Exemple 1: Signalisation Simple
11.1 Exemple 1: Signalisation simple Scénario – L’opérateur dispose d’un Andon WirelessBOX avec 2 boutons. Processus L’opérateur a un problème et appuie sur le bouton 2 de son Andon WirelessBOX. Le bouton 2 de l’Andon WirelessBOX de l’opérateur s’allume en rouge. La colonne lumineuse de l’opérateur s’allume en rouge. Une fois le problème résolu, l’opérateur appuie sur le bouton 1 de son Andon WirelessBOX. -
Page 113: Exemple 2 : Signaler Un Problème Au Chef D'équipe Et Demander De L'aide
11.2 Exemple 2 : Signaler un problème au chef d’équipe et demander de l’aide Scénario – L’opérateur et le chef d’équipe disposent d’un Andon WirelessBOX avec 2 boutons. Processus L’opérateur a besoin d’aide et appuie sur le bouton 2 de son Andon WirelessBOX. Le bouton 2 de l’Andon WirelessBOX de l’opérateur s’allume en rouge. - Page 114 Andon WirelessBOX du chef d’équipe...
-
Page 115: Exemple 3 : Postes De Travail Multiples
11.3 Exemple 3 : Postes de travail multiples Scénario – Chaque opérateur dispose d’un Andon WirelessBOX avec 2 boutons. – Le chef d’équipe dispose d’un Andon WirelessBOX avec 5 boutons. – Les colonnes lumineuses reflètent les besoins. – Niveau 1 des colonnes lumineuses : Opérateur 1 ; couleur blanche –... - Page 116 Configuration des Andon WirelessBOXes Andon WirelessBOX de l’opérateur 2 Andon WirelessBOX du chef d’équipe, par exemple pour la touche 2 pour l’opérateur 2 La configuration des Andon WirelessBOXes des autres opérateurs ne diffère que par la mise en place du niveau de l’opérateur respectif et de la couleur du bouton 1.
-
Page 117: Exemple 4 : Appel Demande Livraison Matériel
11.4 Exemple 4 : Appel demande livraison matériel Scénario – Chaque opérateur dispose d’un Andon WirelessBOX avec 5 boutons. – Le responsable de l’entrepôt dispose d’un Andon WirelessBOX avec 5 boutons. – La colonne lumineuse reflète les besoins. – Niveau 1 : appel pour le matériel 1 ; couleur blanche –... - Page 118 Configuration des Andon WirelessBOXes Andon WirelessBOX des opérateurs, par exemple pour matériel 3 Andon WirelessBOX de l’entrepôt, par exemple pour matériel 3 La configuration des boutons ne diffère que par le réglage de l’étage pour le matériau res- pectif et la couleur du bouton.
Need help?
Do you have a question about the AndonWIRELESS and is the answer not in the manual?
Questions and answers