Table of Contents
Advertisement
Quick Links
Advertisement
Table of Contents

Related Manuals for werma AndonWireless


Summary of Contents for werma AndonWireless
- Page 1 Manual WERMA AndonWireless Version: 1.0 - 05/2021...
- Page 2 Help Manual: – Microsoft and Windows 10 are trademarks of the Microsoft Corporation WERMA reserves the right to make technical changes to the product and accepts no respon- sibility for mistakes or printing errors which may be contained in this documentation.
-
Page 3: Table Of Contents
1 Overview 1.1 Function 1.2 LED display 1.2.1 AndonWirelessBOX 1.2.2 Transceiver 1.3 System requirements 2 Installing the AndonWireless configuration software 3 Starting the AndonWireless configuration software 3.1 Setting the language 4 Configuring the AndonWirelessBOX 4.1 Importing the configuration 4.2 Creating a new configuration or modifying an existing configuration 4.2.1 Setting the radio channel and radio network ID 4.2.2 Configuring the button functions... - Page 4 6 Exporting and importing the configuration 6.1 Exporting the configuration to a configuration file 6.2 Importing the configuration from the configuration file 7 Resetting to factory settings 8 Updating the software 9 Updating the firmware 10 Manual driver installation 11 Configuration examples 11.1 Example 1: Simple signalling 11.2 Example 2: Reporting a problem to the shift manager and signalling help 11.3 Example 3: Multiple workstations 11.4 Example 3: Signalling material requirements...
-
Page 5: 1 Overview
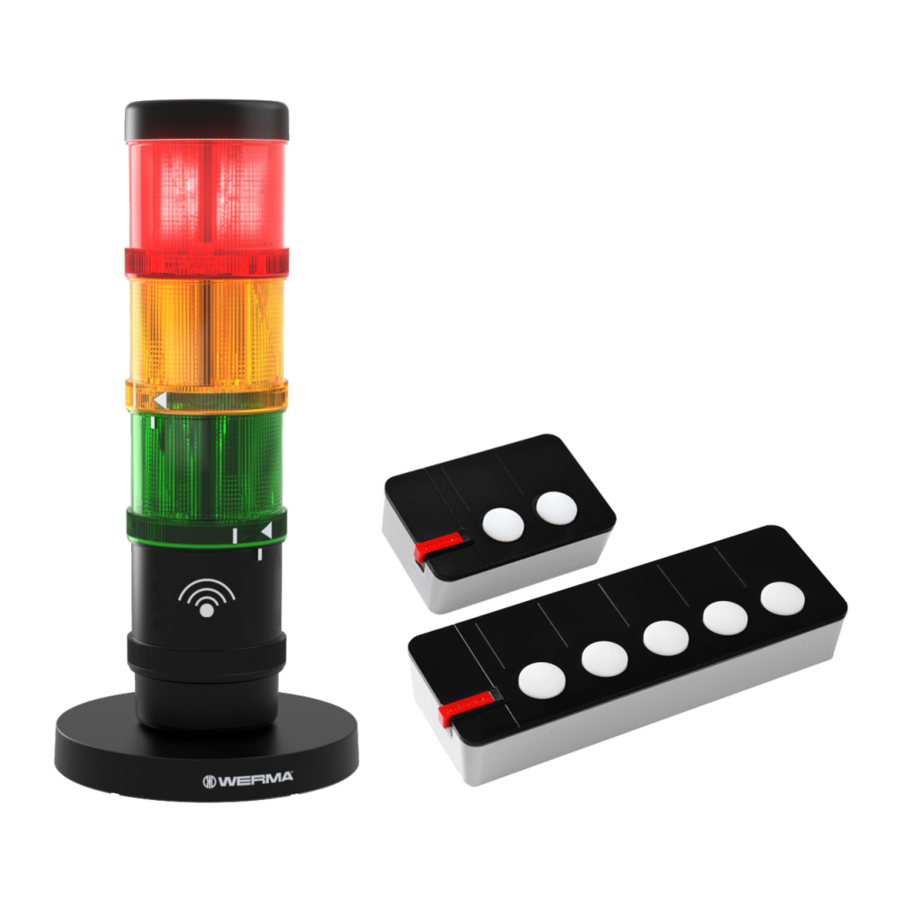
1 Overview 1.1 Function The WERMA AndonWireless configuration software can be used to set up AndonWirelessBOXes and Transceivers individually. The combination of an AndonWirelessBOX with 2 or 5 buttons and a Transceiver allows controlling the tiers of a WERMA signal light via a wireless connection. -
Page 6: Led Display
868.0 - 868.6 MHz USA and parts of Asia 921.0 - 922.0 MHz 1.2 LED display Possible errors and the current status of the WERMA AndonWireless devices are displayed by the respective LEDs. 1.2.1 AndonWirelessBOX Meaning Status display for the supply of power via the USB port LED lights up green continuously... -
Page 7: Transceiver
250 MB (recommended) USB port Required for the hardware configuration. Internet connection Necessary for updating the AndonWireless configuration soft- ware. Supported operating systems are only supported for as long as Microsoft also supports them through the Microsoft Support Lifecycle. Version: 1.0 - 05/2021... -
Page 8: 2 Installing The Andonwireless Configuration Software
2 Installing the AndonWireless con- figuration software The AndonWireless configuration software does not need to be installed and runs as a portable version. 1. Unzip the AndonWireless-x.x.x.xx.zip file at the desired location. 3 Starting the AndonWireless configuration software 1. Double-click on AndonWireless.exe. -
Page 9: 4 Configuring The Andonwirelessbox
If both AndonWirelessBOXes are used with 2 and 5 buttons, WERMA recommends con- figuring the AndonWirelessBOX with 5 buttons and exporting the configuration first, see "Exporting the configuration to a configuration file", p. -
Page 10: Importing The Configuration
4.1 Importing the configuration 1. Click on Import from file in the New Device Setup window. 2. Navigate to the saved configuration file (*.json) and click on Open. The configuration is loaded and displayed. 3. Click on Save to device to transfer the configuration to the AndonWirelessBOX. The configuration is transferred to the AndonWirelessBOX. -
Page 11: Creating A New Configuration Or Modifying An Existing Configuration
4. Click on Yes to transfer the current configuration to other AndonWirelessBOXes, see "Trans- ferring the configuration to other AndonWirelessBOXes", p. 16. 5. Click on No to configure another AndonWireless device. 6. Remove the USB cable from the AndonWirelessBOX. 4.2 Creating a new configuration or modifying an existing... -
Page 12: Setting The Radio Channel And Radio Network Id
4.2.1 Setting the radio channel and radio network ID All AndonWireless devices that are to communicate with each other must use the same radio channel and the same radio network ID. 1. Select the common radio channel for the AndonWirelessBOX and Transceiver in the Radio channel selection menu. - Page 13 2. For each tier of the signal tower, select the status after pressing the button briefly (short pres- sed) and after pressing the button for longer (long pressed). Status Description – Retain the current status of the tier. Keep current state –...
-
Page 14: Configuring Button Colours
4.2.3 Configuring button colours It is possible to define the colour in which the button lights up when it is pressed for each button. In addition, it is possible to specify whether the button remains lit after it has been pressed and dis- plays the status of the tier if the AndonWirelessBOX is powered via the USB-C port. - Page 15 3. Select the behaviour of the button with the Button LED status with battery power option if the AndonWirelessBOX is operated with battery voltage. Option Description – The button does not light up when the button is pressed. – The battery life is extended. –...
-
Page 16: Transferring The Configuration To The Andonwirelessbox
"Exporting the con- figuration to a configuration file", p. 23. WERMA recommends that you export the configuration to a configuration file to be able to import the setting of the radio channel and the radio network ID for the configuration of the Transceiver. -
Page 17: 5 Configuring The Transceiver
1. Use the USB cable to connect the Transceiver to the computer. The AndonWireless configuration software detects the Transceiver. If necessary, the required drivers are installed by the Windows update. If the driver instal- lation fails, the drivers can be installed manually, see "Manual driver installation", p. -
Page 18: Importing The Configuration
5.1 Importing the configuration When importing the configuration file, only the radio channel and the radio network ID are imported. The tier assignment is not loaded. 1. Click on Import from file in the New Device Setup window. 2. Navigate to the saved configuration file (*.json) and click on Open. The configuration is loaded and displayed. - Page 19 4. Click on Yes to transfer the current configuration to other Transceivers, see "Transferring the configuration to other Transceivers", p. 22. 5. Click on No to configure another AndonWireless device. 6. Remove the USB cable from the Transceiver. Version: 1.0 - 05/2021...
-
Page 20: Creating A New Configuration Or Modifying An Existing Configuration
5.2 Creating a new configuration or modifying an existing configuration Modified settings can be changed at any time by clicking on Discard changes in the last configuration saved on the Transceiver. 1. Click on Create New in the New Device Setup window. The configuration screen appears. -
Page 21: Setting The Radio Channel And Radio Network Id
5.2.1 Setting the radio channel and radio network ID All AndonWireless devices that are to communicate with each other must use the same radio channel and the same radio network ID. 1. Select the common radio channel for the AndonWirelessBOX and Transceiver in the Radio channel selection menu. -
Page 22: Transferring The Configuration To The Transceiver
2. Click on Yes to transfer the current configuration to other Transceivers, see "Transferring the configuration to other Transceivers", p. 22. 3. Click on No to configure another AndonWireless device. 4. Remove the USB cable from the Transceiver. Transferring the configuration to other Transceivers 1. -
Page 23: 6 Exporting And Importing The Configuration
2. Navigate to the saved configuration file (*.json) and click on Open. The configuration is loaded and displayed. The configuration can be modified and transferred to the AndonWireless device, see "Crea- ting a new configuration or modifying an existing configuration", p. 11 or see "Creating a new configuration or modifying an existing configuration", p. -
Page 24: 7 Resetting To Factory Settings
2. Click on Factory reset. A security prompt appears. 3. Click on No if you don't want to reset the AndonWireless device to the factory settings. 4. Click on Yes to reset the AndonWireless device to the factory settings. AndonWireless device is reset to the factory settings. -
Page 25: 8 Updating The Software
The AndonWireless configuration software checks for software updates. A corresponding message appears if an update is found. 2. Click on Yes to download the new version of the AndonWireless configuration software from the product website. The product website is loaded. -
Page 26: 9 Updating The Firmware
Damage caused by an interruption to the firmware update! If the firmware update is interrupted, the AndonWireless device may be damaged or the AndonWireless device may no longer be accessible. 1. Never interrupt the firmware update. - Page 27 2. Click on Start update to perform the firmware update. The firmware update is downloaded and transferred to the AndonWireless device. If an error occurs during the firmware update, the status LED on the AndonWireless device lights up blue. 1. Disconnect the USB cable from the AndonWireless device and reconnect it.
-
Page 28: 10 Manual Driver Installation
10 Manual driver installation Manual driver installation is only required if the device driver software has not been auto- matically installed during the connection of an AndonWireless device. 1. Double-click on the CDM21228_Setup.exe in the driver folder. The installation of the FTDI CDM driver starts. -
Page 29: 11 Configuration Examples
11 Configuration examples In all of the following configuration examples, the AndonWirelessBOXes are powered via the USB port to reflect the status of the signal towers. Version: 1.0 - 05/2021... -
Page 30: Example 1: Simple Signalling
11.1 Example 1: Simple signalling Scenario – The operator has an AndonWirelessBOX with 2 buttons. Process The operator has a problem and presses button 2 of his AndonWirelessBOX. Button 2 of the operator's AndonWirelessBOX lights up red. The operator's signal tower lights up red. After the problem has been resolved, the operator presses button 1 of his AndonWirelessBOX. -
Page 31: Example 2: Reporting A Problem To The Shift Manager And Signalling Help
11.2 Example 2: Reporting a problem to the shift manager and signalling help Scenario – The operator and shift manager have an AndonWirelessBOX with 2 buttons. Process The operator needs help and presses button 2 of his AndonWirelessBOX. Button 2 of the operator's AndonWirelessBOX lights up red. The operator's signal tower lights up red. - Page 32 Configuration of the AndonWirelessBOXes Operator's AndonWirelessBOX Shift manager's AndonWirelessBOX...
-
Page 33: Example 3: Multiple Workstations
11.3 Example 3: Multiple workstations Scenario – Every operator has an AndonWirelessBOXwith 2 buttons. – The shift manager has an AndonWirelessBOX with 5 buttons. – The signal towers reflect the requirement. – Tier 1 of the signal towers: Operator 1; colour white –... - Page 34 Configuration of the AndonWirelessBOXes Operator 2's AndonWirelessBOX Shift manager's AndonWirelessBOX, with the example of button 2 for operator 2 The configuration of the AndonWirelessBOXes of the other operators differs only in the set- ting of the tier for the respective operator and the colour of button 1.
-
Page 35: Example 3: Signalling Material Requirements
11.4 Example 3: Signalling material requirements Scenario – Every operator has an AndonWirelessBOXwith 5 buttons. – The warehouse has an AndonWirelessBOX with 5 buttons. – The signal towers reflect the requirement. – Tier 1 of the signal towers: Requirement for material 1; colour white –... - Page 36 Configuration of the AndonWirelessBOXes Operators’ AndonWirelessBOXes, with the Warehouse’s AndonWirelessBOX, with the example of material 3 example of material 3 The configuration of the buttons differs only in the setting of the tier for the respective material and the colour of the button.
Need help?
Do you have a question about the AndonWireless and is the answer not in the manual?
Questions and answers