Table of Contents
Advertisement
Quick Links
Advertisement
Table of Contents

Subscribe to Our Youtube Channel
Related Manuals for Bellini BMWM28


Summary of Contents for Bellini BMWM28
- Page 1 Built-In Black Microwave Model No. BMWM28 GSM Retail Australia Pty Ltd ABN: 53 007 582 475 For Warranty and technical queries: 1300 373 199 Aust OR 0800 764 912 NZ www.belliniappliances.com.au Model: BMWM28 Fineline: 295810 Built-In Black Microwave V2 March 2022...
- Page 2 Bellini prides itself on ‘affordable living’ making sure there is not compromise in your favourite room..The Kitchen. All Bellini appliances carry a 3 year In Home warranty, be sure to retain your installation and user manual and receipt. For all warranty and technical queries please phone:...
- Page 3 Start using your appliance ......... 9 Maintenance ............10-11 Warranty .............. 12-13 GSM Retail Australia Pty Ltd ABN: 53 007 582 475 For Warranty and technical queries: 1300 373 199 Aust OR 0800 764 912 NZ www.belliniappliances.com.au Model: BMWM28 Fineline: 295810 Built-In Black Microwave...
-
Page 4: Safety Instructions
In case of failure, only the authorised Technical Service may repair this hob. Otherwise the guarantee will be null and void. All Bellini Appliances are for domestic use only. 1. This appliance is not intended for use by 13. -
Page 5: Precautions To Avoid Possible Exposure To Excessive Microwave Energy
Safety Instructions Consult a qualified electrician or serviceman if the DANGER grounding instructions are not completely Electric Shock Hazard Touching some of the understood or if doubt exists as to whether the internal components can cause serious personal appliance is properly grounded. injury or death. - Page 6 CLEANING Be sure to unplug the appliance from the power supply. 1. Clean the cavity of the oven after using with a slightly damp cloth. 2. Clean the accessories in the usual way in soapy water. 3. The door frame and seal and neighboring parts must be cleaned carefully with a damp cloth when they are dirty.
-
Page 7: Materials You Can Use In Microwave Oven
Materials you can use in microwave oven Utensils Remarks Browning dish Follow manufacturer’s instructions. The bottom of browning dish must be at least 3/16 inch (5mm) above the turntable. Incorrect usage may cause the turntable to break. Dinnerware Microwave-safe only. Follow manufacturer's instructions. Do not use cracked or chipped dishes. -
Page 8: Turntable Installation
Installation TURNTABLE INSTALLATION Cleaning the cooking compartment and putting the turntable in place. For new installations, make sure all packaging and shipping tape has been removed from the turntable shaft. Before using the appliance to prepare food for the first time, you will need to put the turntable in place correctly. - Page 9 Installation and connection 1.This appliance is only intended for domestic use. 2.This oven is intended for built-in use only. It is not intended for counter-top use or for use inside a cupboard. 3.. Please observe the special stallation instructions. 4.The appliance can be installed in a 60cm wide wall-mounted cupboard. 5.The appliance is fitted with a plug and must only be connected to a properly installed earthed socket.
-
Page 10: Installing The Appliance
Installing the appliance • The oven is fitted with a plug and must only be connected to a proper installed earthed socket. The socket must only be installed and the connecting cable must only be replaced by a qualified electrician, and in accordance with appropriate regulations. If the plug is no longer accessible following installation, an all-pole isolating switch must be present on the installation side with a contact gap of at least 3mm. - Page 12 B.Pre p are the cai b inet 1.. Read the instruction on the BOTTOM CABINET TEMPLATE put the template on the bottom plane of cabinet. Holes " "a" PN:261800316968 2.. Make the marks on the bottom plane of cabinet according to marks"a" the template 3..
- Page 13 C.Install the oven 4. . Install the oven to the cabin - Make sure the back of the oven is locked by mounting plate - Do not trap or kink the power cord Mounting Plate 5. . Open the door, fix the oven to the cabinet th Screw , at the installation hole.
-
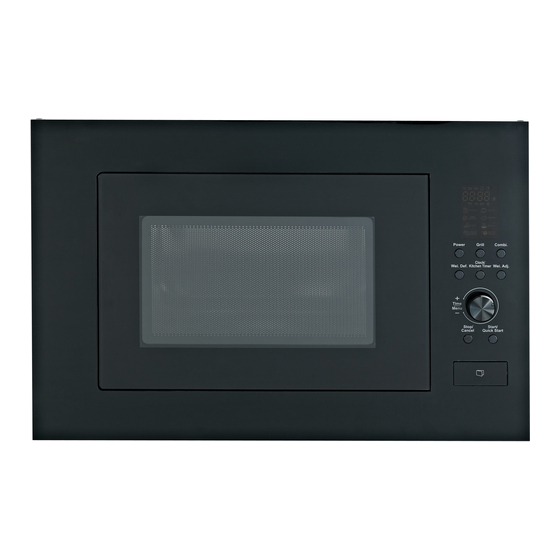
Page 14: Control Panel
Control Panel... - Page 15 Operation Instructions 1. . Clock Setting When the microwave oven is electrified, the LED will display "0:00", buzzer will ring once. 1) ) Press "Kitchen Timer/Clock" twice to select clock function, the hour figures will flash. 2) ) Turn 2) Turn " "...
- Page 16 3. Kitchen Timer itchen Timer/Clock " once, LED will display 00:00. (1) 1) Pres (2) Turn " urn " " to enter the correct r.(The maximum cooking time is 95 minutes.) Star t/+30Sec./Con firm " to confirm setting. (3) 3) Pres ) Press "...
- Page 17 7. . ulti-section cooking (1)At most 2 sections can be set for cooking. In multi-section cooking, if one section is defrosting, then defrosting shall be placed in the first section.(2)kitchenr timer and auto menu can not as one of the multi stage.(3)Press" St art/+30Sec./Confirm " to increase the cook time by 30 seconds each time except weight defrost.
- Page 18 10. Auto Menu 1) Turn " " right to choose the menu, and "A-1" to "A-8" will display, which means pizza,meat, vegetable,pasta, potato, fish,beverage and popcorn. 2) 2) ) Press Press " Press " Start/+30S ec./Confirm 3) Turn " urn " "...
-
Page 19: Troubleshooting
Trouble shooting Normal Radio and TV reception may be interfered when microwave oven operating. It is similar to the interference Microwave oven interfering TV of small electrical appliances, like mixer, vacuum reception cleaner, and electric fan. It is normal. In low power microwave cooking, oven light may Dim oven light become dim. -
Page 20: Warranty
Subject to the other clauses of this warranty, the Company warrants to the Consumer that the Bellini product will be free of manufacturing defects and will perform to the Company’s specifications. The benefit of this warranty extends only to the Consumer as original purchaser of a Bellini product which is installed in a domestic household area. - Page 21 1.10 If you are required to transport the Bellini product to the Company or its service agent, you must ensure it is safely disconnected by a qualified tradesman and securely packed and insured. The Company does not accept any responsibility for loss or damage of the Bellini product prior to it being received by the Company or its service agent.
Need help?
Do you have a question about the BMWM28 and is the answer not in the manual?
Questions and answers