Table of Contents
Advertisement
Quick Links
Advertisement
Table of Contents

Related Manuals for Luthor TL-60


Summary of Contents for Luthor TL-60
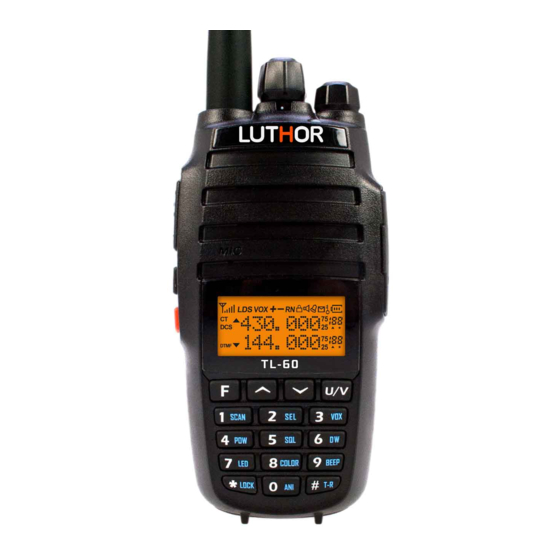
- Page 1 TL-60 DUAL BAND VHF/UHF TRANSCEIVER VHF/UHF 144/430 MHz USER’S MANUALS 0700...
- Page 2 In the design of TL-60 every effort, excitement and professionalism has been made to finally reach the obtained result, an EASY HANDLING DUAL BAND VHF/UHF transceiver with a RELIABILITY only reachable by the best worldwide manufacturers.
- Page 3 Please read carefully the following manual before using the transceiver in order to guarantee the equipment’s maximum performances. The use of the symbol shows that this equipment it’s under use restrictions in certain countries. Countries where the use of this equipment is permitted, without prejudice that in any of them their administration request a licence, an authorisation or indicates some restrictions.
-
Page 4: Table Of Contents
Contents Cautions and practical advices Cautions and practical advices for the battery and the charger Main features Unpacking of the equipment and content Supplied accessories Battery charge Accessories installation Battery installation Transceiver’s description Introduction to display’s icons Working modes Menu function list Function’s detailed descriptions... - Page 5 Basic operations Table of CTCSS / DCS codes Troubleshooting guide General technical specifications Warranty information Note on environmental protection Declaration of conformity Notes...
-
Page 6: Cautions And Practical Advices
Cautions and practical advices I Both the transceiver and the elements supplied with it are not toys, and as you can see later on this text of compulsory reading for the user, prior to unpacking the equipment and its accessories detailed below, you should consequently keep them out of: children’s, persons with reduced cognitive capacity, and domestic or wild animals reach. - Page 7 they are completely dry before using it or charging the battery. Neither use the equipment with your hands wet. I Do not supply the equipment with a different tension than the one indicated by the manufacturer. Neither use a different battery than the one supplied by the manufacturer for this equipment.
- Page 8 board of an aeroplane is restricted and subjected to the rules applied to those devices. It can interfere with the navigation electronic instruments of the aeroplane. In case of doubt ask the crew members about the possible restrictions of using the transceiver also in other kind of public transports like trains, ships, etc.
- Page 9 I Please pay special attention to the use of transceiver’s external accessories like earphones or micro-earphones, etc. The cable used for those accessories could get caught up on machinery, vehicles, etc. causing the consequent transceiver’s or accessory material risk or even pose a danger the user’s physical integrity.
-
Page 10: Cautions And Practical Advices For The Battery And The Charger
Cautions and practical advices for the battery and the charger I This transceiver is supplied with a Lithium-Ion (Li-Ion) battery. I The excessive battery’s overheating can cause the battery to ignite or explode with the resulting risk of serious physical damages or even the death. Avoid exposing it to temperatures up to 45º. - Page 11 supplied. Do not following this advice implies an important risk of ignite or explode, and could seriously damage both the equipment and other people around. I Do not apply a soldering iron on the battery terminals, could cause the battery overheating with the consequent risk of suffering a serious accident.
- Page 12 electrical shocks, ignites and explodes. In that case, call a professional electrician to solve the problem. I During the charging process do not touch none of its components nor the battery. That could cause electrical shocks with serious security risk or even the death. I Do not touch the charger, any of its components nor the battery with wet hands nor your bare feet.
-
Page 13: Main Features
Main features Dual band, dual display, dual wait mode 2 x 128 memory channels FM Radio reception with 25 channels Selectable frequency steps VOX hands free function CTCSS / DCS coding and decoding Low battery alarm Emergency alarm Repeater shift function ANI function DTMF function Reverse frequency function... -
Page 14: Unpacking Of The Equipment And Content
Unpack carefully the content of your transceiver’s box. We recommend you to verify the elements listed in the following table before discarding the package. If some element is missing or it had been damaged due to the shipping, please contact your LUTHOR TECHNOLOGIES dealer as soon as possible. -
Page 15: Battery Charge
Battery charge This device is equipped with a Lithium-Ion battery (also known as Li-Ion or simply Lithium battery). The main features of these batteries are lightness, no memory effect and a high energetic capacity in a reduced size. It is necessary to take some cautions with the Lithium batteries, therefore we recommend you to carefully read the cautions and advices regarding the Lithium batteries and the charger in the section “Cautions and practical advices for the battery and the charger”... - Page 16 Antenna: The short antenna is suitable for short distance communications, while the long antenna will offer you a better communication. Carrying the antenna on your waist will not make you uncomfortable. With bad weather or between trees conditions the communication range will be reduced, please, plan in advance in order to avoid any issue for your communication or your security.
-
Page 17: Accessories Installation
Accessories installation Battery installation 1. Line up the battery slots with the guide situated on the aluminium case, making sure that both are in contact and aligned, slide the battery towards the upper transceiver’s part until the battery fastening button locks it. (Figure 1) 2. - Page 18 Antenna installation To install the supplied antenna, line up the antenna threaded end with the thread situated on the upper side of the radio, hold it on the base and make it turn clockwise into the transceiver’s top connector until it will be totally fixed. (Figure 3) To uninstall the antenna, hold it on the base and make it turn counter-clockwise.
- Page 19 Belt clip installation Line up both holes on the the transceiver’s back side with the clip ones, fix the clip to the transceiver with the two supplied screws (M2.5x5). (Figure 5) Unscrew the screws to remove the clip. (Figure 6) Figure 5 Figure 6...
- Page 20 External accessory installation Open (not remove) the connections cover placed on the right lateral side, and insert the accessory connection. (Figure 7) Figure 7 Note: the use of an external earphone will affect the water resistant features of the transceiver.
-
Page 21: Transceiver's Description
Transceiver’s description CHANNEL SELECTOR Use it to adjust the channel and the frequency. ANTENNA VOLUME KNOB Connect here the supplied antenna. Power on / off the radio, and adjust the volume level. LED INDICATOR Lights red during transmission and green SPEAKER during reception. - Page 22 BELT CLIP Allows hanging the radio on your belt and it will be easy PTT BUTTON to take. Press To Transmit and release to receive when your transmission is done. SP/MIC CONNECTOR Use it to connect MONI BUTTON an earphone or the Keep pressed to disable programming cable (through squelch allowing to hear...
-
Page 23: Introduction To Display's Icons
Introduction to display’s icons You can see different icons on the display when the radio is power on. The following table will help you to identify the meaning of display’s icons. Signal’s power level, power meter Low power ON Dual watch / standby ON Battery save function ON VOX function ON Frequency shift direction... - Page 24 Squelch function ON Beep function ON Call received Battery level indicator CTCSS ON DCS ON DTMF ON A band in use indicator B band in use indicator Decimal frequency for frequency steps Channel number / menu number indicator Busy channel indicator Scan function available in channel mode...
-
Page 25: Working Modes
Working modes Frequency mode (VFO) Using this mode, you can use the key to toggle between the A and B bands, and then use the keys or the channel selector to change the frequency, or introduce the frequency number directly through the numeric keyboard, and store the channel. Frequency-channel mode (MR) When there is at least one memory channel memorized and being in frequency mode (VFO), press key to enter MR mode. -
Page 26: Menu Function List
Menu function list Display and Nº Selectable parameters Function’s description function SCAN Frequencies / Channels search TX.SEL EDIT / BUSY Selection of priority channel 1 - 9 VOX (hands free) sensitivity level LOW / HIGH High or Low transmission power 0 - 9 Squelch sensitivity level D.WAIT... - Page 27 Display and Nº Selectable parameters Function’s description function ROGER ON / OFF Transmission’s end notice setting ON / OFF Dual watch / Monitor setting RX.SAV ON / OFF Reception’s energy save setting SCAN.S TO / CO / SE Signals search mode setting AUTOLK ON / OFF Automatic keyboard lock setting...
- Page 28 Display and Nº Selectable parameters Function’s description function WIDE / NARROW Bandwidth: Wide / Narrow setting SEEK 67.0 CTCSS tones search SEEK D023N DCS tones search...
- Page 29 Menu operation 1. In standby mode, press the key to enter into menu setting, “MENU” will be shown on the display. 2. Press the keys to select the wished menu’s item, the item’s current setting will be shown on the display. 3.
- Page 30 Return to Item Nº Parameter standby and name How to enter Display text selection Parameter settings Confirm mode Press 7.Display ON / AUTO / OFF to select available values light 8.Display Press Color 1 / 2 / 3 to select colour available values Press...
- Page 31 Return to Item Nº Parameter standby and name How to enter Display text selection Parameter settings Confirm mode 14.Time Out Press OFF / 30... / 360s to select Timer available values 15.Busy Press ON / OFF to select channel lock available values 16.VOX Press...
- Page 32 Press ON / OFF to select available values Press English / Chinese to select / OFF available values Press ON / OFF to select available values Press OFF / DC / MSG to select available values Press Shows the battery to select voltage available values...
- Page 33 Return to Item Nº Parameter standby and name How to enter Display text selection Parameter settings Confirm mode 28.Edition Press *Lock / #T-R / U/V of channel to select available values name 29.CTCSS/ Press DCS tones in OFF / QT / DCS to select available values TX/RX...
- Page 34 Return to Item Nº Parameter standby and name How to enter Display text selection Parameter settings Confirm mode 35.Bandwi- Press dth: /Wide / Wide / Narrow to select available values Narrow 36.CTCSS Press Press to start to change tones search search search direction 37.DCS tones...
-
Page 35: Function's Detailed Descriptions
Function’s detailed descriptions The current menu number appear in the upper left side of the display. Setting the search mode (SCAN and SCAN.S - MENU 1 and 20) Function: in VFO / MR / CH modes, the transceiver allows searching in the entire operative band and in the stored channels. - Page 36 There are 9 available levels. The higher the level is, the greater sensitivity you will have. The TL-60 has a setting via software for adjusting a VOX delay time (a delay time for transmitting- receiving after you stop speaking). The default value is: 2 secondss.
- Page 37 Setting the noise filter level (squelch) (SQL - MENU 5) Function: allows silencing the background noise when no signal is received. The squelch function not only makes the standby mode more pleasant but significantly reduces battery consumption. Enter into menu 5 to set the Squelch level. The default value is: 5. Dual watch or dual standby activation (D.WAIT - MENU 6) Function: allows receiving signals in other channel while you are in the operating channel.
- Page 38 ANI code activation (ANI - MENU 10) Function: enable/disable the ANI code. When enabling the ANI code, always sending the ANI code when transmitting, the receiving radios can see it on the display in case of having also the ANI code function.
- Page 39 Busy channel lock (BCLO - MENU 15) Function: prevents the user from transmitting if the radio is receiving a signal strong enough to brake the squelch. In frequencies where different transceivers using different CTCSS or DCS codes can be actives, this function prevents to accidentally interrupt their communications (because the transceiver can be silenced by its own tone decoder).
- Page 40 English voice guide (VOICE - MENU 22) Function: enable/disable English voice guide. Enter into menu 22 to activate the VOICE function. The default value is: English. OFF: disables the voice guide. English: enables the English voice guide. Chinese: enables the Chinese voice guide. End of transmission noise elimination (TAIL - MENU 23) Enter into menu 23 to set the TAIL function.
- Page 41 CTCSS / DCS / OFF. After selecting CTCSS / DCS / OFF use the keys to choose the particular group you need. Press the key to select the DCS tone direction. The TL-60 has 50 CTCSS groups and 104 DCS normal / inverted groups. Function 2: tones search.
- Page 42 Bandwidth setting (N/W - MENU 35) Function: adjust the bandwidth. Enter into menu 35 to set the bandwidth. Available values: “WIDE” (25KHz) / “NARROW” (12.5KHz).
-
Page 43: Basic Operations
Basic operations Power the radio on / off Turn the volume knob clockwise to power on the transceiver after hearing a click sound. Turn the volume knob counter-clockwise to power off the transceiver. Adjusting the volume After powering on the transceiver, turn the volume knob clockwise to increase the volume, and turn it counter-clockwise to decrease the volume. - Page 44 MONI button Keeping this key pressed disables the squelch function, allowing you to hear very weak signals close to background noise. FM radio In standby mode, press the key followed by MONI button to enter FM Radio mode. You can introduce the desired station frequency or carry out a search.
- Page 45 Press the keys, press the keys to select the channel number 05. Press the key to confirm. Delete of a channel In MR or CH modes, press the key and next power on the radio,“DEL ?” will appear on the display and the channel number blinks in the upper right side of the display.
- Page 46 key to confirm. Repeating this operation, you will be able to delete all the radio stations, you can store a maximum of 25 radio stations. DTMF coding To manually send a DTMF code, keep pressed the PTT button, next introduce the DTMF code through the keyboard, release the PTT button to finish.
-
Page 47: Table Of Ctcss / Dcs Codes
Table of CTCSS / DCS codes CTCSS (analogical tones) 67.0 94.8 131.8 171.3 203.5 69.3 97.4 136.5 173.8 206.5 71.9 100.0 141.3 177.3 210.7 74.4 103.5 146.2 179.9 218.1 77.0 107.2 151.4 183.5 225.7 79.7 110.9 156.7 186.2 229.1 82.5 114.8 159.8 189.9... - Page 48 DCS (digital tones)
-
Page 49: Troubleshooting Guide
Troubleshooting guide Problem Possible cause possible solution The battery pack is exhausted. Please, charge it again or replace it for a new one. No reaction when power on. The battery pack could not be properly installed. Please, check it and install it again. The operation time is very brief, even though Replace the battery pack for a new one. -
Page 50: General Technical Specifications
General technical specifications Frequency range 144 - 146 MHz / 430 - 440 MHz Frequency stability ± 2.5 ppm Operating voltage 7.2 Vcc (rechargeable Li-Ion battery) Memory channels 2 x 128 Antenna High gain Antenna impedance 50Ω Operation mode Simplex or semi-duplex Battery capacity 3600 mA Transmitter... - Page 51 Receptor Sensitivity (12dB SINAD) -122 dBm (12dB SINAD) Audio power > 0.5 W Audio distortion < 10 % Intermediation ≥ 60dB ≥55dB Selectivity ≥ 65dB ≥60dB Spurious reject ≥ 65dB Block ≥ 85dB ATTENTION: Some of these specifications can be subject to modification without previous notice.
-
Page 52: Warranty Information
Warranty information Period: 2 years from transceiver’s date of purchase. Note: keep your equipment’s sales receipt. Is essential to give it for any complaint related to the equipment and for applying your warranty claim of it. Warranty exclusions: The equipment will lose its warranty in the next cases: •... -
Page 53: Note On Environmental Protection
We have done everything possible to obtain the maximum of detail in this manual, but we are not responsible for any possible omission as well as printing errors or translation. All the specifications are subject to change by LUTHOR TECHNOLOGIES without previous notice. Total or partial reproduction of this manual contents without the express authorisation of LUTHOR TECHNOLOGIES is prohibited. -
Page 54: Declaration Of Conformity
We declare under our sole responsibility the conformity of the following product: Type of equipment: Dual band VHF/UHF in FM movile transceiver for amateur Brand name: LUTHOR TECHNOLOGIES Model number: TL-60 Manufacturer: GENEREUS S.L. Manufacturing site: China... -
Page 55: Notes
Notes... - Page 56 “LIFE IS GOOD COMMUNICATION” luthortechnologies.com Importador/Imported by Importé par Genereus S.L. ES B66339029...
Need help?
Do you have a question about the TL-60 and is the answer not in the manual?
Questions and answers